Why Garage Door Weather Stripping Replacement Matters
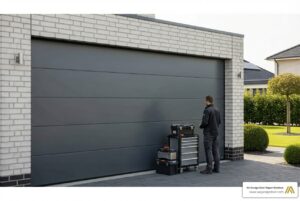
Garage door weather stripping replacement is one of the most cost-effective ways to protect your home from Minnesota’s harsh winters, unwanted pests, and rising energy costs. When your garage door’s seal fails, you’ll notice drafts, water puddles, and even critters finding their way inside. For comprehensive garage door repair and maintenance services, professional installation ensures optimal performance and longevity.
Quick Answer for Garage Door Weather Stripping Replacement:
- Cost: $150-$450 total ($20-$100 materials + $100-$400 labor)
- Time: 1-2 hours for professionals, 2-3 hours DIY
- Frequency: Replace every 2-5 years depending on material and climate
- Signs to Replace: Visible cracks, light gaps, water leaks, pest entry
- Materials: Rubber (most durable), vinyl (budget-friendly), silicone (premium)
Your garage door’s weather stripping acts as the first line of defense against external elements. In Minnesota’s climate, a proper seal can significantly reduce energy bills and prevent moisture damage to stored items. Whether you tackle this as a DIY project or hire professionals, replacing worn weather stripping delivers immediate benefits like reduced drafts, better temperature control, and fewer unwanted visitors.
As the owner of AA Garage Door LLC, I’ve helped Twin Cities homeowners with garage door weather stripping replacement for over 23 years. My team understands how Minnesota winters deteriorate seals, and we’ve perfected techniques to ensure lasting protection for your home.

Why and When to Replace Your Garage Door Weather Stripping
The seal around your garage door is a hard-working component. Understanding why garage door weather stripping replacement matters and when to do it can save you from costly repairs and high utility bills.

Key Benefits of Functional Weather Stripping
When your weather stripping is doing its job, you’ll enjoy some impressive benefits that go beyond comfort.
Energy efficiency is a top benefit. A tight seal prevents heated or cooled air from escaping through gaps, meaning your HVAC system works less and you save on energy bills.
Pest control is another huge advantage. A solid weather seal is your first defense against pests like mice, spiders, and ants, keeping them outside where they belong.
Moisture protection is especially important in Minnesota. Proper sealing prevents water from seeping under your door, protecting against puddles, mold, and rust damage to your belongings and the door itself.
It also provides debris protection by blocking dust, leaves, and dirt, keeping your garage cleaner and protecting moving parts. Additionally, good weather stripping offers noise reduction, helping to dampen outside sounds.
To better understand how weather stripping fits into your garage door’s overall system, take a look at our guide on understanding the different parts of your garage door.
Telltale Signs Your Weather Stripping Needs Replacement
Weather stripping wears out from sun, temperature, and friction. Fortunately, it provides clear warning signs when it needs replacement.
- Visible cracks: Inspect the material along the bottom, sides, and top. If you see cracks, tears, or missing chunks, the seal is compromised.
- Brittleness or stiffness: The material should be flexible. If it feels hard or brittle, it can no longer create a tight seal.
- Gaps of light: Close the door on a sunny day and stand inside. If you see light peeking through the perimeter, you have sealing issues.
- Water pooling: Puddles or dampness inside your garage after rain or snowmelt are a dead giveaway that water is getting past your seal.
- Pests in your garage: Worn weather stripping is a common entry point for rodents and insects.
- Increased energy bills: A sudden spike in heating or cooling costs might indicate your garage is losing conditioned air through a failing seal.
If you’re noticing several of these issues, it might be time to consider more comprehensive maintenance. Check out our article on 10 Signs It’s Time to Get Your Garage Door Serviced for additional warning signs to watch for.
Lifespan and Replacement Frequency
Most weather stripping lasts between 2 to 5 years, but this can vary based on several factors.
- Minnesota’s climate accelerates wear and tear. Extreme temperature swings, heavy snow, and ice can shorten its lifespan.
- Material type plays a major role. Higher-quality materials like premium rubber or silicone will outlast cheaper vinyl options.
- Usage patterns also matter. A door that opens and closes multiple times daily experiences more wear on its seals.
We recommend an annual inspection of your weather stripping, ideally before winter. This proactive approach helps you catch wear early and plan for replacement before problems become costly.
Preparing for Your Garage Door Weather Stripping Replacement
Proper preparation is key to a successful installation. This means choosing the right materials, gathering tools, and deciding between DIY or hiring a pro.
| Material Type | Cost (per foot) | Durability | Climate Suitability | Notes |
|---|---|---|---|---|
| Vinyl | $7-$20 | Good | Moderate | Most common, affordable, but can become brittle in extreme cold. |
| Rubber | $10-$25 | Excellent | All climates | More durable, flexible, and resistant to temperature extremes. |
| Silicone | $20-$30 | Superior | All climates | Best longevity and weather resistance, but highest cost. |
Preparing for your garage door weather stripping replacement is straightforward with a little planning. Your main material choices are vinyl, rubber, and silicone. Vinyl is budget-friendly but can crack in Minnesota’s cold. Rubber offers a great balance of durability and cost, staying flexible in extreme temperatures. Silicone is the premium, most durable option with the highest price tag.
Choosing the Right Materials and Tools
Bottom seals slide into a retainer at the door’s base. Common types include T-channel, bead-style, and U-shape seals. It’s crucial to match the new seal’s profile to your existing retainer. Top and side seals, often called vinyl stop molding, are fastened to the door frame to create a perimeter barrier.
For more detailed information about seal types and options, The Home Depot offers a comprehensive selection with helpful specifications.
Before starting, gather these essential tools: a tape measure, a pry bar or flathead screwdriver, a hammer, and a utility knife or electric scissors. Don’t forget safety glasses and work gloves. You’ll also want cleaning rags, silicone lubricant or dish soap solution, and galvanized nails or screws.
How to Measure for Your Garage Door Weather Stripping Replacement
Accurate measurements are essential for a professional result. For your bottom seal, measure the width of your garage door. More importantly, identify your retainer channel type by examining the existing seal’s profile. When in doubt, cut a small sample and bring it to the store to ensure a match.
For side and top seals, measure your door frame’s height on both sides and the width across the top. Always purchase material slightly longer than your measurements to allow for precise cutting.
When cutting, longer is better—you can always trim excess, but you can’t stretch what’s too short. For a professional look where top and side seals meet, consider mitering the corners at 45-degree angles for a clean, tight joint.
A Step-by-Step Guide to Installing New Weather Stripping
With your materials ready, follow these steps for a professional-quality seal that will protect your garage for years to come.

Step 1: Remove the Old Weather Stripping
Properly removing the old weather stripping is the foundation of a successful garage door weather stripping replacement.
Safety first: Disconnect your garage door opener from power. Raise the door to chest height and secure it firmly with C-clamps or vice grips on the tracks just below the rollers to prevent it from sliding down.
For bottom seal removal, if it’s in a retainer, pull the old seal out, using silicone lubricant if it’s stuck. For seals on wooden doors, use a pry bar carefully to avoid damaging the wood.
For side and top seal removal, use a pry bar to gently remove the old seals, which are typically nailed or screwed to the frame. Take your time to avoid splintering the wood.
Once everything’s off, remove all old nails completely. Pull them out or hammer them flush with the surface. Clean the channels and frame thoroughly with a damp rag and dry completely. A clean surface ensures an easier installation and a longer-lasting seal.
For additional guidance on this process, you can check out this helpful resource on How to Replace Your Garage Door Weather Stripping.
Step 2: Install the New Bottom Seal
Installing the new bottom seal requires patience but is very satisfying.

Start by lubricating the channel generously with silicone spray or a solution of dish soap and water. This crucial step prevents the seal from binding or tearing.
Feeding the seal is easier with two people. Fold one end into a “U” shape and guide it into the channel while the other person gently pulls it through from the opposite end. Pro tip: don’t stretch the seal during installation, as it may shrink back later, leaving gaps.
Once threaded through, trim the excess with a utility knife, leaving about half an inch of overhang on each side. This can be tucked in or secured to prevent the seal from sliding out.
Step 3: Install the Top and Side Seals
Perimeter seals (vinyl stop molding) complete the weather protection by creating a barrier around the door frame.
Close the door completely before starting. This allows you to position the flexible flap for the tightest seal against the door face.
Install the top seal first. Position it against the top of the door frame so the flap presses firmly against the closed door. Tack it in place with nails driven only halfway in for later adjustment.
For the side seals, position them so their flaps press against the sides of the door, ensuring the top end of each side seal overlaps the top seal’s flexible section. This creates a weatherproof corner.
Fasten everything securely once you’re happy with the positioning, using galvanized nails or screws spaced 8 to 18 inches apart. Test the door by opening and closing it several times to check for smooth operation without binding. If all is well, drive the fasteners in completely.
Cost of Replacement and Hiring a Professional
While DIY is an option, sometimes a professional touch is needed for a perfect, long-lasting seal. Here’s what to expect in terms of cost and how to choose the right service.
Garage door weather stripping replacement is a budget-friendly project, typically ranging from $150 to $450. The final price depends on material type, door size, and labor rates.
- Material type is the biggest factor. Basic vinyl costs less than premium rubber or silicone.
- Door size matters; a double door requires more material and labor than a single door.
- Labor rates in our area typically fall between $50 and $100 per hour.
On average, expect material costs of $20-$100 for a single door and professional installation labor of $100-$400, bringing the total to the $150-$450 range.
For a comprehensive look at what drives garage door service pricing, check out our detailed guide on Garage Door Repair Cost: Key Factors That Influence Pricing and What to Expect.
Finding a Reputable Garage Door Service
If you prefer a professional installation, choosing the right provider is key.
Choosing a pro involves checking reviews, verifying licenses and insurance, and getting detailed written quotes. Ask about their experience, especially with unique doors.
At AA Garage Door Repair, we bring over two decades of local expertise to communities like St. Paul, the Twin Cities, and Western WI. Since 2001, our reputation is built on transparent pricing with no hidden fees. Our experienced technicians have handled every weather stripping challenge Minnesota offers.
Timeframe for professional installation is typically 1 to 2 hours, though larger doors may take longer. We work efficiently to minimize disruption.
Warranty is essential. We provide a three-year warranty on all garage door weather seal replacements, covering both materials and labor, for your peace of mind.
Frequently Asked Questions about Weather Stripping
Here are answers to the most common questions we receive about garage door weather stripping replacement.
How do I know which type of weather stripping to buy?
To get the right type, you must match the new seal to your garage door’s retainer channel (e.g., T-channel, J-channel, bead-style). The best way is to cut a small piece of the old seal and take it to a hardware store for a perfect match. For top and side seals, vinyl stop molding is a common and effective choice that is more universal.
Can I replace just the bottom seal of my garage door?
Yes. The bottom seal wears out fastest due to contact with the ground and weather, so it often needs replacement before the top and side seals. However, it’s a good idea to inspect the other seals while you’re working. If they show wear, replacing everything at once is more efficient and saves you from tackling the job again soon.
What’s the best way to seal a gap from an uneven garage floor?
Uneven floors can leave gaps even after installing a new seal. Start with a thicker, more robust bottom seal with extra compression capability to adapt to minor unevenness. For moderately larger gaps, you can insert a foam backer rod into the hollow section of your weatherstrip to add bulk and help it make better contact.
For the best long-term solution, especially with significant floor unevenness, consider having a professional install a garage door threshold seal directly onto your concrete floor. This creates a permanent raised barrier that your bottom seal compresses against, providing superior protection against water, drafts, and pests.
Conclusion
Garage door weather stripping replacement is a high-impact, low-cost home maintenance task. It delivers immediate benefits like lower energy bills, a cleaner garage, and better pest control.
Whether you DIY or hire a pro, replacing a worn seal is a smart move. It makes your garage more comfortable, protects stored items, and can even reduce noise. This project prevents larger issues down the road, such as water damage, pest infestations, and high heating bills.
For expert installation or any garage door repair and replacement needs in St. Paul, the Twin Cities, or Western WI, our team at AA Garage Door Repair is here to help. We’ve been protecting homes like yours since 2001, and we understand what Minnesota’s tough climate demands from your garage door.
Ready to give your garage the protection it deserves? Contact us for fast, friendly service that gets the job done right. Your garage—and your energy bills—will thank you!