Why Single Torsion Spring Garage Door Installation Demands Your Attention
Single torsion spring garage door installation is one of the most critical and dangerous home repairs. When your garage door won’t open, the torsion spring—the powerhouse that lifts hundreds of pounds of door weight—has likely failed. For homeowners seeking reliable garage door solutions, understanding this component is crucial. Here’s what you need to know:
Quick Answer: Single Torsion Spring Installation Overview
- Disconnect power and secure the door with C-clamps.
- Unwind the old spring using solid steel winding bars (never screwdrivers).
- Remove the broken spring and measure it carefully (inner diameter, wire size, length, wind direction).
- Install the new spring on the torsion tube with the correct orientation.
- Wind the new spring based on door height (approx. 7.5 turns for a 7-foot door).
- Test the balance by lifting the door halfway; it should stay in place.
- Reconnect the opener and test full operation.
Critical Warning: Torsion springs store enough energy to cause serious injury or death. This repair requires extreme caution, the right tools, and precise measurements. An estimated 10% of garage doors have incorrectly sized springs, compounding the risk.
I’m David Sands, owner of AA Garage Door LLC. With over 23 years of experience in Minnesota and Wisconsin, I’ve seen the consequences of improper installations and know how to get the job done right. For homeowners in the Twin Cities area needing immediate, expert help, call our team at (651) 702-1420.

Before You Begin: Is a Replacement Necessary?
Before starting a single torsion spring garage door installation, confirm you need one. Garage door springs counterbalance the door’s weight, making it easy to lift. When they fail, the change is dramatic.
Signs of a Broken Spring
The most common sign is a loud bang from the garage, but other symptoms also indicate failure.
- Loud Bang: A sound like a gunshot often signals a spring has snapped.
- Door Won’t Open: The door feels impossibly heavy to lift manually because the spring is no longer assisting.
- Door Slams Shut: Gravity takes over without the spring’s counterforce, causing the door to close dangerously fast.
- Visible Gap in Coils: A clear break in the spring coils is definitive proof of failure.
- Crooked Door: The door hangs unevenly, indicating an imbalance in the lift system.
- Fails the Balance Test: Lift the door halfway and let go. If it falls or rises, the spring has failed or lost tension.
For more on spring longevity, see our guide on how long do garage door springs last before needing replacement. Most torsion springs are rated for 10,000 to 15,000 cycles, or about 7-10 years of average use.
Torsion vs. Extension Springs
Residential doors use two main spring types. Identifying your system is essential.
- Torsion Springs: Mounted on a metal shaft above the door, they twist to store energy. They are safer, more durable, and provide smoother operation, making them the standard for modern doors.
- Extension Springs: These run alongside the horizontal tracks and work by stretching. They are typically found on older, lighter doors and require safety cables to prevent them from becoming projectiles if they break.
- EZ-SET® Torsion Springs: A specific system for Clopay doors with a different winding mechanism, often using a drill instead of winding bars. They still carry significant risk.
Here is a comparison of the spring systems:
| Feature | Torsion Springs | EZ-SET® Springs | Extension Springs |
|---|---|---|---|
| Location | Mounted on a shaft above the door | Mounted on a shaft above the door (Clopay specific) | Run along the horizontal tracks |
| Operation | Twists to provide torque | Twists to provide torque, easier winding mechanism | Stretches to store energy |
| Safety | Safer design, but high tension requires caution | Designed for easier DIY, but still high tension | Requires safety cables to prevent injury when broken |
| Lifespan | 10,000-15,000 cycles (7-10 years) | Similar to standard torsion springs | Generally shorter lifespan than torsion springs |
| Cost | Moderate to High | Moderate (proprietary parts) | Low to Moderate |
| Doors | Heavier, larger doors; smoother operation | Residential doors, often DIY-friendly | Lighter, older doors |
Understanding your system is key to a safe repair. If you’re uncertain, it’s always best to consult a professional.
Safety First & Essential Preparation
This section is non-negotiable. Garage door springs are under extreme tension and can cause serious injury or death if mishandled. If you feel unsure at any point, stop and call a professional.
Safety Precautions
- Disconnect Power: Unplug the garage door opener or turn off its circuit breaker.
- Secure the Door: Clamp the door to the vertical tracks with C-clamps or locking pliers to prevent it from moving unexpectedly.
- Wear Protective Gear: Always wear safety glasses and heavy-duty work gloves.
- Use Proper Tools: Only use solid steel winding bars of the correct diameter (usually 1/2 inch). Never use screwdrivers or rebar, which can bend or break.
- Maintain a Safe Stance: Stand to the side of the winding cones, never directly in the path of the winding bars.
- Assume Incorrect Parts: About 10% of garage doors have the wrong springs. Double-check all measurements.
- Clear the Area: Keep children, pets, and others out of the garage during the repair.
Tools & Parts Required
- Winding Bars: Two solid steel bars, 1/2-inch diameter, at least 18 inches long.
- Socket Wrench Set
- Adjustable Wrench
- C-Clamps or Locking Pliers (2)
- Sturdy Ladder
- Tape Measure
- Safety Glasses and Work Gloves
- Permanent Marker
- Hammer
- Lubricant: 40 wt. motor oil or a silicone-based spray.
How to Accurately Measure for a New Spring

Incorrect measurements will result in an unbalanced and dangerous door. For a complete overview of parts, see our guide on garage door springs. You need four key measurements from the old spring:
- Inner Diameter (ID): Measure the inside diameter. Common sizes are 1 3/4″, 2″, and 2 1/4″.
- Wire Size: Measure 20 coils and match the length to a wire gauge chart. For example, 20 coils measuring 4.75 inches equals a 0.2375-inch wire size.
- Spring Length: Measure the length of the spring from end to end of the coils only. If broken, measure both pieces and add them together.
- Wind Direction: Determine if the spring is left-wound (LW) or right-wound (RW). Look at the end of the spring wire on the cone; if it points left, it’s left-wound. A single spring is typically a right-wound spring (black cone) installed on the left side of the center bracket.
The Complete DIY Guide to Single Torsion Spring Garage Door Installation
This process demands precision. Always refer to manufacturer instructions, like this Standard Torsion Spring Install Supplement, if available.
Step 1: Unwinding and Removing the Old Spring
This is the most dangerous step. Proceed with extreme caution.
- Prepare the Door: Ensure the door is fully closed, the opener is unplugged, and C-clamps are secured to the tracks on both sides.
- Loosen the Old Spring: Insert a winding bar into a hole on the winding cone. While holding it firmly, loosen the two set screws on the cone.
- Unwind the Spring: Control the force as you unwind the spring in quarter-turn increments, using two winding bars. Walk the bars down, never letting go of both at once. Count the turns to know how many to apply to the new spring.
- Disconnect Components: Once all tension is released, unbolt the stationary cone from the center anchor bracket. Then, loosen the set screws on the cable drums at each end of the torsion tube.
- Remove Cables and Spring: Detach the lift cables from the drums. Slide the torsion tube to one side to remove the old spring.
- Inspect Parts: Check the bearings, shaft, and cables for wear or damage. File down any ridges on the shaft left by old set screws.
Step 2: The Core of Single Torsion Spring Installation
With the old spring removed, you can install the new one.

- Install the New Spring: Slide the new spring onto the torsion tube. For a single-spring setup, the spring (typically right-wound with a black cone) goes on the left side of the center bracket, with the winding cone facing the side of the garage.
- Reinstall Drums and Center Bearing: Slide the cable drums back onto each end of the shaft. Connect the spring’s stationary cone to the center anchor bracket, ensuring the shaft is level.
- Re-thread and Tighten Cables: Wrap the lift cables around the drums, ensuring they are seated in the grooves. Pull the cables taut. Use locking pliers on the shaft to hold tension on one side while you tighten the other.
- Secure the Drums: Ensure the drums are flush against the end bearings and the cables are equally taut. Firmly tighten the set screws on both drums, typically a half to three-quarters of a turn past snug.
The Final Touches: Winding, Tensioning, and Balancing
This step creates the stored energy that lifts your door. A properly balanced door is the goal—it should feel nearly weightless and stay in place when opened halfway. This protects your opener from strain and ensures safe operation.
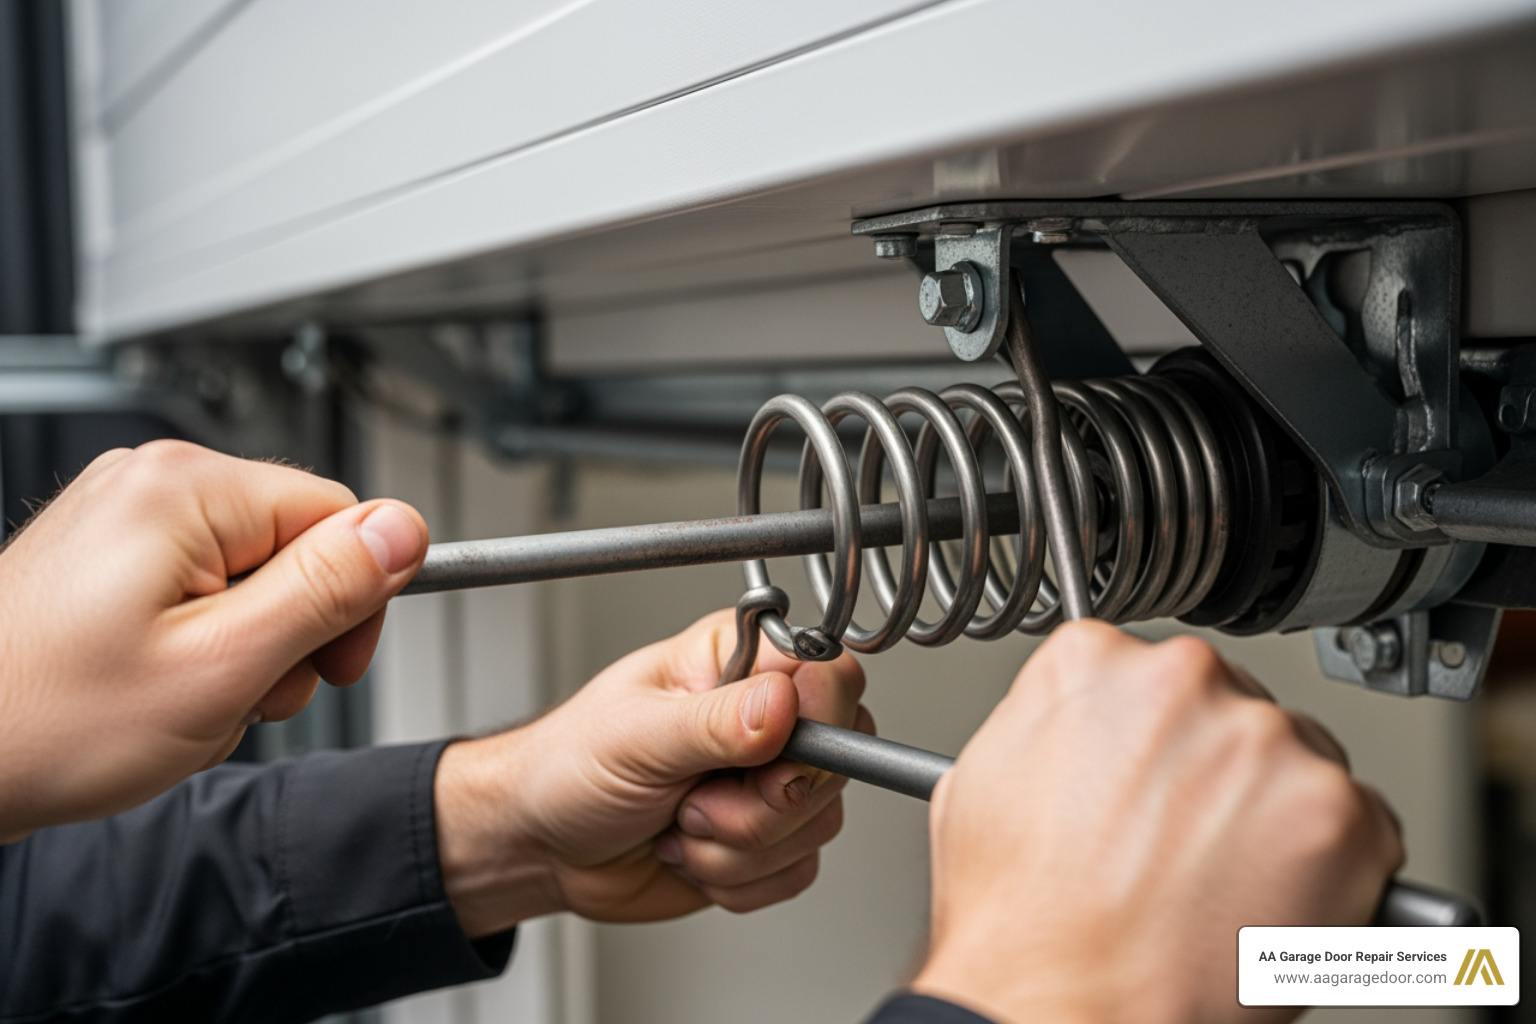
Step 3: How to Properly Wind and Tension the New Spring
This step requires complete focus. The spring is being loaded with immense force.

- Begin Winding: Insert a winding bar into the winding cone. Push the bar upwards, turning the spring in the opposite direction of how you unwound it (clockwise for a right-wound spring).
- Use Both Bars: After a quarter turn, insert the second bar to hold the tension. Continue this process, “walking” the bars upwards one quarter-turn at a time. The spring should lengthen as you wind; if it shortens, you are winding in the wrong direction.
- Count the Turns: The number of turns depends on door height. A 7-foot door typically needs 7.5 full turns (30 quarter turns), while an 8-foot door needs about 8.5 turns (34 quarter turns). Always follow the manufacturer’s specifications if available.
- Set the Cone: Once wound, tap the winding bar with a hammer to stretch the spring about 1/4 inch away from the cone. This prevents binding.
- Tighten Set Screws: While holding the bars, firmly tighten the two set screws on the winding cone. They should be tightened an additional 1/2 to 3/4 turn after feeling snug.
- Remove Bars: Only after confirming the set screws are tight should you carefully remove the winding bars.
Step 4: Testing for Proper Balance and Function
A balanced door is the mark of a successful installation.
- Remove Clamps: Carefully remove the C-clamps from the tracks.
- Perform the Balance Test: Manually lift the door to waist height and let go. A perfectly balanced door will stay in place.
- If the door falls, it is under-wound. Add 1/4 turn of tension and test again.
- If the door rises, it is over-wound. Remove 1/4 turn of tension and test again.
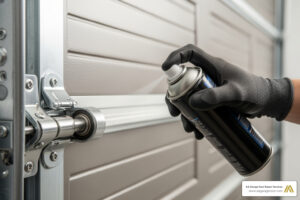
- Lubricate the Spring: Apply 40 wt. motor oil along the length of the coils, but avoid the last inch on each end near the cones.
- Reconnect and Test Opener: Reconnect the opener’s power and re-engage it. Run the door through several full cycles, listening for smooth operation. Adjust the opener’s travel and force limits if necessary, per the manufacturer’s manual.
If you encounter any issues or feel unsafe, stop immediately. The expert technicians at AA Garage Door Services have been safely handling these repairs since 2001. For guaranteed safety and peace of mind in the Twin Cities, call us at (651) 702-1420.
Common Mistakes and When to Call a Professional
Knowing when to stop a DIY project and call for help is crucial, especially with garage door springs. In our years serving St. Paul, Woodbury, and the surrounding areas, we’ve seen several common pitfalls.
Common Installation Mistakes to Avoid
- Using Incorrect Tools: Never use screwdrivers or rebar as winding bars. They can slip or break, causing severe injury. This is the most dangerous mistake.
- Mis-measuring the Spring: An incorrectly sized spring will create an unbalanced door, straining the opener and causing premature wear. An estimated 10% of doors have the wrong springs.
- Improper Tension: Too little tension makes the door dangerously heavy. Too much tension causes the door to fly open and resist closing.
- Forgetting to Tighten Set Screws: The set screws on the winding cone and cable drums hold all the force. If they are not tightened sufficiently, the spring can violently unwind.
- Incorrect Winding Direction: Winding the spring the wrong way will damage it. The spring should lengthen as it’s wound.
- Replacing Only One Spring: On a dual-spring system, always replace both springs at the same time. The second spring is likely near the end of its life and will fail soon.
When to Hire a Professional for Single Torsion Spring Garage Door Installation
We strongly recommend calling a professional in these situations:
- If You Feel Unsure: Uncertainty can lead to catastrophic failure. Your safety is worth more than the cost of a service call.
- Low Headroom or Non-Standard Systems: These installations are more complex and require specialized knowledge and tools.
- If You Lack Proper Tools: The cost of professional service is often less than buying the correct tools for a one-time job.
- For Emergency Repairs: If your car is trapped or the door is a safety hazard, a professional provides a fast, reliable solution. We offer 24/7 emergency service.
For more insight, see these 3 reasons to have damaged springs professionally replaced. If you value your time and safety, professional installation ensures the job is done right. Our team in the St. Paul area is ready to assist. Call us at (651) 702-1420 for expert help.
Frequently Asked Questions about Single Torsion Spring Installation
After more than two decades in the business, we’ve answered thousands of questions about single torsion spring garage door installation. Here are the most common ones.
How many turns do you put on a single torsion spring?
The number of turns depends on the door’s height. A standard rule is one full turn for every foot of door height, plus an additional half turn. This means a 7-foot door typically requires 7.5 turns (30 quarter turns), and an 8-foot door needs about 8.5 turns (34 quarter turns).
However, this is a general guideline. Always check the manufacturer’s recommendation for your specific spring and door model. The ultimate goal is a balanced door, which you can test by lifting it halfway and seeing if it stays in place. Adjust by quarter-turns as needed to achieve perfect balance.
Can I replace a dual torsion spring system with a single spring?
While physically possible, converting a dual-spring system to a single spring is not recommended as a DIY project. This conversion requires a new, much stronger spring calculated for the door’s total weight, height, track radius, and cable drum size. An incorrect calculation will result in a dangerously unbalanced door.
A single spring replacing a dual system is under significantly more tension, making the installation more hazardous. This type of modification is best left to a professional who can accurately calculate the required spring specifications and perform the installation safely.
What happens if you put the wrong size torsion spring on a garage door?
Installing the wrong size torsion spring is a common and dangerous error. An estimated 10% of garage doors have incorrectly sized springs.
- If the spring is too weak, the door will be extremely heavy. The opener will strain, leading to premature motor failure, and the door could slam shut with dangerous force.
- If the spring is too strong, the door will be difficult to close and may fly open uncontrollably. This creates a significant safety risk and can damage the door panels, tracks, and opener.
Accurate spring measurement is non-negotiable for safe operation. If you are unsure about your measurements, it is always best to have a professional verify them.
Conclusion
Completing a single torsion spring garage door installation is a major accomplishment. If you’ve followed this guide, you should have a balanced, safe garage door and a new appreciation for your home’s largest moving part.
However, this guide also highlights the significant dangers involved. The tension in these springs is enough to cause life-altering injuries in an instant. If you felt uncertain at any point, lacked the proper tools, or simply decided the risk wasn’t worth it, making the call for professional help is the wisest decision.
Professional garage door technicians perform this work daily. At AA Garage Door Services, our team has been ensuring safe, reliable repairs since 2001, serving homeowners throughout St. Paul, Woodbury, Baldwin, Hudson, and the surrounding Minnesota and Western Wisconsin communities. We have the right tools, parts, and experience to do the job correctly and safely the first time.
Your safety is more important than any potential DIY savings. If you need professional assistance with your garage door, our team is here to provide fast, reliable service with a satisfaction guarantee.