Why Garage Door Opener Circuits Matter for Your Home
A garage door opener circuit is the electronic brain that powers and manages your garage door’s operation. This control system is vital for everything from responding to your remote to activating safety features. Understanding its function is key to troubleshooting problems and ensuring your system is safe and up to code. When issues arise, knowing the basics helps you decide if you need a simple part or the help of professional garage door repair services. A faulty circuit can cause clicking sounds without movement, reduced remote range, or inconsistent operation.
These sophisticated electronics work together to protect your family and property. Proper electrical installation and maintenance are essential for long-term reliability. When a garage door opener circuit fails, it’s often the root cause of mysterious opener problems that can disrupt your daily routine.

The Brains of the Operation: What is a Garage Door Opener Circuit Board?
Ever wondered how a simple click lifts your heavy garage door? The magic happens inside the garage door opener circuit board, also known as a logic board. This board acts as the opener’s brain, receiving signals from your remote, wall button, and safety sensors. It translates these commands into precise motor movements to open, close, or stop the door. It also manages travel limits, force settings, and security features, making it an indispensable component for a functioning and safe garage door.

Types of Circuit Boards in Your Opener
While the terms are often used interchangeably, openers can have a few types of boards. The logic board is the main control unit, housing a microprocessor that processes commands and manages safety features. Most modern openers integrate all functions onto this single board.
Older systems might have a separate receiver board, which exclusively handles radio frequency signals from remotes and keypads. If your garage door remote has range issues, this board is often the culprit. Vintage openers could even have a sequencer board to manage step-by-step operations, a function now handled by modern logic boards. The term control board is a general phrase for the main electronic component governing the system.
How Smart Technology Changed the Garage Door Opener Circuit
The garage door opener circuit is at the heart of the industry’s evolution toward smart home technology. Modern circuit boards include Wi-Fi modules, enabling smartphone control from anywhere. This allows you to check your door’s status, grant access remotely, and receive real-time alerts when the door is opened or closed, integrating your garage into your smart home ecosystem.
Today’s boards also support advanced security like rolling code technology, which prevents signal theft. They power battery backup systems for power outages and manage more reliable safety sensors, changing the opener from a simple switch into a smart appliance that improves convenience and security.
Is Your Circuit Board Failing? Common Warning Signs
When your garage door opener acts up, the garage door opener circuit board is a common culprit. Differentiating a board failure from a mechanical issue can save you time and money. Look for these tell-tale signs that point to an electronic problem.
Symptoms of a Faulty Garage Door Opener Circuit Board
- Opener is unresponsive; Clicking sound without motor activation. This is a classic symptom. You press the button, hear a click from the opener, but the door doesn’t move. The board receives the command but fails to send power to the motor.
- Inconsistent or erratic operation. If the door opens halfway, stops, or reverses for no reason, the circuit board may be sending faulty signals.
- Safety sensors not working; Flashing lights indicating a sensor error. If your photo-eye sensors malfunction despite being aligned and clear of obstructions, the board may not be processing their signals correctly. This is a critical safety issue detailed in our Garage Door Safety Tips for Homeowners.
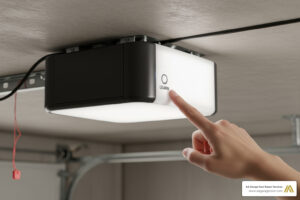
- Opener lights won’t turn on or off. The circuit board also controls the opener’s lights. If they stay on, won’t turn on, or flicker, the board could be malfunctioning.

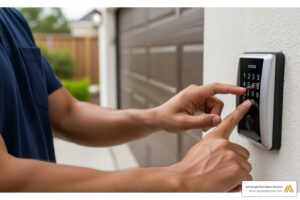
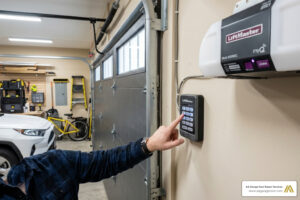
Remote Control and Keypad Problems
Problems with remotes and keypads often trace back to the circuit board’s receiver.
- Remote has significantly reduced range. If you have to be right next to the door for the remote to work, even with new batteries, the receiver on the circuit board is likely weakening.
- Inability to program new remotes or keypads. If the opener won’t learn the code from a new remote or garage door opener keypad, the board’s programming function has likely failed.
- Opener forgets programmed remotes. If you must constantly reprogram remotes, the board’s memory is failing.
- Differentiating from a bad capacitor: A buzzing or humming motor that doesn’t move the door often points to a bad capacitor, not the garage door opener circuit board. The capacitor provides the initial power surge to start the motor.
A DIY Guide to Replacing Your Circuit Board
Replacing a garage door opener circuit board is a cost-effective repair that can save you a service call. New boards typically cost over $150, far less than a full opener replacement. For those comfortable with basic electronics, this is a manageable project. However, safety is paramount, as one wrong move can damage the new board or create a hazard. With proper preparation, most homeowners can complete this repair in about an hour.
Step 1: Safety Precautions and Preparation
Before touching any wires, prioritize safety.
- Disconnect all power. Unplug the opener from the ceiling outlet and turn off the corresponding circuit breaker at your electrical panel. This double-lock approach is crucial.
- Gather your tools. You’ll need Phillips and flat-head screwdrivers and needle-nose pliers. A small container for screws is also helpful.
- Take photos of the wiring. Before disconnecting anything, take detailed photos of the wire connections from multiple angles. This will be your guide for reassembly.

Step 2: Identifying and Sourcing the Correct Replacement
Ordering the wrong part is a common mistake. Be precise to avoid delays.
- Find the model number on a sticker on your opener’s housing.
- Check the owner’s manual for the circuit board part number. If you don’t have it, check the manufacturer’s website for a digital version.
- Source the correct part using the model and part numbers. Online retailers like Star Door Parts are good resources. Double-check compatibility, as part numbers can change.
Step 3: The Replacement Process
With the new board ready and power off, you can begin the swap.
- Remove the opener’s housing to access the internal components. Keep track of any screws.
- Disconnect the wire harnesses from the old board, using your photos as a guide. Gently pull on the plastic connectors, not the wires. Some connectors have release clips.
- Unscrew the old circuit board and lift it out.
- Install the new board, securing it with the original screws or clips. Ensure it sits flush.
- Reconnect all wire harnesses exactly as they were, referring to your photos. Double-check that each connection is secure and in the correct slot.
- Reassemble the housing and restore power. Plug the unit in and flip the circuit breaker on.
- Test and reprogram. Test the wall button first. Then, reprogram your garage door remotes and keypad, as the new board’s memory will be empty. Follow the manufacturer’s instructions for programming.
Understanding the Garage Door Opener Circuit and Electrical Requirements
The power supplying your opener is as important as the garage door opener circuit board itself. Improper wiring can lead to poor performance, damage to electronics, and safety hazards. Understanding electrical best practices ensures your opener receives the clean, consistent power it needs for reliable operation.
Does the NEC Require a Dedicated Circuit?
The National Electrical Code (NEC) causes some confusion on this topic. Section 210.11(C)(4) requires garages to have at least one 120-volt, 20-amp branch circuit for receptacles, and this circuit generally cannot supply lighting. This is because garages are often used as workshops with power-hungry tools.
However, the key rule is NEC 110.3(B), which mandates following manufacturer specifications. If your opener’s manual requires a dedicated circuit, that instruction overrides the general code. Always check your installation manual, as ignoring it could void your warranty.
Benefits vs. Risks of Shared Circuits
Most openers are efficient but can draw up to 1400 watts (about 12 amps) on startup. This initial surge is where a shared circuit can cause problems.
| Feature | Dedicated Circuit | Shared Circuit |
|---|---|---|
| Reliability | Prevents nuisance breaker trips. | Risk of trips when other heavy-draw devices are used. |
| Safety | Protects sensitive electronics from power fluctuations. | Power surges from other devices can damage the logic board. |
| Performance | Ensures consistent power delivery for smooth operation. | Inconsistent power can strain the motor and components. |
| Code Compliance | Always compliant if installed correctly. | May not comply with manufacturer’s requirements. |
Benefits of a dedicated circuit are clear. It prevents breaker trips, protects the sensitive garage door opener circuit board from power surges, and ensures consistent power delivery, which can extend the life of your motor and other components.
Risks of a shared circuit include more than just inconvenience. Power fluctuations can damage the logic board over time. Heavy tools on the same circuit can cause trips, leaving you locked in or out. Furthermore, GFCI outlets, common in garages, can sometimes trip from the motor’s startup surge, cutting power unexpectedly.
Frequently Asked Questions about Garage Door Opener Circuits
Here are answers to the most common questions about garage door opener circuits.
Can I put my garage door opener on a 15-amp circuit?
Yes, most modern openers can run on a 15-amp circuit, as their normal power draw is low. However, the startup surge can be close to 12 amps. If other devices are on the same circuit (like power tools or a freezer), you risk tripping the breaker. A dedicated circuit is always the best practice to ensure reliability. Always check the manufacturer’s recommendation, as some may require a 20-amp circuit.
Why does my garage door opener just click?
A single click without any door movement is a classic sign of a failing logic board. The click is the sound of a relay on the garage door opener circuit board trying to send power to the motor. When the board is faulty, it receives the command but fails to complete the action. If you hear a buzzing or humming sound instead of a click, the problem is more likely a bad motor capacitor, not the circuit board.
Is it cheaper to replace the circuit board or the whole opener?
Replacing just the circuit board is almost always cheaper upfront, with parts costing around $150-$200 compared to $400-$800 for a new opener installation. However, if your opener is over 10-15 years old, replacing the entire unit is often a better long-term investment. A new opener comes with a full warranty and modern features like better security, smartphone connectivity, and battery backup. For an older unit, a new circuit board can be a temporary fix for a system that’s nearing the end of its life.
Conclusion: Ensuring Safe and Reliable Power for Your Garage Door
Your garage door opener circuit is a small but critical component that governs your system’s performance, safety, and security. From interpreting remote commands to managing safety sensors, this electronic brain is indispensable. Many circuit board issues can be resolved with a straightforward replacement, which can save you hundreds of dollars compared to buying a new opener.
However, electrical work requires expertise. Adhering to NEC guidelines and manufacturer specifications is crucial for the safety of your home and family. While a dedicated circuit isn’t always legally mandated, it is the best practice for ensuring years of trouble-free operation and preventing damage to your opener’s electronics.
If you’re facing persistent opener issues, are unsure about your wiring, or prefer to leave electrical work to the experts, don’t hesitate to seek professional help. For expert diagnosis and repair of all garage door opener problems, our team at AA Garage Door Repair Services provides fast, reliable service. We understand both the electronic and electrical sides of modern garage door systems and are here to ensure your garage door is powered safely and correctly.
To get expert help, schedule a service with our Minneapolis team today. We’ll ensure your garage door opener circuit gets the care it needs to run reliably for years to come.