Why Reprogramming Your Garage Door Opener Matters for Security and Convenience
Learning how to reprogram garage door opener systems is a straightforward process that improves your home’s security and convenience. Whether you’ve lost a remote, moved into a new home, or want to add a new device, reprogramming takes just a few minutes. As a leading provider of garage door solutions since 2001, our team at AA Garage Door LLC has helped thousands of homeowners master this essential task. This guide compiles our expertise to walk you through every common scenario.
Quick Answer: Basic Reprogramming Steps
- Locate the ‘Learn’ button on your garage door opener motor unit (usually near the antenna wire).
- Press and release the ‘Learn’ button.
- Within 30 seconds, press the desired button on your remote control or enter your PIN on the keypad.
- Wait for confirmation—the opener’s light will blink or you’ll hear a click.
- Test your device to ensure it operates the door.
Reprogramming is a critical security measure. When you move into a new home, previous owners may have given access to numerous people. Resetting your opener codes is as important as changing your door locks. Similarly, if a remote is lost or stolen, reprogramming immediately prevents unauthorized access.
This guide covers all major brands and opener types with clear, step-by-step instructions, whether you need to program a new remote, sync your car’s HomeLink® system, or troubleshoot a malfunction.
 and typical locations on garage door opener units. - how to reprogram garage door opener infographic")
Important how to reprogram garage door opener terms:
Why and When to Reprogram Your Opener
Your garage door opener is a critical entry point to your home. Knowing when and why to reprogram it is key to maintaining security and functionality.
When Moving Into Your New Home
When you buy a new home in a community like St. Paul, Baldwin, Woodbury, or Hudson, reprogramming your garage door opener should be a top priority. The previous owners likely shared codes with family, friends, and service providers. Erasing the opener’s memory and starting fresh is the only way to ensure you are the only one with access.
After Losing or Misplacing a Remote
A lost or stolen remote is a security risk. Reprogramming your system deactivates the old remote’s code, rendering it useless and preventing unauthorized entry.
Adding New Devices to Your System
Whether you’re giving a remote to a new driver, installing a keypad for convenience, or replacing an old remote, each new device must be programmed to communicate with your opener motor.
When Devices Stop Working Properly
If a remote or keypad becomes unreliable, try reprogramming it before buying a replacement. This often re-establishes the connection and resolves functionality issues, especially after a battery has been completely drained.
Following a Power Outage
Significant power outages can sometimes disrupt an opener’s memory. If your opener behaves erratically after power is restored, reprogramming is the standard first step to reset its functions.
As a Proactive Security Practice
Some homeowners reprogram their openers annually as a security best practice, similar to changing online passwords. This ensures any old or unintentionally shared codes are wiped clean, maintaining tight control over who has access.
Providing Temporary Access
If you need to grant temporary access to a guest or service provider, you can program a specific code for them. Once access is no longer needed, you can erase all codes and reprogram your personal devices to restore your primary security settings.
Before You Begin: Essential Prep and Finding the ‘Learn’ Button
A few minutes of preparation ensures the how to reprogram garage door opener process is smooth and successful. Gather your materials before you climb the ladder.

Getting Your Tools and Materials Ready
You will need the following items:
- A sturdy ladder for safe access to the ceiling-mounted motor unit.
- Your new remote or keypad. Be sure to install a fresh garage door opener battery first, as a weak battery is a common cause of programming failure.
- Your opener’s user manual. If you’ve misplaced it, most manufacturers provide PDF versions online.
- A flashlight to help you see the motor unit clearly.
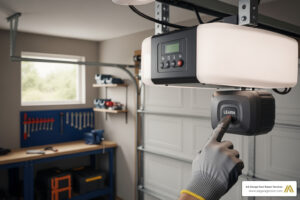
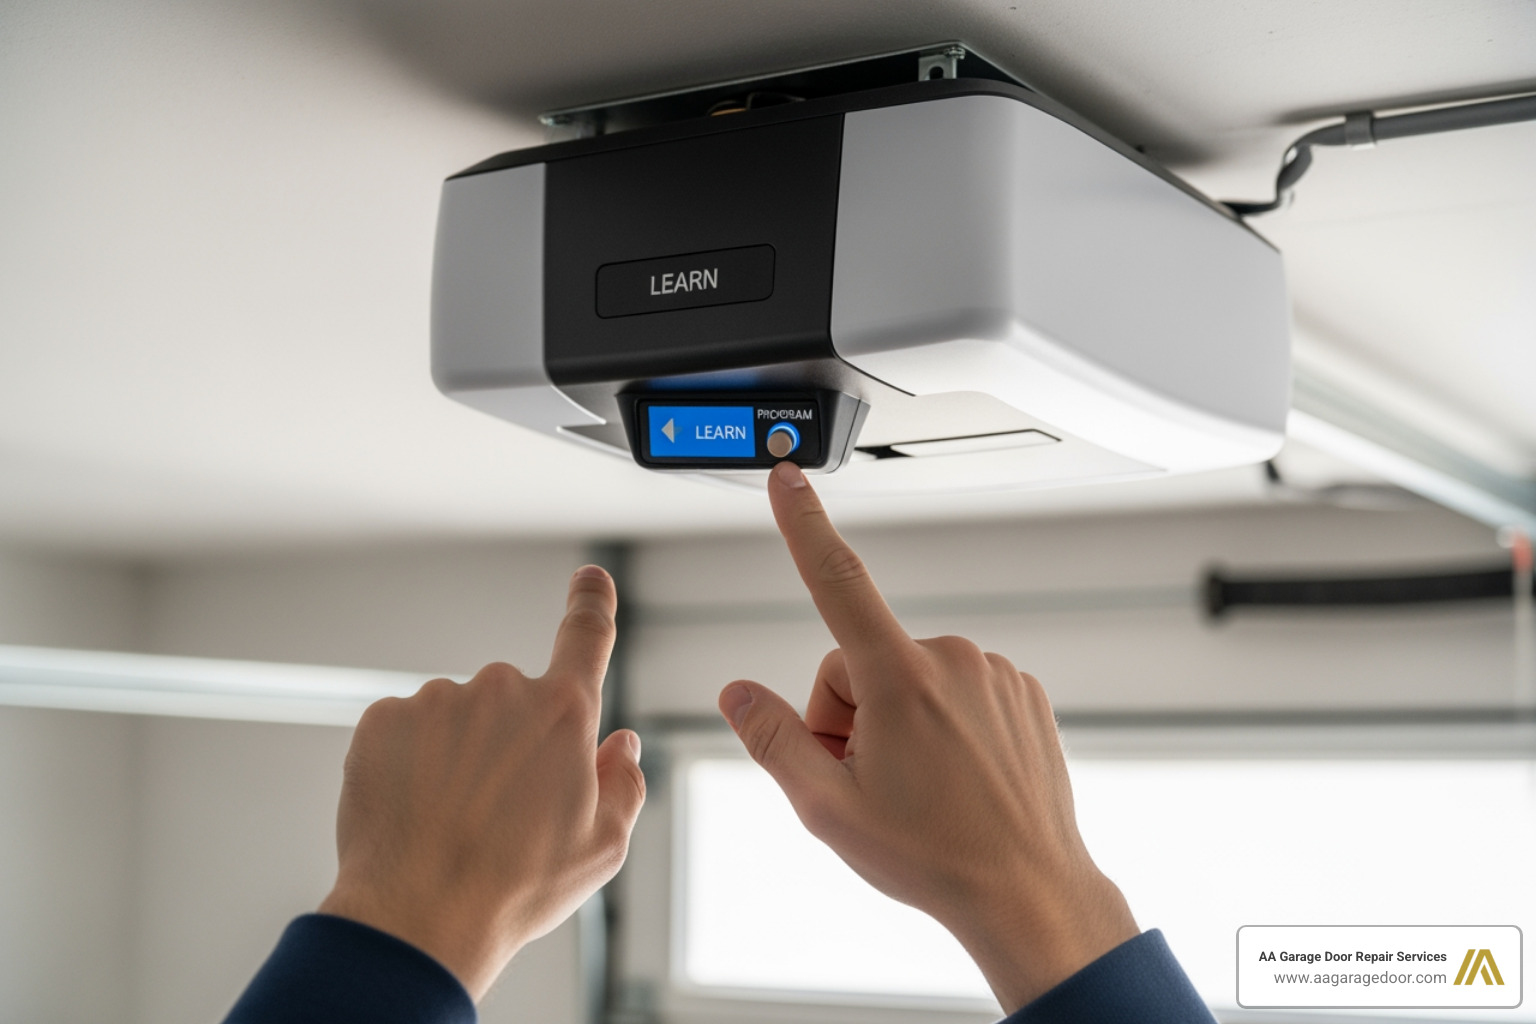
Finding That Elusive ‘Learn’ Button
The ‘Learn’ button is the key to reprogramming. It is a small button located on the motor unit itself, not the wall-mounted control panel.
Look on the back or side panel of the motor unit, often near where the antenna wire hangs down. On some models, it is located under the light cover, which can be gently popped off.
The color of the ‘Learn’ button indicates the opener’s technology and manufacturing date:
- Red or Orange: Typically found on Chamberlain, LiftMaster, or Craftsman models made between 1993-1997.
- Green: Indicates a model from 1997-2005.
- Purple: Used on models manufactured between 2005-2014.
- Yellow: Found on modern Security+ 2.0 openers from 2011 onward.
Genie and Overhead Door openers may use different colors or labels like “Program” or “Set.” Once you’ve located the button and noted its color, you are ready to begin.
How to Reprogram Your Garage Door Opener for Any Device
Once you’ve located the ‘Learn’ button, the process for how to reprogram garage door opener systems is consistent across most major brands. The core principle is to put the opener in “learning mode” and then send a signal from your new device within a 30-second window.

General Steps and Important Considerations
- Safety First: Always clear the garage door’s path of any people, pets, or objects before you begin. Stand clear of the door while testing.
- The 30-Second Window: After pressing the ‘Learn’ button, you have approximately 30 seconds to complete the next step. If you miss this window, the opener will exit programming mode, and you will need to start over.
- Confirmation Signals: Success is confirmed by a visual or audible signal from the motor unit, such as blinking lights or a distinct click.
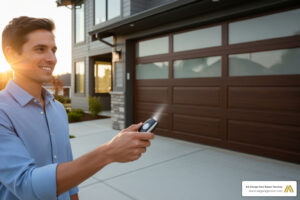
Programming a Standard Remote Control
- Activate Learning Mode: Climb your ladder and press and immediately release the ‘Learn’ button on the motor unit. The indicator light will turn on.
- Program the Remote: Within 30 seconds, press and hold the button on your remote that you wish to program.
- Confirm Programming: Continue holding the remote button until the opener’s main light bulbs blink or you hear a click from the motor unit. Release the button.
- Test the Remote: Step away from the door and press the newly programmed button to confirm it operates the door.
For more details, our garage door opener remote complete guide offers advanced troubleshooting.
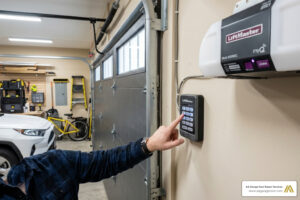
How to Reprogram a Garage Door Opener Keypad
- Activate Learning Mode: Press and release the ‘Learn’ button on the motor unit.
- Enter Your PIN: Within 30 seconds, go to your keypad and enter your chosen 4-digit PIN.
- Finalize Programming: Press and hold the ‘Enter’ (or ‘Program’) button on the keypad until the opener’s lights blink or you hear a click.
- Test the Keypad: Enter your PIN and press ‘Enter’ to confirm the door operates.
Pro Tip: Avoid easily guessed PINs like “1234” or your street address. For more on this topic, see our guide on garage door keypad programming.
Syncing Your Car’s Built-in System (HomeLink®)

Programming your car’s built-in remote requires a few extra steps, especially for modern openers with rolling code technology.
- Prepare Your Vehicle: Park your car outside the garage, facing the door, with the ignition on.
- Clear HomeLink® Memory: Press and hold the two outer HomeLink® buttons until the indicator light flashes rapidly (about 20 seconds). This erases any factory-set codes.
- Train HomeLink®: Hold your existing, functional garage door remote 1-3 inches from the HomeLink® button you want to program. Press and hold both the remote button and the desired HomeLink® button simultaneously. Release both when the HomeLink® indicator light changes from a slow blink to a rapid blink.
- Sync with Rolling Code Opener: This step often requires a helper. Have one person press and release the ‘Learn’ button on the garage door motor unit. Within 30 seconds, return to your car and press and release the just-programmed HomeLink® button for two seconds. Repeat this press-and-release sequence up to three times until the garage door moves.
- Test the Button: Press the programmed HomeLink® button to confirm it works.
For vehicle-specific instructions, consult your car’s owner’s manual or the official HomeLink® programming instructions.
Troubleshooting and Advanced Programming
Even with the right steps, programming can sometimes fail. Most issues are simple to fix, but if you’ve tried all troubleshooting and the opener remains unresponsive, it may be time for professional garage door opener repair. A faulty circuit board or signal interference could be the culprit.
How to Erase All Codes and Start Fresh
Erasing all codes from your opener’s memory is the ultimate security reset. This is essential when moving into a new home or if you’ve lost a remote.
- Locate the ‘Learn’ button on the motor unit.
- Press and hold the ‘Learn’ button for 6-10 seconds.
- Release the button once the indicator light next to it turns off. This confirms the memory has been wiped.
- You must now reprogram every remote and keypad you wish to use from scratch.
What to Do If Programming Fails
If you’re having trouble with how to reprogram garage door opener systems, follow these troubleshooting steps:
- Check Batteries: A weak or dead battery is the most common cause of failure. Always use fresh batteries.
- Verify Compatibility: Ensure your remote or keypad is compatible with your opener’s brand and model (check the ‘Learn’ button color).
- Reduce Interference: Other wireless devices and even some LED light bulbs can interfere with the signal. Try turning off nearby electronics.
- Check Range: Stand within a clear line of sight of the motor unit during programming.
- Power Cycle the Opener: Unplug the motor unit for 60 seconds, then plug it back in. This can reset minor electronic glitches.
- Consult the Manual: Your opener’s manual has model-specific instructions. If you’ve lost it, you can often find your opener’s user manual online.
Handling Older Models and Rolling Code Systems
- Older Models with DIP Switches: Openers made before 1993 often use a series of 8-12 small switches (DIP switches) instead of a ‘Learn’ button. To program these, you must open the remote and the motor unit and manually set the switches on both devices to the exact same ON/OFF pattern.
- Rolling Code Systems: Most modern openers use rolling code technology for improved security. These systems often require an extra step after the initial programming. You may need to press the remote button a second or third time to finalize the sync after the initial confirmation blink. Your manual will specify if this is necessary.
Frequently Asked Questions About Opener Reprogramming
Here are answers to the most common questions we receive from homeowners in St. Paul, Baldwin, Woodbury, and Hudson about how to reprogram garage door opener systems.
How long does it take to reprogram a garage door opener?
Reprogramming a single remote or keypad typically takes less than five minutes. The actual programming sequence is under 60 seconds; the most time-consuming part is safely setting up a ladder to reach the motor unit.
Will reprogramming one remote erase my other remotes?
No. When you program a new device, you are simply adding it to the opener’s memory. Your existing remotes and keypads will continue to work. The only action that erases all devices is deliberately clearing the memory by pressing and holding the ‘Learn’ button for 6-10 seconds.
Do I need a professional to reprogram my opener?
For most modern openers, reprogramming is a straightforward DIY task. However, professional help is recommended if you have an older model with DIP switches, if troubleshooting fails, or if you simply prefer an expert to handle it. Persistent programming issues can sometimes indicate a deeper problem with the opener’s logic board that requires professional diagnosis.
Conclusion: Your Garage is Secure, What’s Next?
You’ve now mastered the essential skill of how to reprogram garage door opener devices, putting you in control of your home’s security. Whether you’re securing a new home in St. Paul, responding to a lost remote in Woodbury, or adding a keypad for convenience, you have the knowledge to manage your garage access.
Remember the key steps: locate the ‘Learn’ button, act within the 30-second programming window, and test your device. For maximum security, you also know how to erase all codes and start fresh.

Of course, sometimes the issue is more than just programming. If troubleshooting fails or you notice grinding sounds, erratic door movement, or other mechanical warning signs, it’s time to call in a professional.
At AA Garage Door Repair Services, we’ve been helping homeowners across Minnesota and Wisconsin since 2001. Our technicians understand every type of opener on the market, from vintage models to the latest smart systems. If you need help with programming or suspect a larger issue, our team is ready to provide fast, reliable service.
Ready to get your garage door working perfectly? Contact AA Garage Door Repair Services today for the expert assistance you can count on. Call (651) 702-1420.