Why Proper Installation Matters for Your Sectional Garage Door Opener
A proper sectional garage door opener installation is a manageable DIY project that can save money and give you control over one of your home’s largest moving systems. For those who prefer a professional touch, our local garage door experts provide expert garage door services to ensure a perfect setup from day one. Here’s what you need to know before you start:
Quick Installation Overview:
- Gather tools and materials – Drill, wrenches, ladder, level, safety glasses, and a helper
- Assemble the rail and trolley – Connect carriage tube sections and attach to motor unit
- Mount the header bracket – Position 2 inches above door’s highest travel point
- Hang the power unit – Secure to ceiling joists with angle irons
- Connect the door arm – Attach J-arm from trolley to reinforced door bracket
- Wire safety sensors – Install photoelectric eyes no more than 6 inches above floor
- Test all safety features – Verify auto-reverse with 2×4 test and sensor alignment
Time Required: 3-6 hours for professionals, 8+ hours for DIY
Skill Level: Intermediate (basic electrical and mechanical knowledge required)
Critical Safety Note: Never adjust, loosen, or remove garage door springs yourself. Spring-related accidents cause over 10,000 injuries annually in the U.S.
The difference between a smooth, quiet opener and one that fails prematurely often comes down to the quality of installation. Research shows that one in four serious problems stems from skipping precision steps in the manufacturer’s manual. Proper installation ensures your opener will deliver reliable performance for its full 10 to 15-year lifespan.
I’m David Sands, owner of AA Garage Door LLC, and I’ve overseen thousands of sectional garage door opener installations across Wisconsin and Minnesota since 2001. As an authorized LiftMaster dealer and member of the International Door Association, I’ve seen how correct installation techniques prevent callbacks and extend equipment life.

Need professional installation? Our team completes installations in 3-6 hours with a full warranty. Request same-day service in the Twin Cities metro area on our website.
Pre-Installation: Tools, Components, and Opener Types
Before starting your sectional garage door opener installation, proper preparation is half the battle. Understanding the components and having the right tools on hand will ensure a smooth process.
Essential Components of a Sectional Garage Door Opener System
An opener system is a collection of parts working in unison. Here are the key players:
- Power Unit: The motor and circuit board that mounts to the ceiling and provides the lifting power.
- Rail or Carriage Tube: The track extending from the power unit to the wall, on which the trolley travels.
- Trolley & Drive Mechanism: The trolley connects the motor’s power to the door via a drive mechanism (chain, belt, or screw).
- Brackets & Arm: The header bracket anchors the rail to the wall, the door bracket attaches to the door’s top panel, and the J-arm connects them.
- Safety & Control: Legally required safety sensors create an invisible beam that reverses the door if obstructed. Wall panels and remote controls operate the system.
Tools and Materials Required for Installation
Nothing kills a DIY project faster than a missing tool. Gather these items before you begin:
- Sturdy ladder
- Socket wrench set and adjustable wrench
- Tape measure and level
- Power drill with various drill bits
- Phillips head and flathead screwdrivers
- Wire strippers
- Safety glasses and work gloves
- A helper: This is non-negotiable for safety and efficiency. Lifting and aligning the power unit is a two-person job.
A 2023 survey found that while trained installers finish in 3 to 6 hours, DIYers often spend 8 hours or more. If you’d rather leave it to the pros, AA Garage Door offers fast, reliable same-day installation backed by a satisfaction guarantee.
Choosing Your Opener: Chain vs. Belt vs. Direct Drive
Not all openers are created equal. The three main types offer different balances of cost, noise, and maintenance.
- Chain Drive: The most affordable and reliable option, using a metal chain to move the door. Its main drawback is noise, making it best for detached garages. It requires occasional lubrication.
- Belt Drive: This type swaps the chain for a steel-reinforced rubber belt, resulting in whisper-quiet operation. It’s ideal for attached garages where noise is a concern and requires minimal maintenance.
- Direct Drive: The premium option where the motor itself travels along the rail. This design has fewer moving parts, offering extremely quiet operation and the lowest maintenance needs, but comes at a higher price.
| Opener Type | Cost | Noise Level | Maintenance Needs |
|---|---|---|---|
| Chain Drive | Low | High | Moderate |
| Belt Drive | Moderate | Low | Low |
| Direct Drive | High | Very Low | Very Low |
If you have an attached garage, a belt or direct drive is a worthwhile investment in daily comfort. For a deeper look, see our guide on 4 Differences Between Chain Drive and Belt Drive Garage Door Openers.
The Core of Sectional Garage Door Opener Installation
With your tools gathered, it’s time for the main event of your sectional garage door opener installation. Follow these steps carefully for a professional-quality result.
Assembling and Mounting the Carriage Tube
The carriage tube, or rail, is the highway for your opener’s trolley. Start by laying out the rail sections on the floor. Your manufacturer’s manual is essential here, as each brand has a specific assembly order. Ensure each section is fully seated before connecting the next.
Once the rail is assembled, attach it securely to the power unit. Before lifting, slide the trolley onto the rail and confirm it glides smoothly. Install the idler pulley at the far end of the rail where the chain or belt will loop. Rushing this step is a common mistake; analysis of installation callbacks shows that one in four serious problems stems from skipping the precision steps in the manual.

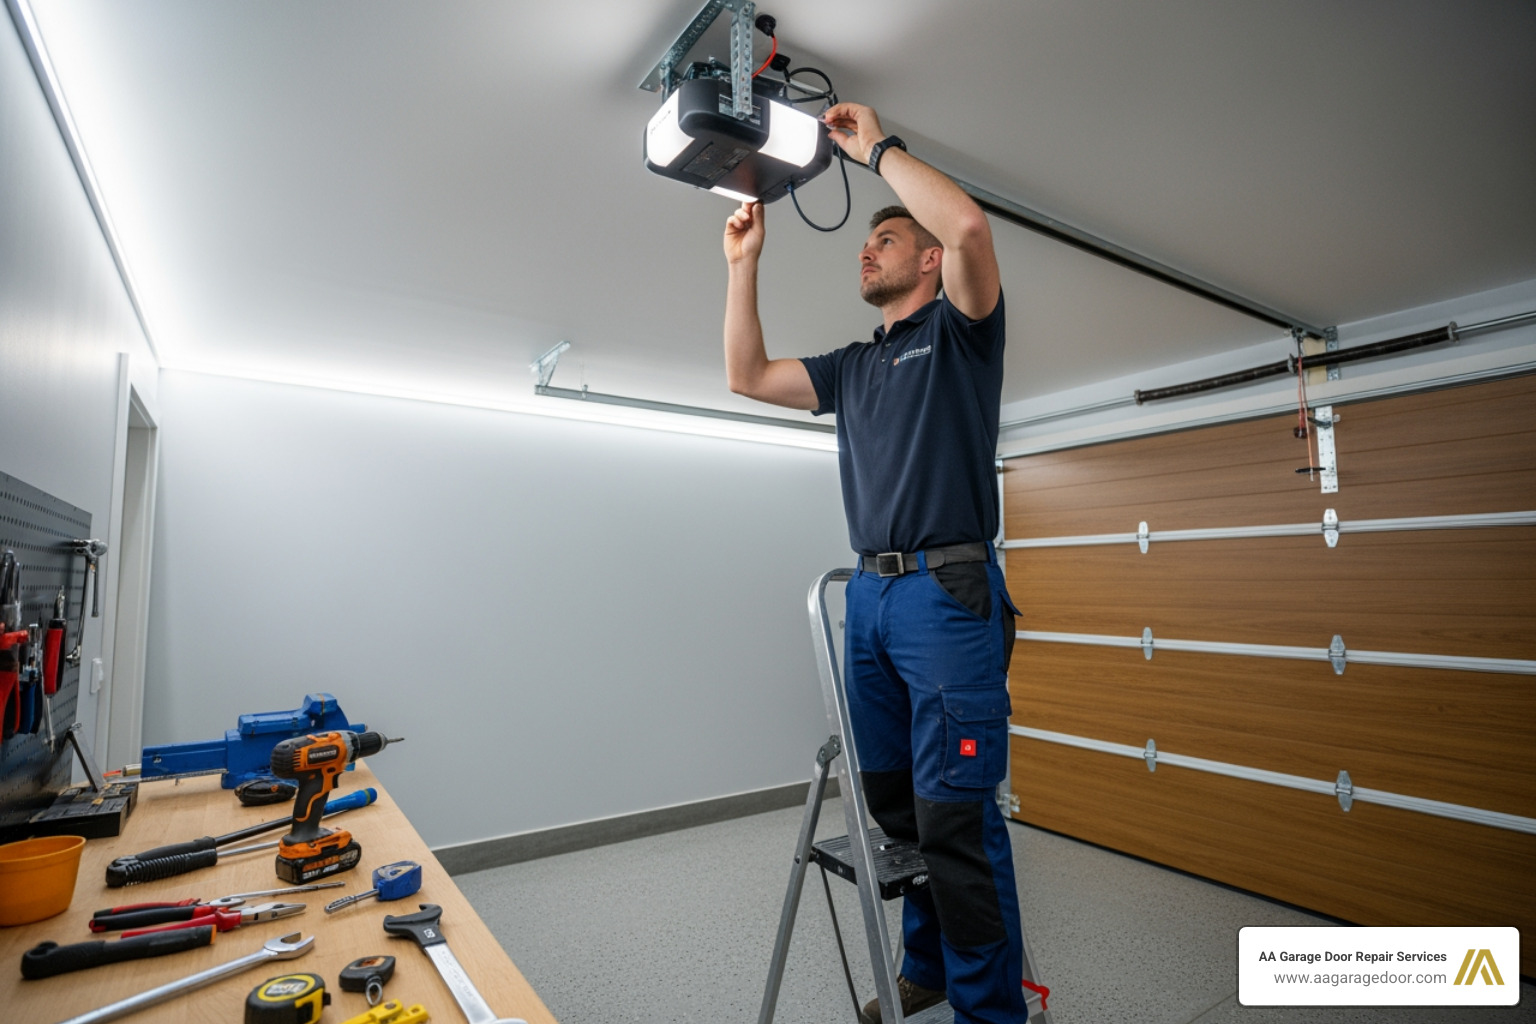
Mounting the Header Bracket and Hanging the Power Unit
This is where your helper becomes invaluable. First, find your door’s highest point of travel by opening it fully. Mark the wall, then measure up another two inches—this is where the bottom of your header bracket will go, ensuring clearance.
Find and mark the center of your garage door opening on the header wall. Secure the header bracket to solid wood framing using lag screws; use proper masonry anchors for brick or concrete. Connect the rail to the header bracket with the provided clevis pin.
With your helper, lift the power unit and attached rail toward the ceiling. Hang the motor head from ceiling joists using angle irons. These must be bolted directly to solid joists, never just drywall. Use a level to ensure the power unit is horizontal and parallel to the door. The rail should be roughly level when the door is closed, about two inches above it. For more guidance, Home Depot offers detailed instructions for installing an opener.

Attaching the Bracket That Connects the Carriage Arm to the Garage Door
This final mechanical connection moves the door. Reinforcing your top door panel is not optional; it’s essential for lightweight steel, aluminum, or fiberglass doors. Install an opener reinforcement bracket or strut across the top panel’s full width. This distributes the pulling force, preventing the panel from cracking or warping over time.
Attach the door bracket to the center of the reinforced top panel, bolting through both the strut and the door. Assemble the J-arm (curved and straight sections) and connect it between the trolley and the door bracket. Finally, attach the emergency release rope and handle to the trolley, positioning it at least six feet off the floor to prevent accidental release.

Wiring, Accessories, and Safety Systems
This phase of your sectional garage door opener installation transforms the motor into a smart, safe, and convenient system for your home.
Installing Safety Devices and Wall Controls
Safety is paramount. The Protector System® (photoelectric eyes) is your door’s most critical safety feature. These sensors mount on each side of the door track, no more than 6 inches above the floor. They create an invisible light beam that, if broken during closing, instantly reverses the door. This feature is a federal safety requirement that prevents many of the 10,000+ garage door-related injuries that occur annually in the U.S.
Mount the sensors securely and align them until the indicator lights on both units glow steadily. A blinking light means they are misaligned. Run the low-voltage wires from each sensor back to the power unit, securing them neatly with staples.
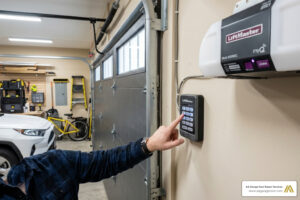
Install the wall control panel at a minimum height of 5 feet above the floor, keeping it out of reach of small children. Position it near your home’s access door for convenience. Run its low-voltage wire back to the power unit, just as you did for the sensors.
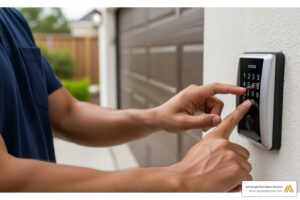
How to Install and Connect a Garage Door Keypad
A wireless keypad offers convenient, key-free access. Mount it on the exterior wall next to your garage door. Program your personal identification number (PIN) following the manufacturer’s instructions. To sync it with the opener, press the “Learn” button on the motor unit and then enter your PIN on the keypad. The opener’s light will flash to confirm the connection. Test it several times to ensure it works reliably. For more details, see our Garage Door Opener Keypad Complete Guide.
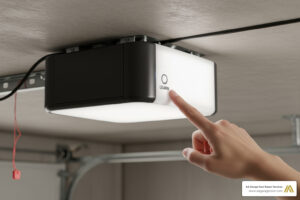
Upgrading to a Smart Garage with myQ
Smart technology like myQ connects your opener to your home’s Wi-Fi, allowing you to control and monitor it from anywhere via the myQ App. This eliminates the anxiety of wondering if you left the door open.
Key features include:
- Smartphone Control: Open or close your door from anywhere in the world.
- Real-Time Alerts: Receive notifications on your phone whenever the door is opened or closed.
- Scheduling: Set the door to close automatically at a certain time each night.
Smart garage doors are experiencing annual growth exceeding 25%, as 57% of homeowners now seek smart capabilities when upgrading. This technology is quickly becoming the new standard for home automation. For a full walkthrough, read our Smart Garage Door Installation Complete Guide.
Final Testing and Troubleshooting
Congratulations on reaching the final phase of your sectional garage door opener installation. Before you’re done, a series of critical tests will ensure your opener is both functional and safe.
Best Practices for Testing Your Newly Installed Opener
These tests are your opener’s final exam. Do not skip them.
- Program Travel Limits: Teach the opener its fully open and closed positions by following the manual’s instructions. Incorrect limits can cause the door to slam or stop short.
- Set the Force: The opener must learn the correct force needed to move the door. Most units calibrate this automatically, but verify the setting in your manual.
- Safety Reversal System Test: This is a mandatory safety check. Place a 2×4 board flat on the floor in the door’s path. When closing, the door must reverse immediately upon contact. If it fails, readjust your force and travel limits.
- Photoelectric Sensor Test: While the door is closing, wave your hand through the sensor beam. The door must stop and reverse instantly. If it doesn’t, your sensors are misaligned.
- Controls and Release: Test all remotes and the keypad. Pull the emergency release handle to ensure you can operate the door manually, then re-engage the trolley.

Overcoming Common Installation Challenges
Even careful installers can hit a snag. Here are solutions to common problems.
- Unbalanced Door: If the door doesn’t stay put when lifted halfway manually, the springs are unbalanced. Stop immediately and call a professional. The springs are under extreme tension and are incredibly dangerous to adjust yourself.
- Insufficient Headroom: A low ceiling may require a special low-headroom track kit or a wall-mount (jackshaft) opener.
- Motor Hums but Won’t Move: This indicates a bind. Check for obstructions in the door’s path or a jammed trolley. An unbalanced door can also cause this.
- Remote Programming Issues: Ensure you’re pressing the correct “Learn” button and that the remote’s battery is fresh. Stand close to the motor unit to avoid interference.
- Misaligned Sensors: Blinking indicator lights mean the sensors aren’t aligned. Gently adjust them until both lights are solid.
If you’re stuck, a fresh set of experienced eyes can help. Our technicians at AA Garage Door are available 24/7 because emergencies don’t keep business hours.
Frequently Asked Questions about Sectional Door Opener Installation
Even after a successful installation, questions can arise. Here are answers to the most common queries about sectional garage door opener installation.
How long does it take to install a sectional garage door opener?
A trained professional can typically complete a sectional garage door opener installation in 3 to 6 hours. For a first-time DIYer, it’s wise to set aside a full day, as the project often takes 8 hours or more. Rushing can lead to mistakes, so take your time and follow the manual carefully.
Is it dangerous to install a garage door opener myself?
Installing the opener unit itself is an intermediate-level DIY task. The primary danger lies not with the opener, but with the garage door’s springs. These springs are under extreme tension, and a mishandling can cause severe injury. Spring-related accidents account for over 10,000 injuries in the U.S. each year.
Our non-negotiable rule is: Never attempt to adjust, loosen, or remove the springs, cables, or bottom brackets yourself. If your door is unbalanced, stop and call a professional. It is not worth the risk. If you need spring service, reach our team 24/7 through our website.
Do I need to reinforce my garage door for an opener?
Yes, absolutely. Reinforcement is critical for modern lightweight doors made of steel, aluminum, or fiberglass. An opener reinforcement bracket or strut must be installed on the top panel before connecting the opener’s arm.
This strut distributes the opener’s pulling and pushing force across the entire width of the panel. Without it, the concentrated stress can cause the panel to bend, crack, or break over time. This small, preventative step protects your door and ensures the opener functions correctly for its full 10 to 15-year lifespan.
Your Partner for a Perfect Installation
When you complete your sectional garage door opener installation correctly, you’re setting yourself up for 10 to 15 years of smooth, reliable operation. There’s real satisfaction in tackling this project yourself, but you don’t have to go it alone if you run into trouble.
If you find your garage door is unbalanced, if the wiring seems too complex, or if you simply value the peace of mind that comes with professional expertise, our team is ready to help. AA Garage Door has been serving homeowners across the Twin Cities and Western Wisconsin since 2001, completing thousands of opener installations with precision and care.
A properly installed opener is about safety, longevity, and protecting your investment. Our technicians complete most installations in 3 to 6 hours, and every job comes with our satisfaction guarantee and transparent pricing.
If you’d like to explore your options or discuss which opener type is right for your home, browse our full selection of garage door openers on our website. We’re here to answer your questions and provide expert advice for a professional installation that you can count on for years to come.