What Garage Door Opener Codes Tell You About Your System
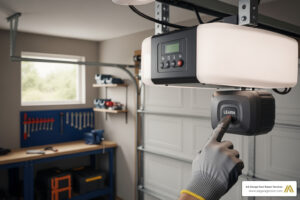
Garage door opener codes are diagnostic signals that appear as blinking LED lights on your opener’s motor unit or control panel. These flashing patterns communicate specific problems, helping you identify issues quickly before they become costly emergencies.
Quick Reference: What Garage Door Opener Codes Mean
Diagnostic Error Codes communicate system problems through LED light patterns:
- 1-10 blinks on the main light typically indicate sensor misalignment
- UP/DOWN arrow patterns (Chamberlain/LiftMaster/Craftsman) signal specific component failures
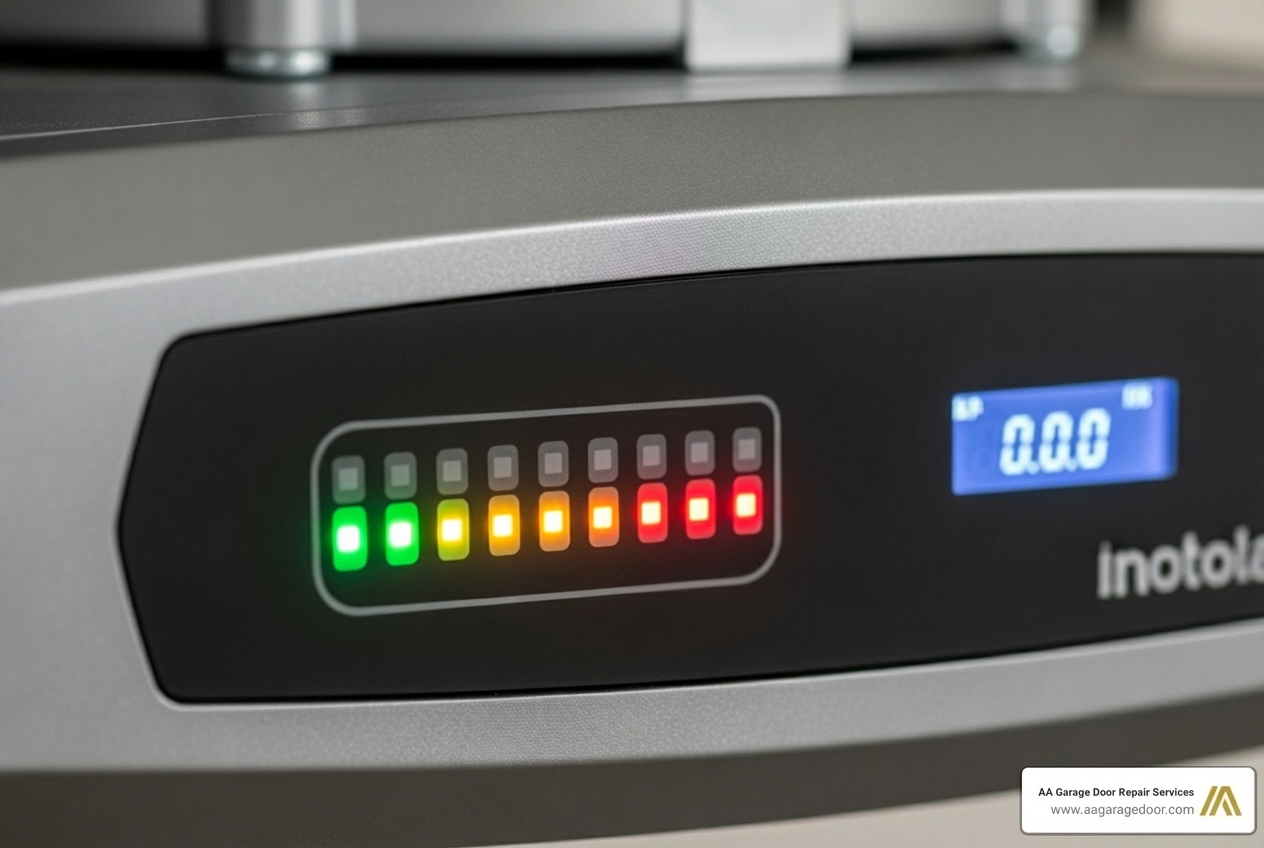
- Red/Green LED blinks (Genie) indicate motor, limit switch, or sensor issues
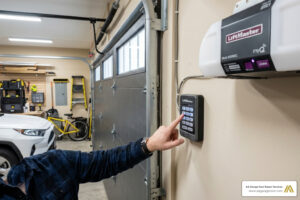
Access Security Codes are the PINs or remote signals you use to open your door:
- 4-digit keypads allow keyless entry to your garage
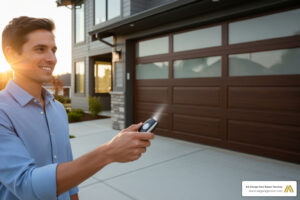
- Remote controls transmit unique rolling codes for security
- Smart openers use app-based access with encryption
Seeing a flashing light on your garage door opener can be puzzling, but these blinks are a diagnostic language designed to tell you exactly what’s wrong. Understanding these patterns can save you time, money, and the headache of a malfunctioning door—especially during Minnesota’s harsh winters when a broken garage door becomes an urgent safety concern.
For homeowners seeking reliable solutions from a trusted Twin Cities garage door company, knowing the code is the first step toward a quick solution. Some errors require nothing more than cleaning a sensor lens or adjusting a setting. Others signal serious electrical or mechanical failures that need professional attention.
This guide will help us interpret the error codes for major brands like Chamberlain, LiftMaster, Craftsman, and Genie. You’ll learn what causes these codes, which fixes you can safely handle yourself, and when it’s time to call an expert.
I’m David Sands, owner of AA Garage Door LLC, and I’ve been diagnosing garage door opener codes and troubleshooting opener systems for over 23 years across Wisconsin and Minnesota. Whether it’s a simple sensor misalignment or a complex logic board failure, understanding what your opener is telling you is the foundation of effective repair.
; right side shows access security codes with images of keypads and remotes, explaining PIN codes and rolling code technology - garage door opener codes infographic")
Handy garage door opener codes terms:
Decoding the Language of Your Opener: Common Error Codes

Your garage door opener communicates problems through a series of flashes from its LED lights. The pattern of these flashes is a code that points to a specific issue. Because The Chamberlain Group owns LiftMaster and Craftsman, these three brands share the same error code system, which is based on the UP and DOWN arrow lights. Genie, on the other hand, uses a combination of red and green LED flashes.
Chamberlain, LiftMaster, and Craftsman Garage Door Opener Codes
Chamberlain, LiftMaster, and Craftsman models manufactured after 2011 with yellow Up and Down arrows use a system of blinking UP and DOWN arrows to signal specific problems. The number of flashes corresponds to a unique error. Error code 1 typically signifies a safety sensor issue, while error code 2 hints at a problem with the wall control for these brands.
- 1 Up, 1 Down Flash: Safety sensors are misaligned or obstructed. This is a very common issue, and the door will not close as a safety precaution. The main light on the opener may also blink 10 times to signify this problem.
- 1 Up, 3 Down Flashes: This indicates a short or fault in the door control wiring. The wall control will not work, but your remotes might still function. This is often referred to generally as “error code 2.”
- 1 Up, 4 Down Flashes: Safety sensors are misaligned, but the door was able to close (though it shouldn’t, indicating a potential safety risk). This is a warning that alignment needs to be checked immediately.
- 4 Up, 1 Down Flash: The opener needs its travel limits reprogrammed. The door may stop short of the fully open or closed position, or reverse prematurely.
- 4 Up, 6 Down Flashes: A safety sensor obstruction was detected while the door was already in motion. The door will typically reverse.
- 5 Up, 5 Down Flashes: The opener is receiving an activation command from an unknown source, possibly related to a myQ accessory issue, or the myQ Work Light not being installed or programmed. This can cause the opener to open or close on its own.
Genie Garage Door Opener Codes
Genie openers use red and green LED lights, typically located near the “Learn” button, to communicate errors. The number of blinks from the red or green LED indicates the problem. These specific blink patterns are crucial for diagnosis.
- Green LED Blinks 1 or 2 Times: The safety beam is blocked or misaligned. The door will reverse to the open position, indicating a safety sensor issue.
- Red LED Blinks 3 Times: The down-limit switch is faulty. This switch tells the opener when the door has reached its fully closed position.
- Red LED Blinks 4 Times: The force settings are too low, and the opener detected an obstruction. This means the opener is trying to close the door but encounters too much resistance.
- Red LED Blinks 5 Times: The motor has overheated. This usually happens after repeated use in a short period. You’ll need to let the unit cool for at least 30 minutes.
- Red LED Blinks 7 or 8 Times: The up-limit or down-limit switch is faulty or has not been set. These switches control the maximum travel of the door in both directions.
Top 5 Reasons Your Garage Door Opener Is Flashing an Error Code

While garage door opener codes can point to many issues, a few common culprits are responsible for the majority of garage door opener faults. Understanding these can help us quickly diagnose the problem and determine if it’s a DIY fix or time for a professional.
1. Safety Sensor Misalignment or Obstruction
This is by far the most common cause of garage door opener errors, often indicated by the main light blinking 10 times or a specific blink pattern like “1 Up, 1 Down” on Chamberlain/LiftMaster/Craftsman openers. Safety sensors, or photo-eyes, are positioned low to the ground and project an invisible beam across the garage opening. They are easily susceptible to collecting dust, debris, or becoming misaligned after being bumped. If this beam is broken by an object, dirt on the lens, or sensor misalignment, the opener will flash an error and refuse to close to prevent injury or damage.
- Solution: First, check for any physical obstructions in the door’s path. Then, gently wipe the sensor lenses with a soft, clean cloth. Ensure both the green (transmitting) and amber (receiving) sensor lights are solid, indicating proper alignment. If one is blinking, gently adjust the sensor until both lights are steady.
2. Wiring Failures and Power Issues
Faulty wiring can cause unpredictable behavior and specific error codes, such as the “1 Up, 3 Down” flash for wall control issues on Chamberlain/LiftMaster/Craftsman. A short in the wire to the wall control, safety sensors, or even the power supply itself can stop the system from working correctly. Power issues, like a tripped circuit breaker or an unplugged unit, can also mimic serious errors.
- Solution: Inspect all visible wiring for staples, pinches, fraying, or damage, paying close attention to the low-voltage wires running to the safety sensors and wall control. Check all connections at the opener unit and the wall control to ensure they are secure. Ensure the opener is plugged into a working electrical outlet. If the opener is unresponsive, check your home’s electrical panel for a tripped circuit breaker and reset it if necessary. For specific local guidelines on electrical wiring in garages, residents of St. Paul, MN, can consult resources like this one on residential garage wiring from StPaul.gov.
3. Incorrect Travel Limit or Force Settings
The travel limits tell the opener precisely when to stop moving, defining the fully open and fully closed positions of the garage door. The force setting determines how much pressure the opener applies before reversing if it encounters an obstruction. If these are set incorrectly, the door might stop halfway, reverse unexpectedly, or not close fully, triggering an error code (e.g., “4 Up, 1 Down” on Chamberlain/LiftMaster/Craftsman, or “Red LED blinks 4 times” on Genie for low force).
- Solution: Consult your owner’s manual to learn how to reprogram the travel and force settings for your specific model. This usually involves a series of button presses on the motor unit to set the “up” and “down” limits and then adjust the force sensitivity.
4. Logic Control Board Failure
The logic board is the opener’s brain, responsible for processing all commands and coordinating the door’s movement. It receives signals from your remotes, keypads, and sensors, and tells the motor what to do. A power surge, age, or constant vibration can cause it to fail, leading to unresponsive behavior, intermittent operation, or persistent, unresolvable error codes. When the logic board malfunctions, the opener can become completely inoperable.
- Solution: A logic board failure typically requires professional diagnosis and replacement. While you might find replacement boards online, installing them correctly requires technical expertise. Attempting to replace it yourself without proper knowledge could lead to further damage or safety risks.
5. Motor Overheating or Mechanical Obstruction
If the opener is used repeatedly in a short time, especially on a heavy or unbalanced door, the motor can overheat. Modern openers have thermal protection that will shut the unit down to prevent damage, often flashing an error code (e.g., “Red LED blinks 5 times” on Genie). Alternatively, a physical obstruction like a bent track, broken roller, or a door that is simply too heavy due to worn springs can stop the door’s movement, causing the opener to register a fault because it cannot complete its cycle.
- Solution: If you suspect overheating, let the motor cool for at least 30 minutes. If the problem persists, manually disconnect the garage door from the opener using the emergency release handle (usually a red cord). Try to open and close the door by hand. If it feels heavy, gets stuck, or is difficult to move, the problem is with the door itself (springs, tracks, rollers), not the opener. This indicates a mechanical issue that needs professional attention.
How to Manage Your Garage Door Opener Access Codes and Remotes
Beyond diagnostic codes, “garage door opener codes” also refer to the PINs and remote signals used for access. Managing these is crucial for your home’s security in the Twin Cities and Western WI, especially if you’ve recently moved or had contractors working on your property.
Programming and Reprogramming Remotes & Keypads
Most modern openers, regardless of brand, use a “Learn” button on the motor unit for programming new remotes or keypads. The color of this button (purple, red, orange, green, or yellow) often indicates the technology type and generation of your opener.
-
General Steps for Programming:
- Ensure your garage door is closed.
- Locate the “Learn” button on your garage door opener’s motor unit (it’s usually on the back or side).
- Press and immediately release the “Learn” button. The LED next to it will light up, indicating it’s in programming mode. You typically have about 30 seconds to complete the next step.
- For a remote: Press and hold the button on your hand-held remote that you wish to program. Release the button when the opener’s main light blinks or you hear two clicks.
- For a keypad: Enter your new 3-5 digit PIN on the keypad, then press the “Enter” or “Learn” button on the keypad. The opener’s light will blink to confirm success.
- Test the remote or keypad by pressing the programmed button or entering the PIN.
-
Brand-Specific Tips:
- Chamberlain, LiftMaster, Craftsman: Often share similar “Learn” button procedures. Yellow “Learn” buttons typically indicate Security+ 2.0 technology.
- Genie: Press the “Learn” button until an LED blinks, then press the remote button within 30 seconds. A second click or light blink confirms programming.
- Sommer Direct Drive: Open the control housing, press the ‘P’ button, press the remote button within 10 seconds, then press ‘P’ again to save.
- Ryobi: Find the control panel, press and hold the ‘PRG’ button until a beep, press the remote button, and listen for a final beep.
For more detailed, manufacturer-specific instructions, we always recommend visiting the manufacturer’s website. You can often find comprehensive guides on how to reprogram a remote or keypad there.
Troubleshooting Common Remote and Keypad Problems
If your remote or keypad is unresponsive, don’t panic! We’ve found that many issues are simple fixes before assuming a major failure:
- Check the Batteries: This is the most common fix. Remote batteries typically last 1-2 years. If your remote only works when you’re very close to the opener, it’s a strong indicator of a weak battery.
- Check for Interference: New LED light bulbs, security cameras, or other wireless devices can sometimes interfere with the remote’s radio frequency signal. Try temporarily unplugging nearby electronics to see if the problem resolves.
- Reprogram the Remote/Keypad: If changing batteries doesn’t work, the remote or keypad might have lost its programming. Follow the steps above to reprogram it.
- Check Antenna: Ensure the opener’s antenna wire (usually a thin wire hanging from the motor unit) is not damaged, cut, or obstructed. Try gently repositioning it.
Why and How Often to Change Your Garage Door Opener Codes
For improved security of your home in the Twin Cities area, you should change your access codes periodically. This simple step can significantly reduce the risk of unauthorized entry.
-
When to Change:
- When you move into a new home.
- If you’ve lost a remote or keypad.
- After giving a temporary code to a service person (like a contractor or house cleaner).
- If you suspect someone has gained unauthorized access to your code.
- After a break-in or security concern in your neighborhood.
- When selling your home, ensure all previous codes are cleared.
-
How Often: As a best practice, changing your code once every six months is a good security habit, even if you don’t have a specific reason. This proactive approach helps maintain a secure environment. For detailed guides on how to change your keypad code, Clopay Door offers steps for reprogramming your garage door keypad, and Continental Door provides a guide on how to change a garage door opener code.
When to Call a Professional for Garage Door Opener Errors
While many garage door opener codes point to simple DIY fixes, some situations absolutely require an expert. As local experts serving St. Paul, Baldwin, Woodbury, Hudson, and the wider Twin Cities and Western WI regions, we emphasize safety and efficiency. You should call a professional if:
- Persistent Error Codes: The error code persists after you’ve tried all troubleshooting steps, including resetting the opener (unplugging for 30-60 seconds).
- Internal Component Failure: The code indicates a logic board or internal motor failure. These are complex components that require specialized knowledge and tools for replacement.
- Damaged Wiring or Electrical Concerns: You see damaged wiring, or you’re simply uncomfortable working with electricity. Incorrect electrical work can be dangerous and lead to further, more costly repairs.
- Door Mechanism Issues: The garage door itself is damaged, unbalanced, or has a broken spring or cable. Garage door springs and cables are under extreme tension and are incredibly dangerous to repair or replace without proper training and equipment. Attempting these repairs yourself can lead to serious injury.
- Unusual Noises: You hear grinding, straining, or other unusual noises coming from the opener motor or the door’s moving parts.
- Safety Sensor Damage: The safety sensors are physically damaged or cannot be aligned despite all troubleshooting efforts.
For fast, reliable service in the Twin Cities area, you can trust our local experts for your garage door repair in Apple Valley and surrounding communities. We’ve been providing expert solutions since 2001, ensuring your system is safe and functional. When in doubt, it’s always safer and often more cost-effective in the long run to call a professional to schedule service.
Frequently Asked Questions about Garage Door Opener Codes
We often get questions about the cryptic messages our garage door openers send us. Here are some of the most common ones:
What is the most common garage door opener error code?
The most common error codes on nearly all brands relate to the safety sensors. This is typically indicated by 10 flashes of the main light on many openers, or a specific blink pattern on the opener’s diagnostic LEDs, such as “1 Up and 1 Down” flash on Chamberlain, LiftMaster, or Craftsman models. This issue arises because safety sensors are positioned low to the ground, making them prone to collecting dust, debris, or becoming misaligned after being bumped.
How do I reset an error code after fixing the issue?
Once the underlying problem is resolved (e.g., you’ve cleaned and realigned the safety sensors), the error code will usually clear itself automatically. If it doesn’t, you can perform a hard reset. This typically involves unplugging the garage door opener from the power outlet for about 30 to 60 seconds and then plugging it back in. In some cases, pressing and releasing the “Learn” or “Reset” button on the motor unit can also clear the code. Always consult your owner’s manual for specific instructions for your model.
What do the different colored lights on my opener mean?
Different colored lights on your garage door opener and its components serve various diagnostic and operational purposes:
-
Green Light:
- On a safety sensor, a solid green light typically indicates it has power and is functioning.
- On some Genie openers, a green LED is part of the error code flashing sequence.
-
Amber/Yellow Light:
- On a safety sensor, a solid amber (or yellow) light typically indicates that it is properly aligned with the green (transmitting) sensor. A blinking amber light means the sensor is misaligned or obstructed.
- On the motor unit, a yellow “Learn” button indicates Security+ 2.0 technology, found in Chamberlain, LiftMaster, and Craftsman openers manufactured after 2011.
- Some LiftMaster models might show a yellow/amber light when operating off backup power.
-
Red Light:
- On Genie openers, a red LED is extensively used for error code flashes, with different blink patterns signifying various problems like motor overheating or limit switch issues.
- On Chamberlain/LiftMaster openers, a red “Learn” button typically indicates older Security+ technology from 1997-2005.
- A solid red light on a safety sensor can sometimes indicate an obstruction or misalignment, particularly in older models.
-
Blue or Purple Light:
- On newer smart garage door openers, a blue or purple light commonly indicates that the opener is in Wi-Fi or MyQ pairing mode, connecting to your home network.
-
No Light:
- If there is no light at all, check the power outlet, the opener’s bulb, and your home’s circuit breaker. It could indicate a complete power loss or a board failure.
Your Local Experts in Garage Door Solutions
Understanding your garage door opener’s garage door opener codes empowers you to handle minor issues and know when to seek help. From a simple sensor cleaning to reprogramming a remote, these diagnostic flashes are your first line of defense. However, for complex electrical issues, internal motor failures, or problems with the door itself, a professional technician is your safest and most reliable choice. AA Garage Door Repair Services has been providing expert solutions in St. Paul, Twin Cities, MN, and Western WI since 2001, ensuring your system is safe and functional. If you’re facing a stubborn error code or need a complete system upgrade, explore our full range of garage door openers or contact us for fast, reliable service.