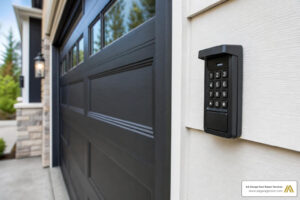
Open Up Convenience with Keyless Entry
If you’re looking to program universal garage door keypad, here’s the essential process:
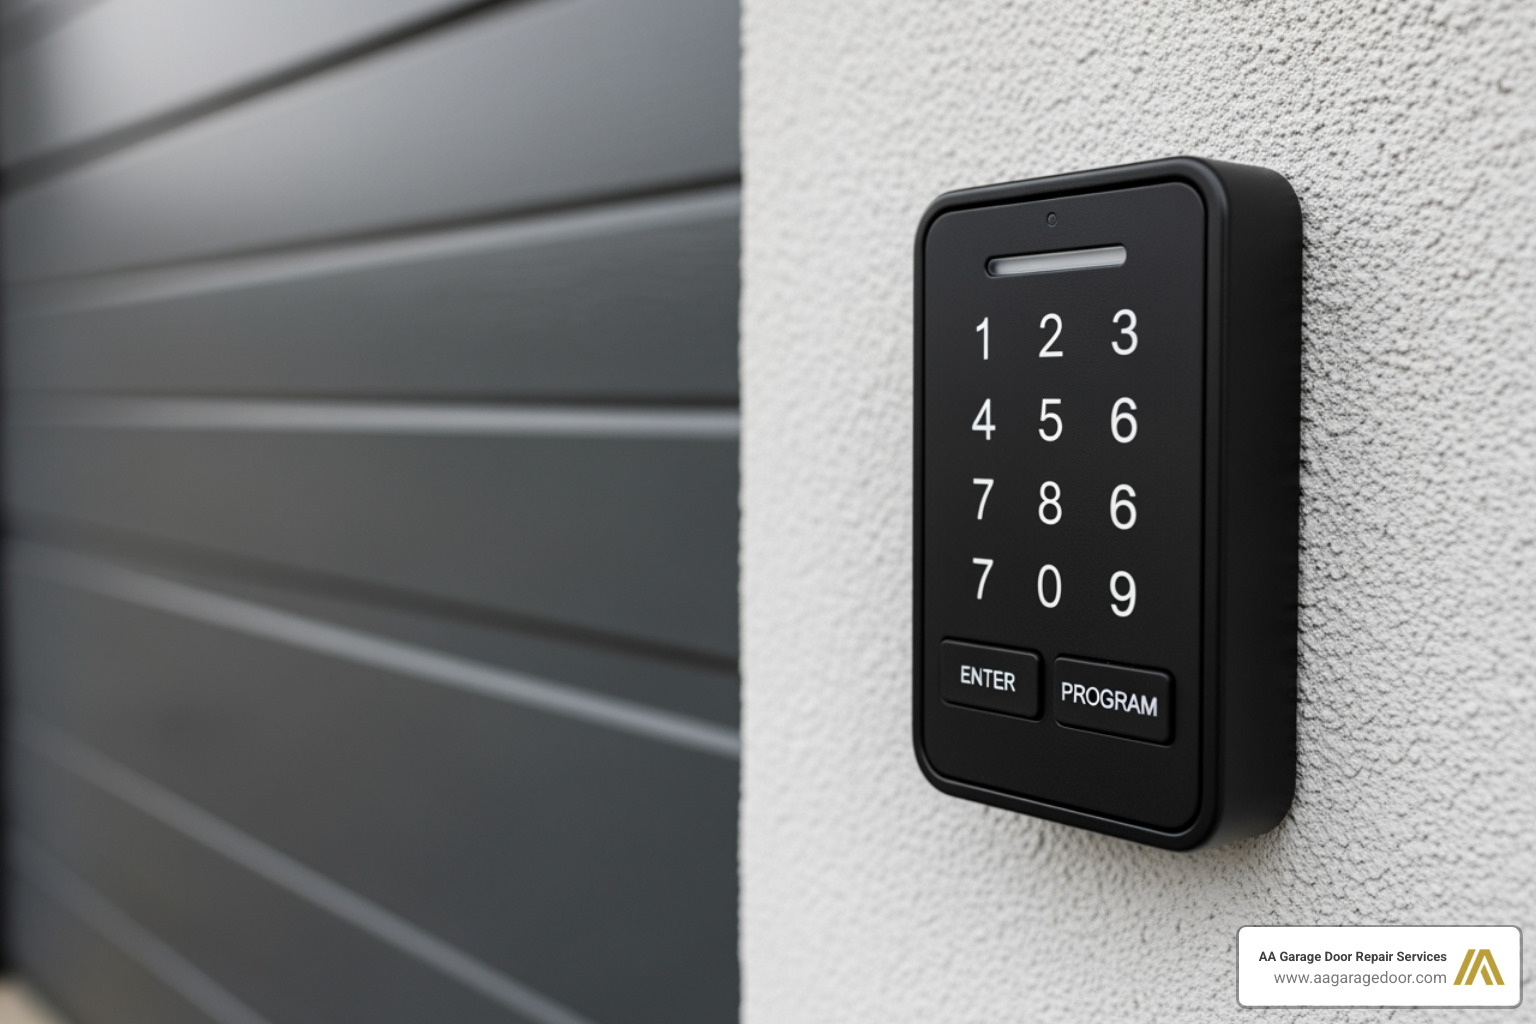
- Enter Programming Mode: Press and hold * and # buttons simultaneously until the keypad stops flashing
- Enter Your PIN: Choose a 4-8 digit code and press #
- Enter Opener ID: Find your opener’s ID from the compatibility chart and press #
- Activate Learn Button: Press the “Learn” button on your garage door opener motor unit for 2-3 seconds
- Sync the Keypad: Enter your PIN on the keypad and press the Up/Down key until the opener activates
- Test: Enter your PIN again to confirm successful programming
A universal garage door keypad is a wireless, externally mounted device that operates your garage door opener by entering a numeric PIN, eliminating the need for keys or remotes. It works by sending a radio frequency signal to the opener’s receiver, compatible with most major brands manufactured after 1993.
The benefits are clear: no more fumbling for keys after a run, no spare keys hidden under doormats, and the ability to grant temporary access to contractors or guests. The global garage door market was valued at USD 21.5 billion in 2022, with keyless entry systems driving significant growth as homeowners prioritize convenience and security. For property owners seeking reliable garage door services, understanding these modern accessories is the first step toward a smarter home.
I’m David Sands, Owner of AA Garage Door LLC, with over 23 years of hands-on experience helping Twin Cities homeowners program universal garage door keypads and troubleshoot access systems. Throughout my career, I’ve guided countless customers through the programming process for every major brand, ensuring they get the convenience and security they deserve from their garage door systems.
 transmitting from keypad to motor unit, Step 3 illustrates the opener's receiver validating the rolling code, and Step 4 shows the garage door opening with a green checkmark indicating successful authentication - program universal garage door keypad infographic step-infographic-4-steps")
For more detailed information, you can explore our comprehensive garage door opener programming guide, learn how to reprogram a garage door opener, or find out what to do if you need garage door opener keypad repair.
Before You Program: Compatibility Checks and Essential Prep

Before we dive into the nitty-gritty of how to program universal garage door keypad, there are a few crucial preliminary steps. Think of it like preparing for a gourmet meal – you wouldn’t start cooking without checking your ingredients! First and foremost, ensure your garage door is closed. This prevents any unexpected movements during programming. Second, confirm that the light bulb in your garage door opener’s motor unit is working. This light often serves as a visual indicator during the programming process, signaling successful pairing or entry into programming mode.
The most critical step, however, is identifying your opener’s technology and compatibility. Not all openers are created equal, and knowing what kind you have will make the programming journey much smoother. Many modern garage door openers manufactured after 1993 are compatible with universal keypads, indicating a large installed base of compatible openers ready for this upgrade.
Identifying Your Opener Type: Rolling Code vs. DIP Switch
Garage door openers primarily fall into two categories based on their security technology: rolling code and DIP switch. Understanding which one you have is key to successful programming.
-
Rolling Code Openers: This is the more advanced and secure technology, found on most openers made after 1993. Rolling code systems, such as Security+ (Chamberlain/LiftMaster), Security+ 2.0, and Intellicode (Genie/Overhead Door), generate a new, unique code each time the remote or keypad is used. This constantly changing code significantly improves security by preventing code-grabbing devices from duplicating your access signal. If your opener has a “Learn” button, it’s almost certainly a rolling code system.
-
DIP Switch Openers: Representing older technology, DIP switch openers were common before 1993. These systems use a series of small physical switches (often 8, 9, or 12) that can be set in binary (on/off) or trinary (on/off/middle) positions. The code generated by these switches is fixed, meaning it doesn’t change. While still functional, they offer less security than rolling code systems. If your opener or original remote has these tiny switches, you have a DIP switch system. For a deeper dive into the mechanics of your garage door system, check out our garage door opener circuit complete guide.
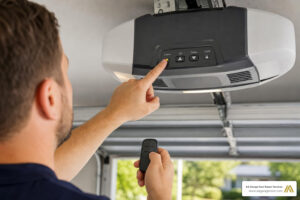
Finding the “Learn” Button and Opener ID
The “Learn” button is your gateway to programming. It’s usually located on the motor unit of your garage door opener, often near the antenna wire or the light cover. Its color is incredibly important, as it often indicates the brand, frequency, and security protocol your opener uses.
-
Locating the Learn Button: Look for a small, colored button on the back or side panel of the motor unit. It might be labeled “Learn,” “Smart,” “Program,” or “PRG.” The color of this button (Green, Red/Orange, Purple, Yellow) is your first clue to compatibility and the specific programming steps needed. For instance, a yellow button typically indicates Security+ 2.0 technology, often found in Chamberlain, LiftMaster, and Craftsman openers.
-
Opener ID Chart: Universal keypads come with a compatibility chart that helps you match your opener’s brand, manufacturing year, and “Learn” button color to a specific “Opener ID” number. This ID is crucial for the keypad to understand how to communicate with your particular opener. We always recommend keeping your keypad’s instruction manual handy for this chart.
| Opener Brand | Approx. Mfg. Years | Learn Button Color | Opener ID | Frequency |
|---|---|---|---|---|
| Chamberlain/LiftMaster/Craftsman | 2011-Present | Yellow | 1 | 310/315/390 MHz |
| Chamberlain/LiftMaster/Craftsman | 2005-2010 | Purple | 2 | 315 MHz |
| Chamberlain/LiftMaster/Craftsman | 1997-2004 | Red/Orange | 3 | 390 MHz |
| Chamberlain/LiftMaster/Craftsman | 1993-1996 | Green | 4 | 390 MHz |
| Genie Intellicode | 2005-Present | None (Program Button) | 5 | 315 MHz |
| Genie Intellicode | 1995-2004 | None (Program Button) | 6 | 390 MHz |
| Overhead Door CodeDodger | 2005-Present | None (Program Button) | 7 | 315 MHz |
| Overhead Door CodeDodger | 1995-2004 | None (Program Button) | 8 | 390 MHz |
| Linear MegaCode | All Years | None (Program Button) | 9 | 318 MHz |
| Stanley SecureCode | All Years | None (Program Button) | 10 | 310 MHz |
| Wayne Dalton | All Years | None (Program Button) | 11 | 372.5 MHz |
Note: This table is a general guide. Always refer to your specific keypad’s manual for the most accurate and up-to-date compatibility information.
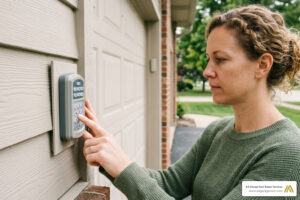
How to Program a Universal Garage Door Keypad: A General Guide

Now that we’ve covered the groundwork, let’s get down to the exciting part: actually programming your universal garage door keypad! The general process involves putting the keypad into programming mode, telling it what type of opener you have, and then syncing it with the opener’s motor unit. We always recommend completing the programming steps before physically mounting the keypad. This allows for easier access to both the keypad and the opener’s “Learn” button.
Step-by-Step: How to Program a Universal Garage Door Keypad for Rolling Code Openers
Most modern openers use rolling code technology. Here’s a generalized sequence that applies to many universal keypads, including popular models like the LiftMaster L979U or Genie GUK-BX:
- Clear the Keypad (Optional but Recommended): If your keypad is new or you’re starting fresh, it’s good practice to clear any previous programming. For many universal keypads, you can press and hold the
*and#buttons simultaneously until the keypad stops flashing or a tone sounds. This resets the keypad to its factory default. - Enter Programming Mode: Press and hold the
*and#buttons on the keypad until the lights on the keypad stop flashing (this usually takes a few seconds). This indicates it’s ready to receive new programming commands. - Enter Your Chosen PIN: Select a 4-8 digit Personal Identification Number (PIN) that you’ll easily remember but is difficult for others to guess. Avoid simple sequences like “1111” or your house number. Enter your chosen PIN, then press the
#button. The keypad light should flash. - Enter the Opener ID: Refer to the compatibility chart (like the one above or in your keypad’s manual) to find the specific “Opener ID” number corresponding to your garage door opener’s brand, “Learn” button color, and manufacturing year. Enter this Opener ID, then press the
#button. The keypad light should flash again. - Activate the Garage Door Opener’s “Learn” Mode: Go to your garage door opener’s motor unit. Press and release the “Learn” button. The indicator light on the opener will typically glow steadily for about 30 seconds, signaling it’s in “Learn” mode. Crucially, do not hold the “Learn” button for more than 2-3 seconds, as this can erase all existing remotes and keypads, requiring you to reprogram everything.
- Sync the Keypad with the Opener: Quickly return to your keypad (you usually have about 30 seconds before the opener’s “Learn” mode times out). Enter your chosen PIN, then press the
0(orEnter/Up/Down) button on the keypad. For some brands like Genie and Overhead Door, you may need to press this0button twice. Release the button once you hear a click from the opener or see its lights flash, indicating successful pairing. - Test the Keypad: Wait a few seconds for the programming to finalize. Then, enter your PIN and press the
0(orEnter/Up/Down) button. Your garage door should activate. If it doesn’t, repeat the entire programming sequence, ensuring you complete each step within the time limits. For more detailed instructions on how to program universal garage door keypad, consult our comprehensive garage keypad programming guide.
Changing or Resetting Your PIN
Life happens, and sometimes we need to change our PIN for security reasons or simply because we forgot it.
-
Changing PIN: If you know your current PIN and want to change it to a new one, the process is usually straightforward. Typically, you’ll enter your current PIN, then press a specific key (often
*orProgram), enter your new PIN, press the same key again to confirm, and then test the new PIN. For example, some keypads require you to enter your current PIN, press*, enter your new PIN, press*, enter your new PIN again, and then hold0to confirm. -
Resetting PIN (if forgotten): If you’ve forgotten your PIN, you cannot reset the keypad itself without the old PIN. Instead, you’ll need to reset the connection between the keypad and your garage door opener. This involves clearing the memory of your garage door opener unit. Go to your opener’s motor unit, press and hold its “Learn” button for approximately 6-10 seconds until the indicator light turns off. This will erase all paired remotes and keypads. Then, simply reprogram the universal keypad with a new PIN as if it were the first time, following the steps above. This essentially gives your keypad a fresh start. For further assistance, our garage keypad reprogram guide offers detailed instructions.
Programming for Multiple Garage Doors
Many universal keypads offer the incredible convenience of controlling multiple garage doors (typically up to three) with a single device. This is a fantastic feature for homes with multi-car garages or separate utility doors.
To program your keypad for multiple doors, you’ll generally follow these steps:
- Program Door 1: First, program the keypad to your first garage door opener using the standard programming steps outlined above. This will assign your chosen PIN to control the first door.
- Initiate Programming for Additional Door: Once the first door is programmed, you’ll need to re-enter the keypad’s programming mode. The method varies slightly by keypad model, but often involves pressing the
*and#buttons again. Then, select the channel for your second door. This might involve pressing theProgrambutton a specific number of times (e.g., twice for Door 2, three times for Door 3) or selecting a specific number on the keypad (e.g.,2#for channel 2). - Repeat Programming Sequence: For the second door, you will repeat the programming sequence:
- Enter your PIN (the same one or a different one, depending on your keypad’s capabilities).
- Enter the Opener ID for the second garage door opener.
- Press and release the “Learn” button on the second garage door opener’s motor unit.
- Return to the keypad and enter your PIN, then press the
0(orEnter/Up/Down) button until the second opener responds.
- Test Each Door Individually: After programming, test each door to ensure it responds correctly to its assigned command. For multi-door operation, you’ll usually enter your PIN, then press the
0(orEnter/Up/Down) button, and then press the number key corresponding to the desired door (e.g.,1,2, or3).
Brand-Specific Programming Instructions
While the general steps provide a solid foundation for how to program universal garage door keypad, some major brands have slight variations or nuances in their programming sequences. Always remember that your specific keypad’s manual is your ultimate guide. However, we’ve gathered some expert tips for the most common brands you’ll find in homes across St. Paul, the Twin Cities, and Western WI.
Chamberlain, LiftMaster, and Craftsman Keypads
These brands are often manufactured by the same company (Chamberlain Group) and share much of their technology, making their programming processes highly similar. The key differentiator for these openers is often the color of their “Learn” button, which signifies the frequency and security protocol.
- Yellow “Learn” Button (Security+ 2.0): Found on openers manufactured from 2011 to the present. For these, after entering your PIN and Opener ID on the universal keypad, you’ll press the “Learn” button on your opener. When you return to the keypad, after entering your PIN, you might need to press the
0button multiple times until the opener activates. Some keypads require you to press0once, wait for the opener to click, then press0again. - Purple “Learn” Button (Security+ 315 MHz): Common on openers from 2005-2010.
- Red/Orange “Learn” Button (Security+ 390 MHz): Found on openers from 1997-2004.
- Green “Learn” Button (Billion Code 390 MHz): Used on older openers from 1993-1996.
For purple, red/orange, and green “Learn” buttons, the standard “press and release Learn button, then enter PIN and press 0 on keypad” method usually works seamlessly. For detailed instructions specific to LiftMaster’s universal keypads, you can refer to LiftMaster’s Universal Keypad instructions. If you’re considering an upgrade, we offer a comprehensive range of LiftMaster garage door openers.
Genie and Overhead Door Keypads
Genie and Overhead Door (often the same company) use Intellicode rolling code technology, which is highly secure. Their programming often has a unique twist compared to Chamberlain/LiftMaster.
- Specific Keypad Presses: When programming a universal keypad to a Genie or Overhead Door opener, pay close attention to the final syncing step. After pressing the “Learn” button on your opener and returning to the keypad, you will enter your PIN and then press the
0(orUp/Down) button twice instead of once. This double press helps ensure the rolling code signal is properly received and recognized by the opener. - Older Models: For older Genie Intellicode or Overhead Door CodeDodger models (1995-2004), ensure you’re using the correct Opener ID (typically ID 6 or 8 from the chart). Current models (2005-Present) will use ID 5 or 7.
- Time Sensitivity: Like all rolling code programming, the process is time-sensitive. Ensure you complete the steps quickly after activating the opener’s “Learn” mode, as it will time out after about 30 seconds.
For in-depth guidance straight from the source, check out Genie’s official wireless keypad programming instructions.
Installation and Troubleshooting Your Universal Keypad
Once you’ve successfully learned how to program universal garage door keypad, the next step is proper physical installation. A well-installed keypad is not just about aesthetics; it’s about reliable function, security, and durability. Knowing how to troubleshoot common issues will also save you headaches down the road.
Physical Installation and Maintenance
- Installation Height: Safety first! We always recommend mounting your garage door keypad at least 5 feet (1.5 meters) high, out of the reach of small children. This prevents unauthorized access and ensures little ones can’t accidentally operate the door.
- Location: Choose a spot within sight of the garage door itself. This allows you to see the door’s movement when operating it, a crucial safety measure. Make sure it’s away from any moving parts of the door, such as tracks, springs, or cables, to prevent interference or damage. Also, ensure there’s enough clearance for the keypad’s cover to open and close freely (typically 4 inches).
- Mounting: Most keypads come with screws and anchors for secure fastening. Choose a smooth, flat surface on your garage door frame or an adjacent wall. Use a drill to create pilot holes if necessary, then securely attach the keypad.
- Battery Replacement: Universal keypads are wireless, meaning they run on batteries (typically a 9V or AAA batteries). Replace them when the keypad’s backlight dims, the buttons become unresponsive, or the keypad fails to light up at all. While programming is often retained during a battery change, some keypads might require reprogramming after new batteries are installed, so keep your manual handy. We recommend using only standard or alkaline batteries, as rechargeable batteries are often not recommended.
Common Troubleshooting Fixes
Even with the best intentions, you might encounter a hiccup or two. Here are some common issues and how we typically resolve them:
- Keypad Not Responding:
- Check Battery: This is the number one culprit! Replace the batteries with fresh ones.
- Within Range: Ensure you are pressing the buttons within a reasonable distance of your garage door opener.
- Reprogram: If the battery isn’t the issue, the keypad might have lost its programming. Try reprogramming the device from scratch, carefully following all steps.
- Opener Light Blinks but Door Doesn’t Move: This is a classic sign of an obstruction or issue with your garage door’s safety sensors. Check the photoelectric sensors located near the bottom of your door tracks. Ensure they are clean, aligned with each other, and that nothing is blocking the beam between them.
- Wrong PIN Entered Too Many Times: For security, many keypads have a lockout feature. If you or someone else enters the wrong PIN multiple times consecutively, the keypad may enter a temporary lockout mode, typically for 1-2 minutes. During this time, it won’t accept any input. Wait for the lockout period to expire, then try again with the correct PIN.
- Keypad Works Sometimes, Not Always: This could point to a weak battery, intermittent interference, or a marginal programming connection. Try replacing the battery first. If the problem persists, try reprogramming the keypad, ensuring you press the “Learn” button on the opener for the correct duration and complete the syncing steps quickly.
If you’re facing persistent issues beyond simple reprogramming or battery replacement, it might signal a deeper problem with the opener itself. This could include issues with the logic board, wiring, or other internal components, requiring professional garage door opener repair. Our local experts in St. Paul and the wider Twin Cities area are always ready to diagnose and fix such problems.
Frequently Asked Questions about Universal Keypad Programming
We hear these questions often from homeowners in Minnesota and Western Wisconsin, and we’re happy to provide clear answers to help you steer your universal keypad.
How do I reset a universal garage door keypad if I forgot the PIN?
You cannot reset the keypad itself without the old PIN. Instead, you must clear the memory of your garage door opener unit. To do this, locate the “Learn” button on your opener’s motor head. Press and hold this “Learn” button for about 6-10 seconds until the indicator light on the opener turns off. This action erases all paired remotes and keypads from the opener’s memory, effectively giving you a clean slate. Once the memory is cleared, you can then reprogram the universal keypad with a new PIN as if it were the first time, following the step-by-step guide we provided earlier.
Are all garage door openers compatible with universal keypads?
No, but most are. Universal keypads are designed to work with the vast majority of residential garage door openers manufactured from 1993 onwards. This includes openers that use either rolling code technology (like Security+, Security+ 2.0, Intellicode, CodeDodger) or older DIP switch technology. However, there are exceptions. Very old openers (pre-1993) or some obscure brands might not be compatible. It’s absolutely essential to always check the keypad’s compatibility chart against your specific opener’s brand, model, and manufacturing year before purchasing. This chart is usually found in the keypad’s instruction manual or on the manufacturer’s website.
Why did my keypad stop working after a power outage?
A power outage, especially one accompanied by a power surge, can sometimes disrupt the delicate electronic memory of your garage door opener’s logic board. While the keypad’s internal memory (where your PIN is stored) is usually fine and battery-powered, the opener itself might “forget” its connection to the keypad. It’s like your computer forgetting its Wi-Fi password after a sudden shutdown. The simplest and most common solution is to reprogram the universal keypad to the opener. Treat it as if you’re programming it for the first time. In rare cases, a severe power surge can damage the opener’s logic board, requiring professional repair or replacement, but reprogramming is always the first step.
Conclusion: Your Key to a More Secure and Convenient Home
Mastering how to program universal garage door keypad empowers you with keyless convenience and improved home security. By following these steps-from compatibility checks to brand-specific programming and troubleshooting-you can easily set up access for your family, friends, and service providers. The flexibility and peace of mind a keypad offers are invaluable, whether you’re living in St. Paul, navigating the busy Twin Cities, or enjoying the tranquility of Western WI.
If you encounter issues beyond simple reprogramming or wish to upgrade your entire system, the experts at AA Garage Door Repair Services are here to help. We’re committed to ensuring your garage door system operates smoothly and securely.