When Your Garage Door Stops Working: What to Do First
This garage door troubleshooting guide from professional garage door services covers the most common problems homeowners face – and the fastest ways to fix them.
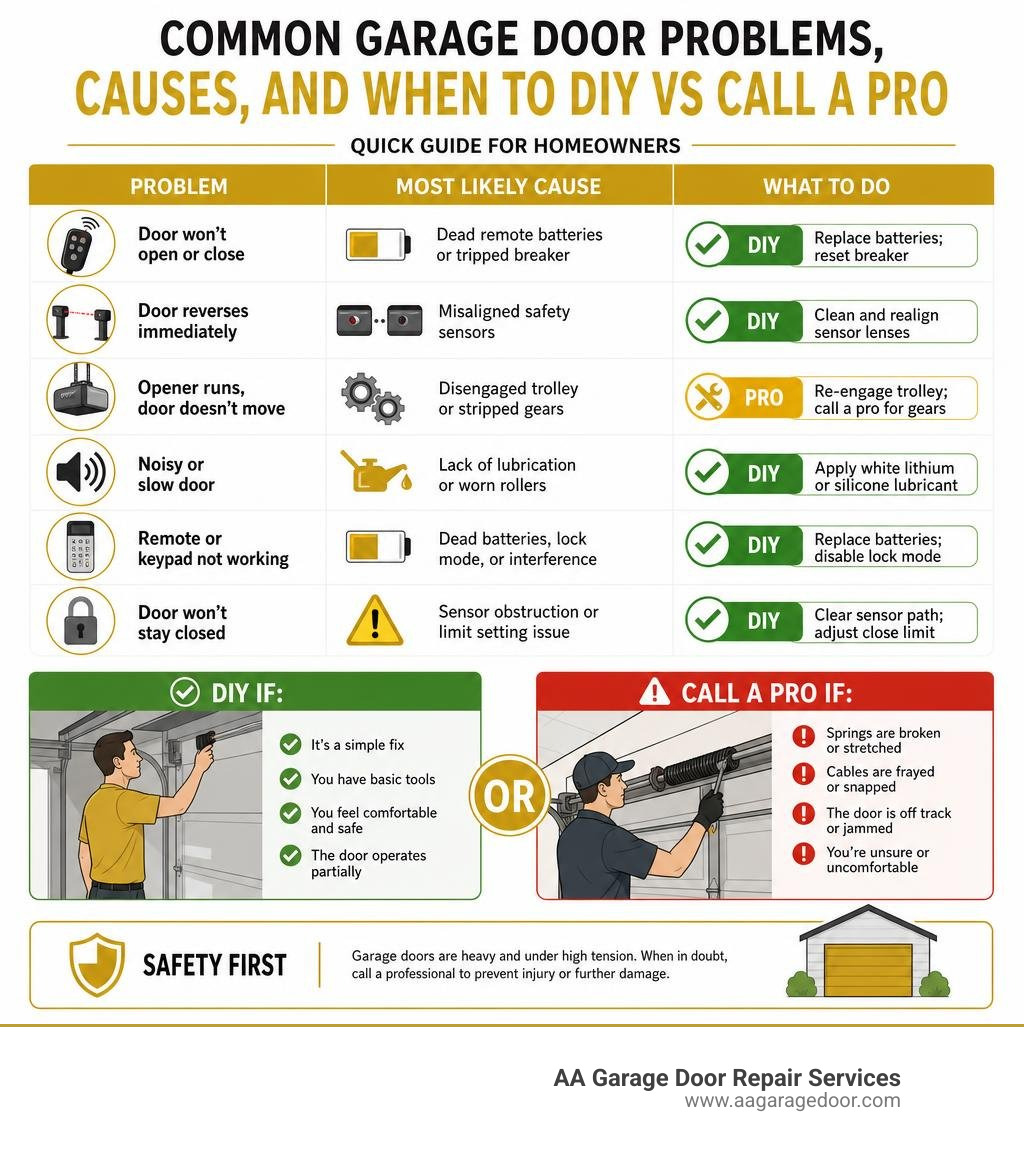
Before reading further, here are the most frequent causes and quick fixes:
| Problem | Most Likely Cause | Quick Fix |
|---|---|---|
| Door won’t open or close | Dead remote batteries or tripped breaker | Replace batteries; reset breaker |
| Door reverses immediately | Misaligned safety sensors | Clean and realign sensor lenses |
| Opener runs, door doesn’t move | Disengaged trolley or stripped gears | Re-engage trolley; call a pro for gears |
| Noisy or slow door | Lack of lubrication or worn rollers | Apply white lithium or silicone lubricant |
| Remote or keypad not working | Dead batteries, lock mode, or interference | Replace batteries; disable lock mode |
| Door won’t stay closed | Sensor obstruction or limit setting issue | Clear sensor path; adjust close limit |
Your garage door weighs around 150 pounds and cycles over 1,500 times a year. That’s a lot of mechanical stress – and it explains why problems are almost inevitable over time. Whether you’re dealing with a sudden loud bang from the garage or a door that’s been getting slower for months, understanding what’s wrong is the first step to fixing it safely. Our professional team is here when a problem goes beyond a simple DIY fix.
I’m David Sands, owner of AA Garage Door LLC, and I’ve spent over 23 years diagnosing and repairing garage door systems across Wisconsin and Minnesota – this garage door troubleshooting guide reflects what I’ve learned from thousands of real service calls. Let’s walk through the most common issues so you can get your door working again safely and quickly.
The Ultimate Garage Door Troubleshooting Guide: Quick Diagnostics
When your garage door fails, it generally happens in one of two ways: a sudden, unexpected breakdown or a gradual decline in performance. Recognizing which type of failure you are dealing with is crucial for diagnosing the root cause and preventing further mechanical strain.
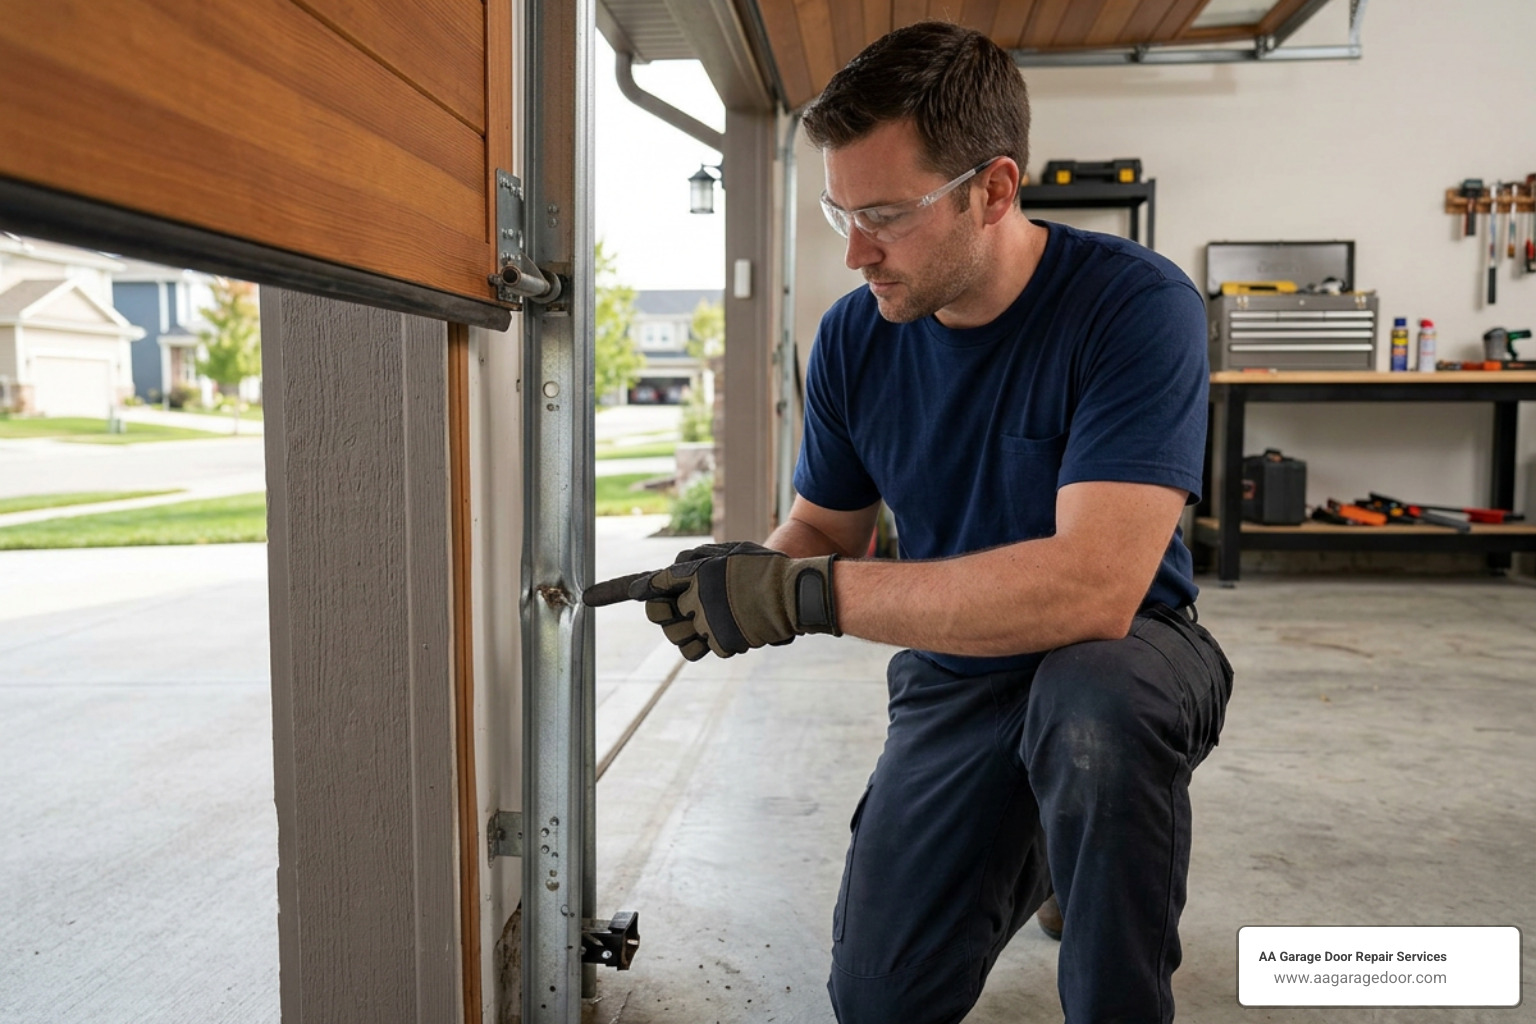
A sudden failure often points to an electrical glitch or a major mechanical break, such as a snapped spring. A gradual failure is usually the result of friction, lack of lubrication, or slowly shifting tracks. If your system is experiencing issues, checking the 10 common reasons for failure is an excellent starting point to narrow down the culprit. For electronic issues, you can also consult official diagnostic support channels to decode blinking opener lights.
To help you categorize your issue, we have compiled a comparison of sudden versus gradual garage door failures:
| Failure Type | Common Symptoms | Primary Suspects |
|---|---|---|
| Sudden Failure | Door stops moving instantly, motor hums but nothing moves, or there is a loud “gunshot” sound. | Broken torsion spring, snapped lift cables, tripped circuit breaker, or sudden sensor misalignment. |
| Gradual Failure | Door moves slower over several months, makes increasing grinding noises, or shakes during operation. | Degraded roller bearings, dried-out track grease, loose structural hinges, or accumulating track debris. |
Why Your Garage Door Reverses Immediately After Closing
A garage door that closes completely and then immediately reverses back to the open position is one of the most frustrating issues a homeowner can face.
The primary cause of a door reversing immediately upon hitting the floor is an incorrect close-limit setting on the garage door opener. The close-limit switch dictates exactly how far the door must travel downward before the motor shuts off. If this limit is set too far, the door will strike the floor, mistake the solid ground for an obstruction, and trigger the automatic safety reversal mechanism.
To resolve this issue, locate the limit adjustment screws on the side or rear of your opener motor. Using a flathead screwdriver, turn the “down limit” screw in small increments (usually counterclockwise) to reduce the downward travel distance.
Other common culprits include:
- Safety Sensor Misalignment: Even a tiny vibration during the closing cycle can cause misaligned sensors to lose their connection momentarily. Refer to our sensor troubleshooting tips for a deeper look at this issue.
- Physical Obstructions: Small pebbles, packed snow, or ice buildup on the garage floor directly under the door can prevent it from reaching its designated limit.
- Weatherstripping Resistance: New or stiff bottom rubber seals can create excessive resistance, tricking the opener’s force settings into reversing.
For more detailed steps on handling these scenarios, you can read our comprehensive door not closing guide.
Step-by-Step Garage Door Troubleshooting Guide for Power and Remote Issues
If your garage door is completely unresponsive to your remote control or wall panel, you can use this systematic checklist to isolate the power or signal issue.
- Perform the Wall Button Test: Press the wall-mounted control panel inside your garage. If the door operates from the wall button but not the remote, the issue is isolated to the remote control’s battery or programming.
- Verify the Lock Mode Status: Check if the “Lock” or “Vacation” button on your wall panel has been accidentally activated. A flashing LED light on the wall panel typically indicates that lock mode is engaged, which completely disables wireless remote signals. Press and hold the lock button for 5 to 10 seconds to deactivate it.
- Inspect the Power Source: Ensure the opener power cord is fully plugged into the ceiling outlet. If it is plugged in but silent, test the outlet with a household lamp. If the lamp fails to light up, check your home breaker box for a tripped circuit breaker or a blown fuse.
- Replace Remote Batteries: Slide open the back of your remote control and insert fresh batteries. This simple step resolves roughly 80% of wireless control failures.
- Check for Signal Interference: Certain LED light bulbs installed inside the garage door opener motor housing emit radio frequency interference that blocks remote signals. If your remote only works when you are standing right next to the door, replace your standard LED bulbs with specialized, shielded garage-door-compatible LEDs.
If you complete these steps and the motor remains completely unresponsive, you may be dealing with a failed logic board. For further steps, review this detailed opener troubleshooting resource.
How to Fix a Noisy, Slow, or Unbalanced Garage Door
A noisy, slow, or shaking garage door is more than just an annoyance; it is a warning sign that your system is working under extreme mechanical stress. Ignoring these early warning signs can quickly burn out your opener motor or lead to a complete system failure.
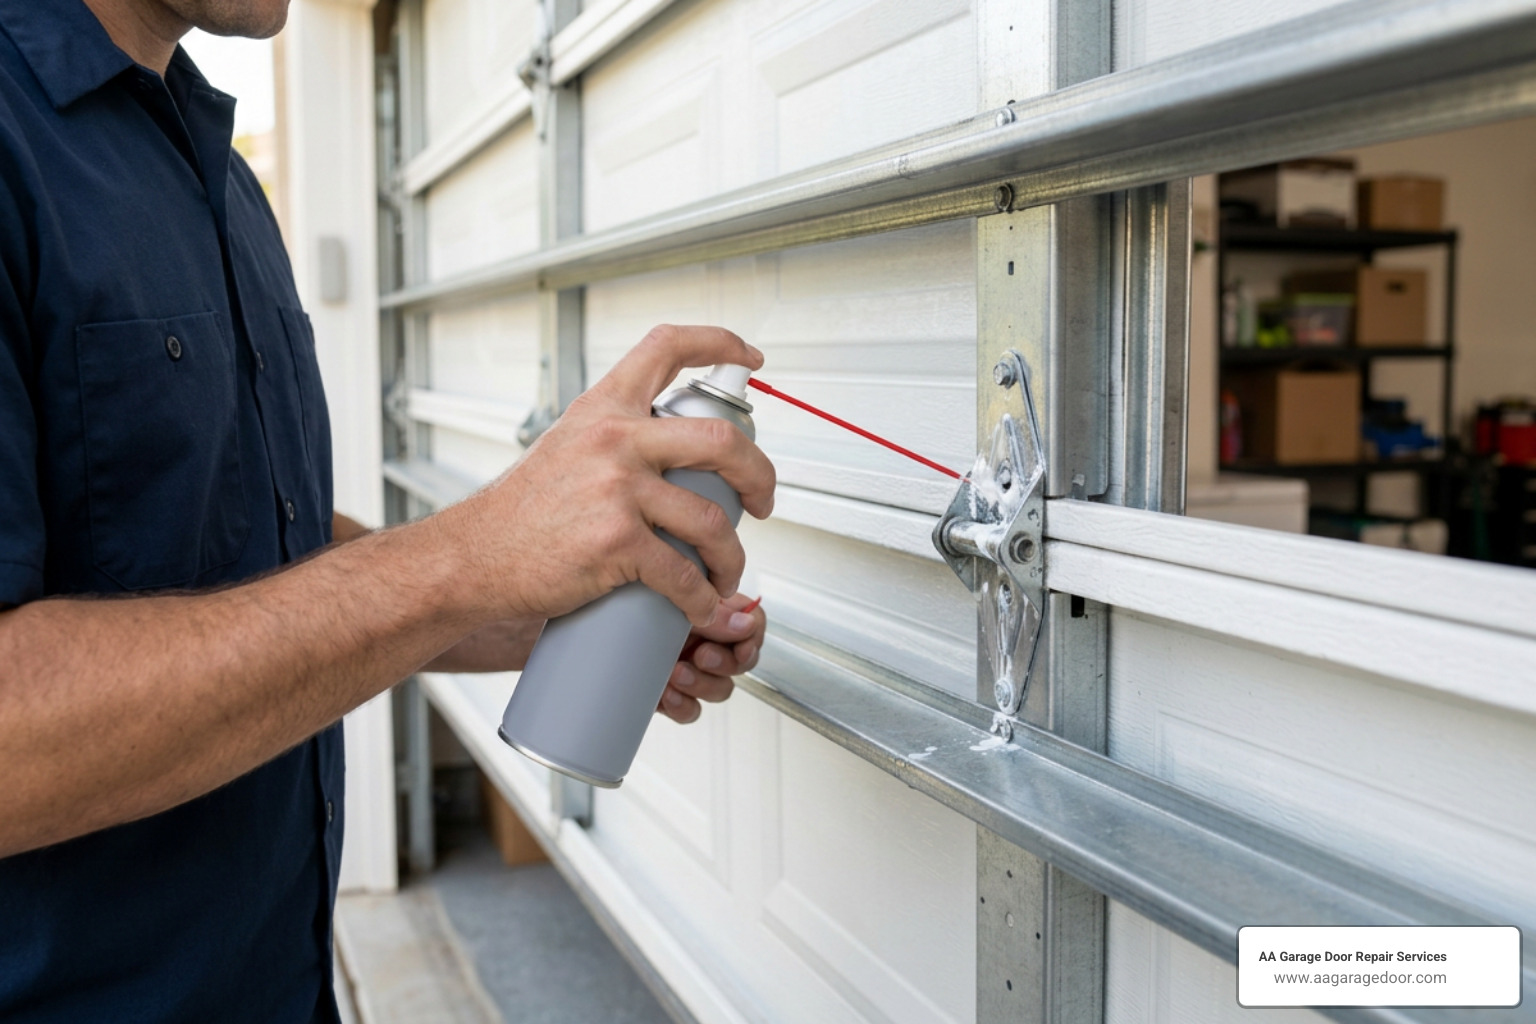
Many noise and speed issues can be safely addressed at home. By learning the basics of fixing a door at home, you can significantly extend the lifespan of your rollers, hinges, and tracks.
To determine the exact cause of the sound, you can perform an acoustic diagnostic test. Run the door through a full cycle and compare what you hear to our breakdown of common noise types:
- Squeaking and Squealing: This high-pitched sound is caused by metal-on-metal friction. It typically indicates dry roller bearings, unlubricated hinges, or dry spring coils.
- Grinding: A harsh grinding noise usually points to worn-out metal rollers, stripped internal gears within the opener housing, or a screw-drive opener operating in extreme cold without cold-weather grease.
- Rattling and Vibrating: This loose sound is caused by vibration. It means track mounting brackets, hinge bolts, or opener support straps have vibrated loose over time and need to be tightened with a socket wrench.
- Banging and Popping: A sudden, loud popping sound while the door is moving suggests that the rollers are binding in the tracks, or that the coils of your torsion spring are binding and releasing friction violently.
To resolve these sounds, apply a high-quality silicone-based spray or white lithium grease to the roller bearings, hinge pivot points, and the entire length of the spring coils. Never use WD-40 on your garage door. WD-40 is a solvent, not a lubricant; it will wash away existing grease and attract airborne dust, leaving your door drier and noisier within a month. For more details on matching sounds to their physical causes, check out this guide on diagnosing noisy doors.
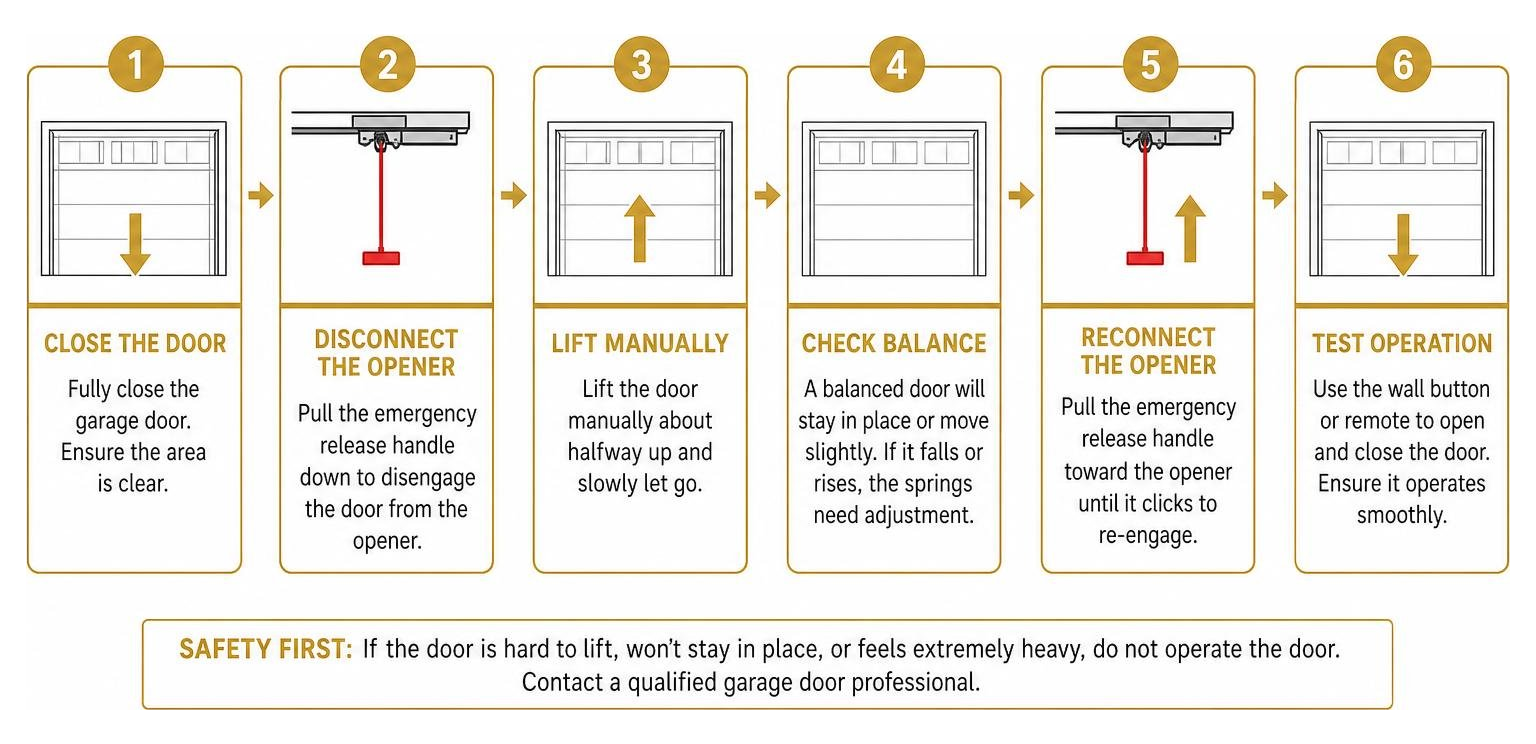
To make sure your door is structurally sound, you should also perform a manual balance test twice a year. An unbalanced door forces the opener to lift far more weight than it is designed to handle.
Why Your Garage Door Opener Runs But the Door Doesn’t Move
If you press your remote, hear the opener motor humming or running, but the actual door does not move an inch, the issue is almost always a disconnected emergency release mechanism.
Every automatic garage door opener features a trolley system with a red emergency release cord. When this cord is pulled, it physically disconnects the garage door from the opener carriage, allowing you to lift the door manually. If this cord is accidentally tugged, the motor will run back and forth along the rail without catching the door.
To re-engage the trolley:
- Locate the metal carriage connected to the opener chain or belt.
- Locate the spring-loaded lever attached to the red cord.
- Pull the red cord toward the opener motor (away from the door) at an angle. This action flips the lever back into the “engage” position.
- Manually lift the garage door up until you hear a loud, physical click. This click indicates that the outer trolley has locked back into the opener’s inner slide.
- Press your remote button to run the opener cycle; the door should now move automatically.
If the trolley is fully engaged but the motor still spins without moving the door, the internal gears inside your opener housing are likely stripped. Over time, the plastic drive gears inside LiftMaster, Chamberlain, and Genie openers can wear down into plastic shavings. If you see white plastic dust inside your motor cover, the gear kit must be replaced.
Understanding these mechanical relationships can also help you identify why doors open/close by themselves or fail to engage properly.
How to Align and Clean Safety Sensors
Since 1993, federal law has required all residential garage door openers sold in the United States to feature photoelectric safety sensors. These sensors project an invisible infrared beam across the base of your door opening, roughly six inches above the floor. If this beam is broken while the door is closing, the door will immediately stop and reverse to prevent entrapment.
If your safety sensors are dirty or misaligned, your door will refuse to close unless you manually hold down the wall button. Follow these steps to clean and align your safety sensors:
- Clean the Lenses: Use a soft, damp microfiber cloth to gently wipe away dirt, spider webs, dust, or condensation from the glass lenses on both the sending and receiving sensors.
- Check the Indicator Lights: Look at the small LED lights on both sensors. One sensor (the sender) should have a solid amber light, while the other (the receiver) should have a solid green light. If either light is blinking or completely dark, the sensors are misaligned or lacking power.
- Align the Sensors: Loosen the wing nut on the misaligned sensor’s mounting bracket. Gently slide or rotate the sensor until the indicator light stops blinking and shines solid. Once both lights are steady, tighten the wing nut securely.
- Inspect the Wiring: Check the low-voltage wires running from the sensors up the wall to the opener motor. Look for staples that may have pinched the wire, or loose wire splices that could cause an intermittent electrical short.
If your sensors continue to malfunction even after cleaning and physical alignment, you may be dealing with direct sunlight interference, which can blind the receiving eye, or a damaged sensor wire. At that point, a trained technician should inspect the sensor circuit and wiring before the opener is used again.
Understanding the Dangers of Broken Springs and Cables
Your garage door springs do not just assist the opener; they do 100% of the heavy lifting. The springs act as a mechanical counterweight, storing physical energy to lift a door that can weigh up to 400 pounds.
There are two primary types of garage door springs:
- Torsion Springs: Located on a metal shaft directly above the closed garage door opening. Torsion springs store energy by winding and tightening.
- Extension Springs: Located above the horizontal tracks on both sides of the door. Extension springs store energy by stretching out.
A typical garage door spring is rated for approximately 10,000 open-and-close cycles, which translates to roughly 7 years of standard residential use. When a spring reaches the end of its operational lifespan, the steel suffers from metal fatigue and snaps. When a torsion spring breaks, it releases all of its stored energy instantly with a loud bang that sounds like a gunshot.
Operating a garage door with a broken spring is incredibly dangerous. If you attempt to open the door manually or using the motor with a broken spring, you risk burning out the opener motor, stripping the gears, or having the full weight of the door crash down unexpectedly. This can sever fingers, crush limbs, or cause fatal injuries.
Furthermore, if one spring snaps, the lifting cables on the sides of the door will lose tension and slip off their drums. If you are located in St. Paul, the Twin Cities, Western Wisconsin, or nearby communities, contact AA Garage Door Repair Services for rapid spring and cable repair.
When to Move Beyond a DIY Garage Door Troubleshooting Guide
While adjusting safety sensors, replacing remote batteries, and applying silicone lubricant are safe, practical DIY projects, certain garage door repairs must be left to trained professionals.
You should immediately stop troubleshooting and call a professional technician if you encounter any of the following high-tension hazards:
- Replacing Torsion or Extension Springs: Winding torsion springs requires specialized winding bars and immense physical force. A single slip can result in severe facial injuries, broken bones, or worse.
- Adjusting Bottom Brackets and Cables: The steel cables that lift the door are attached to bottom brackets under extreme tension. Loosening these brackets without securing the door can cause the cables to whip out with enough force to cut through leather gloves and skin.
- Re-aligning an Off-Track Door: If your door is hanging crookedly, has slipped off its rollers, or has a snapped cable, do not attempt to move it. Trying to force an off-track door closed can cause the entire structure to collapse.
If you are dealing with any of these dangerous mechanical failures, protect your home and family by contacting our certified team for professional Apple Valley repair services or service throughout the surrounding Twin Cities metro.
Frequently Asked Questions about Garage Door Troubleshooting
Why does my garage door only close when I hold the wall switch?
If your garage door only closes when you continuously hold down the wall-mounted control button, your photoelectric safety sensors are either blocked, dirty, misaligned, or damaged.
This behavior is a built-in safety override feature designed to prevent entrapment. By requiring you to hold the wall switch, the system ensures you are physically standing in the garage and visually confirming that the path is clear of children, pets, or vehicles before the door closes. To resolve this, clean the sensor lenses, ensure no objects are blocking the path, and adjust the brackets until both LED indicator lights remain solid.
Can cold weather cause my garage door to malfunction?
Yes, extreme winter temperatures in Minnesota and Western Wisconsin can cause several components of your garage door system to fail.
Cold weather causes metal tracks, hinges, and rollers to contract, which increases physical friction and can cause the door to bind or run slowly. Additionally, standard grease can thicken and harden in the cold, acting like glue rather than a lubricant.
Finally, freezing moisture can cause the bottom rubber weatherstripping to freeze solid to the concrete floor. If you activate your opener while the door is frozen to the ground, you risk burning out the motor or tearing the rubber seal. For specialized tips on winterizing your system, check out our guide on winter garage door problems.
How do I safely use the emergency release cord?
To use the red emergency release cord safely, only pull the cord when the garage door is fully closed.
If you pull the emergency release cord while the door is partially or fully open, you run an immense safety risk. If the door has a broken spring or is out of balance, disconnecting the trolley will cause the full weight of the door to crash down instantly. If you must release the door while it is open during an emergency, use wooden 2×4 boards to securely prop the door open first to prevent it from falling.
Conclusion
A malfunctioning garage door is a major disruption to your daily schedule, but many common issues can be resolved quickly using this guide. By systematically checking your power sources, cleaning your safety sensors, and keeping your moving parts properly lubricated, you can handle most minor glitches yourself.
However, when you are dealing with broken springs, frayed cables, or a completely off-track door, safety must always come first. AA Garage Door Repair Services has been serving St. Paul, the Twin Cities metro, and Western Wisconsin since 2001. We provide fast, reliable 24/7 emergency service with transparent pricing, a satisfaction guarantee, and local expertise you can trust.
If your opener is beyond repair, we also specialize in professional garage door opener repair and replacement to restore safety and convenience to your home.
Don’t risk your safety on a complex repair. Contact the local experts at AA Garage Door Repair Services today or schedule your service online for fast, professional help!