Why Finding the Right Universal Garage Door Keypad Manual Matters
A universal garage door keypad manual is the essential guide to programming, installing, and troubleshooting a wireless keypad that controls your garage door opener without a remote or key. For homeowners seeking convenient and secure access, a universal keypad is an excellent upgrade. While many setups are straightforward, complex compatibility issues can arise, which is where the comprehensive garage door solutions from AA Garage Door become invaluable. Whether you’ve purchased a Chamberlain KLIK2U, LiftMaster 387LM, or Genie GUK-1, locating the correct manual ensures you can set up your device properly and avoid frustrating compatibility issues.
Quick Access to Universal Keypad Manuals:
- LiftMaster 387LM: Download English/French Instructions or Spanish Instructions (pre-2022 units)
- Chamberlain KLIK2U Series: Available through Chamberlain Support or included in product packaging
- Genie GUK Models: Download Universal Keypad Instructions
- Generic Universal Keypads: Check manufacturer websites or contact customer service at phone numbers listed in warranty cards
Most universal garage door keypad manuals share similar programming steps but differ in specific opener ID codes, button sequences, and compatibility requirements. The manual you need depends on your keypad model and your garage door opener type—whether it uses a Smart/Learn button or DIP switches.
For homeowners in the Twin Cities metro area dealing with garage door opener repair needs or installation questions, having the right documentation saves time and prevents programming errors that could lock you out of your garage.
I’m David Sands, owner of AA Garage Door LLC, and over 23 years I’ve helped thousands of Wisconsin and Minnesota homeowners steer the complexities of universal garage door keypad manual instructions and programming challenges. My team and I have worked with every major brand and opener type, from vintage DIP switch systems to the latest Security+ 2.0 technology, ensuring customers get reliable keyless access without the headaches.
; Step 2 - Locate your keypad model manual (showing LiftMaster 387LM, Chamberlain KLIK2U, and Genie GUK-1 with download icons); Step 3 - Find your opener ID code in the manual's compatibility chart (showing sample chart with brand names and ID numbers); Step 4 - Follow brand-specific programming steps (showing keypad with numbered sequence and Learn button press) - universal garage door keypad manual infographic")
Explore more about universal garage door keypad manual:
Before You Program: Identifying Your Garage Door Opener
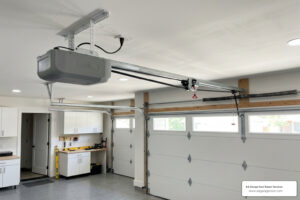
Before you can program your shiny new universal garage door keypad, you need to understand the language your existing garage door opener speaks. This means identifying its technology type, which will dictate how you proceed with programming. Most modern and even many older openers fall into one of two main categories: those with a “Smart/Learn” button or those that use “DIP Switches.”

Smart/Learn Button
This is the most common type you’ll encounter today. Garage door openers with a Smart/Learn button use rolling code technology, which means the code transmitted by your remote or keypad changes every time you use it. This significantly improves security, making it much harder for unauthorized individuals to “grab” your code. These buttons are typically found on the motor unit itself, usually near the antenna wire or the light cover. They come in various colors—yellow, purple, orange/red, or green—and each color often signifies a different frequency or security protocol. For example, LiftMaster’s Security+ 2.0 uses a yellow learn button, while older Security+ systems might use purple or orange/red.
DIP Switches
If your garage door opener is a bit older, it might employ DIP (Dual In-line Package) switches. These are small, physical toggle switches arranged in a row, usually numbering between 8 and 12. Unlike rolling code technology, DIP switch openers use fixed code technology, meaning the code remains the same each time. You’ll typically find these switches on the motor unit or inside an older remote control. Each switch can be set to one of two or three positions (e.g., ON/OFF or UP/MIDDLE/DOWN), creating a unique code sequence. When programming a universal keypad for a DIP switch opener, you’ll need to match these settings precisely.
How to Find Your Opener’s Programming Type
So, how do you figure out which type you have? It’s usually quite straightforward!
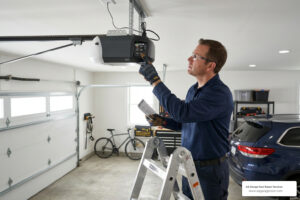
- Locate Your Motor Unit: Head to your garage and look at the main motor unit mounted on the ceiling, typically in the center of the garage door.
- Look for the Learn Button: Scan the motor unit, especially near where the power cord and antenna wire connect. The Learn button is often a prominent, brightly colored square or round button. Note its color – this is crucial for programming.
- Search for DIP Switches: If you don’t find a Learn button, or if your opener is older, look for a small panel or cover on the motor unit that might conceal a row of tiny toggle switches. Sometimes, you might need to open the light cover to access them. If you have an older remote, check inside it as well.
Once you identify whether you have a Learn button (and its color) or a set of DIP switches (and their positions), you’re halfway to programming success!
Understanding Compatibility
Not all universal keypads work with all garage door openers. Compatibility is key! Most universal keypads are designed to be broadly compatible, covering major brands like Chamberlain, LiftMaster, Genie, Overhead Door, Craftsman, Stanley, Wayne Dalton, and Linear. However, there are nuances.
For instance, the Chamberlain KLIK2U Universal Wireless Keypad is compatible with garage door openers manufactured after 1993 that use photoelectric sensors. Many universal keypads offer compatibility with various security protocols and frequencies:
- Security+ 2.0: Often associated with yellow learn buttons, providing advanced rolling code security.
- Security+ 315 MHz / 390 MHz: Associated with purple or orange/red learn buttons.
- Billion Code 390 MHz: Often found with green learn buttons.
- Intellicode / CodeDodger: Genie and Overhead Door’s proprietary rolling code technologies.
It’s vital to check your universal garage door keypad manual or the product’s compatibility chart to ensure it supports your specific opener’s brand, learn button color, and frequency. This information is usually detailed in the manual, often with a helpful table.
 and their compatibility with different Learn button colors, frequencies (315 MHz, 390 MHz), and opener brands (LiftMaster, Genie, Craftsman, etc.). - universal garage door keypad manual infographic")
As experts, we often see issues arise when compatibility is overlooked. For more detailed information on specific opener brands and their technologies, especially for our customers in St. Paul, Woodbury, Hudson, and Baldwin, you can explore resources like More info about LiftMaster Garage Door Openers.
The Ultimate Universal Garage Door Keypad Manual for Programming
Now that you’ve identified your garage door opener’s type, it’s time for the main event: programming your universal keypad! Think of it like teaching your keypad the secret handshake your garage door opener understands. The core principle involves putting the keypad into a programming mode, telling it what kind of opener it needs to talk to, setting a personal access code, and then syncing it with your opener.
General Steps for Programming a Universal Keypad
While specific button presses might vary slightly between keypad models, the general flow of programming remains consistent. Here’s a breakdown of the typical process:
- Install the Battery: First things first, get that keypad powered up! Most universal keypads use a 9V or AAA battery. Open the battery compartment, insert the battery, and sometimes you’ll need to pull a protective tab to activate it. We recommend installing the battery before you even think about mounting the keypad.
- Enter Programming Mode: This usually involves pressing and holding a combination of keys on the keypad, often the ‘*’ and ‘#’ buttons, until the keypad’s lights start flashing or stay on. This signals that it’s ready to learn.
- Identify Your Opener Type (Opener ID): Your universal garage door keypad manual will have a chart or list of “Opener IDs.” These are codes that tell the keypad which brand, learn button color, or DIP switch configuration it needs to emulate. You’ll enter the ID code corresponding to your specific garage door opener.
- Set Your Personal PIN: This is your secret code! You’ll be prompted to enter a personal 4-digit (or sometimes 3-8 digit) PIN. Choose something memorable but not easily guessable.
- Activate Your Opener’s Learn Feature: This is where you tell your garage door opener to “listen” for a new signal.
- For Learn Button Openers: You’ll press the Learn button on your garage door opener motor unit. You typically have about 30 seconds to a minute to complete the next step after pressing it.
- For DIP Switch Openers: You’ll often enter a sequence of numbers on the keypad that corresponds to the ON/OFF/MIDDLE positions of your opener’s DIP switches. Your keypad manual will provide a conversion chart (e.g., UP=1, MIDDLE=2, DOWN=3).
- Sync and Test: After activating your opener’s learn feature, you’ll enter your new PIN on the keypad and press the “Enter” or “0” button. The garage door opener’s lights should flash, or you’ll hear a click, indicating successful programming. Test it out by entering your PIN again!
If you’re looking for a more in-depth understanding of the programming logic, our guide to garage keypad programming offers additional insights.
Specific Programming Steps for Your Brand
While the general steps are similar, the devil is in the details, and those details often come down to your specific brand and opener model.
- Chamberlain/LiftMaster: These brands (often part of the same company) typically use colored learn buttons. You’ll usually select an Opener ID based on the learn button color (Yellow, Purple, Orange/Red, Green) and then press the learn button on the opener within a short timeframe after entering your PIN on the keypad. For instance, a LiftMaster 387LM is compatible with Security+ 2.0 (yellow button), Security+ 315/390 MHz (purple/orange-red), and Billion Code 390 MHz (green).
- Genie/Overhead Door: These brands often use Intellicode or CodeDodger rolling code technology. Your universal garage door keypad manual might instruct you to enter your PIN and then press a specific key (like “Enter”) twice to finalize the programming with these openers. The Universal Keypad Instructions Chart from The Genie Company is an excellent resource for specific steps.
- Stanley/Wayne Dalton/Linear: For these and other brands, you’ll follow a similar pattern: find the correct Opener ID in your keypad’s manual, enter it, set your PIN, and then sync with the opener’s learn button or DIP switch settings.
The goal is always to consult the specific universal garage door keypad manual for your keypad model, as it will contain the precise Opener IDs and button sequences. If you ever need to completely reset or reprogram your system, our guide on how to reprogram your garage door opener can walk you through it.
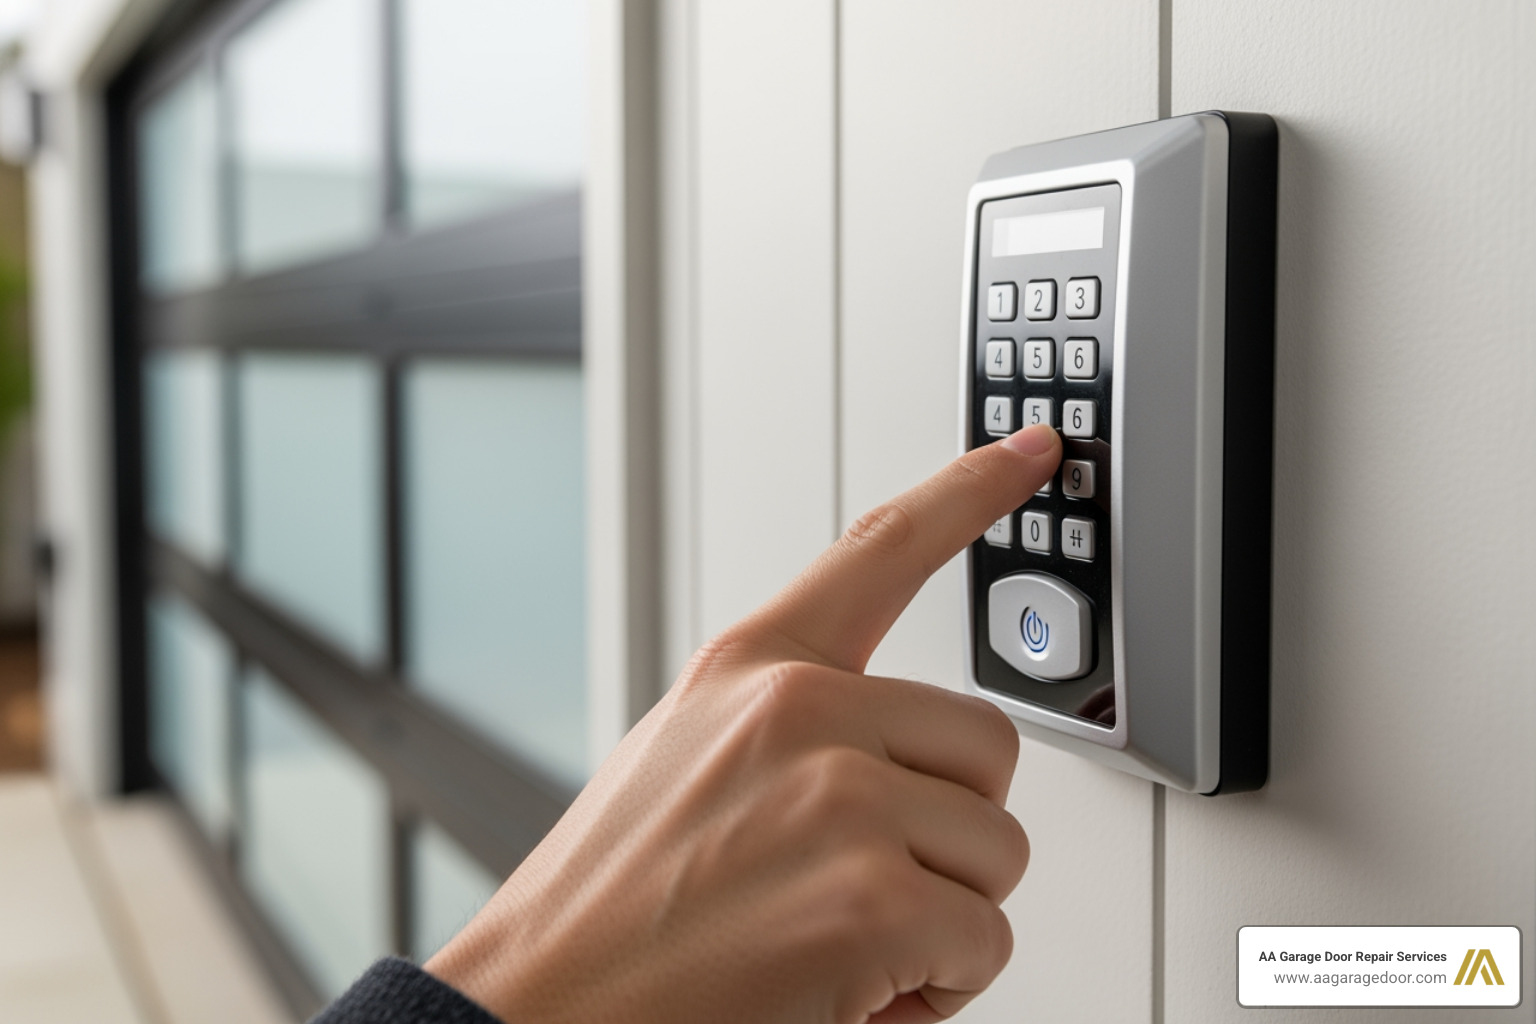
How to Set, Change, and Use Your PIN
Your Personal Identification Number (PIN) is the heart of your keypad’s security and convenience.
- Setting Your Initial PIN: This happens during the main programming sequence, as described above. You’ll be prompted to enter a 4-digit (or longer) code that will become your primary access method.
- Changing an Existing PIN: Life changes, and so should your PIN sometimes! To change it, you typically need to:
- Enter your current programmed PIN.
- Press a specific function key (often ‘*’ or ‘#’) on the keypad.
- Enter your new desired PIN.
- Press the function key again to save. This process is usually detailed explicitly in your universal garage door keypad manual.
- Using Temporary PINs: Many modern universal keypads offer the fantastic feature of temporary PINs. This is perfect for:
- Guests: Granting access to friends or family visiting for a few days.
- Service Personnel: Allowing a delivery person, cleaner, or repair technician one-time or limited access without sharing your permanent code. Temporary PINs can often be programmed to expire after a certain number of uses (e.g., 255 times) or a set period. You’ll typically enter your main PIN, then a special sequence to set the temporary PIN, specifying its duration or number of uses. It’s a great way to maintain security while offering flexible access!
Installation, Maintenance, and Troubleshooting
Once your universal garage door keypad is programmed, you’ll want to get it mounted, keep it running smoothly, and know what to do if it throws a tantrum. Let’s explore the practicalities.
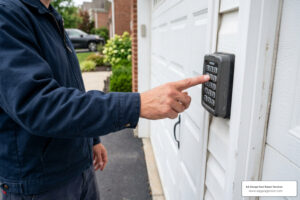
Physical Installation Steps
Mounting your keypad isn’t just about aesthetics; it’s about safety and functionality.
- Choose the Right Spot: Pick a location on the wall next to your garage door. It should be:
- At least 5 feet (1.5 meters) high: This is a crucial safety measure to keep it out of the reach of small children.
- In sight of the garage door: You need to be able to see the door moving when you operate it.
- Away from moving parts: Ensure it’s clear of the door’s path, tracks, or any other moving components.
- Prepare the Surface: Hold the keypad (or its mounting plate) against the wall at your chosen height. Use a pencil to mark the locations for the mounting screws.
- Drill Pilot Holes: Using a drill bit (typically 1/8 inch or 3.2mm, check your manual), drill pilot holes at your marked spots.
- Secure the Mounting Plate: Fasten the mounting plate to the wall with the provided screws. Be careful not to overtighten, as this can crack the plastic housing.
- Attach the Keypad: Slide or snap the keypad onto the mounting plate. Most keypads have a weatherproof slide-up protective cover to shield the buttons from the elements.
- Test: Give your newly mounted keypad a quick test with your PIN to ensure everything is working correctly.
Your Universal Garage Door Keypad Manual for Maintenance
Maintaining your universal keypad is mercifully simple, mostly revolving around one key component: the battery.
Battery Replacement: This is the most common maintenance task. Most universal keypads are powered by either a 9V battery or a few AAA batteries. You’ll know it’s time for a change when:
- The keypad’s backlight dims significantly.
- The keypad becomes unresponsive or inconsistent.
- The keypad stops working entirely. To replace, simply open the battery compartment (usually on the back or bottom), swap out the old battery for a fresh one, and close it up.
Reprogramming After Battery Change: While some keypads retain their programming after a battery swap, many will require you to reprogram them. If your keypad isn’t working after a new battery, don’t fret – just follow the programming steps outlined earlier.
- Cleaning: Periodically wipe down your keypad with a damp cloth to remove dirt, dust, or grime. Avoid harsh chemicals that could damage the electronics or the weatherproof cover.
For a broader understanding of how to keep all your garage door components in tip-top shape, check out our Garage Door Opener Maintenance Guide.
Common Troubleshooting Fixes
It’s frustrating when technology doesn’t cooperate, but often, issues with universal garage door keypads have simple solutions.
- Keypad Not Responding:
- Check the Battery: This is always the first step! If the lights don’t come on when you press a button, or they’re very dim, it’s almost certainly the battery. Replace it.
- Reprogram: If the battery is good but the keypad still isn’t operating the door, try reprogramming the unit from scratch. Sometimes, the connection can get lost, especially after a power outage or battery change.
- Door Not Closing/Opening:
- Safety Sensors: Ensure there are no obstructions blocking the path of your garage door’s safety sensors (the small “eyes” near the bottom of the door tracks). If these are blocked or misaligned, the door won’t close.
- Opener Power: Check if your garage door opener itself has power. Is the light on? Is it plugged in?
- Keypad Buttons Flashing/Unresponsive:
- Factory Reset: If the keypad seems stuck or behaves erratically, a factory reset can often clear the memory and resolve the issue. Your universal garage door keypad manual (like this example from FCC Report) will detail how to do this, usually by holding down a combination of keys or a hidden reset button in the battery compartment. You’ll then need to reprogram it completely.
- Incompatibility: Double-check that your keypad is indeed compatible with your specific garage door opener model and frequency. This is a common oversight.
- Still Not Working?: If you’ve tried all these steps and your keypad (or opener) is still acting up, the problem might lie with the opener’s internal receiver or another component. At this point, it’s best to call in the cavalry! Our team at AA Garage Door specializes in garage door opener repair and can diagnose and fix more complex issues quickly and efficiently for our St. Paul, Woodbury, Hudson, and Baldwin customers.
Frequently Asked Questions about Universal Keypads
We hear a lot of questions about universal garage door keypads. Here are some of the most common ones we encounter, along with our expert answers.
Can a universal keypad control more than one garage door?
Yes, absolutely! Many universal keypads are designed with multi-door functionality. For example, the Genie GUK-1 Universal Garage Door Wireless Keypad can control up to three doors independently. This is a fantastic feature for homes with multiple garage bays or even a detached garage.
To control multiple doors, your keypad will typically have “channels” (e.g., 1, 2, 3). You’ll program each door to a separate channel. When you want to open a specific door, you’ll usually press the corresponding channel button before entering your PIN. For instance, press “1” then your PIN for door one, and “2” then your PIN for door two. The universal garage door keypad manual for your specific model will detail the exact steps for multi-door programming.
How do I reset a universal keypad if I forgot my PIN?
It happens to the best of us! Forgetting your PIN isn’t a dead end. Most universal keypads have a factory reset function. The exact method varies by model, but generally, you’ll need to:
- Access the Battery Compartment: Open the keypad’s battery cover.
- Locate the Reset Button: Look for a small, often recessed, reset button inside the compartment. Sometimes it’s labeled “Reset,” other times it’s a tiny button you might need a paperclip to press.
- Press and Hold: Press and hold this reset button for approximately 5-10 seconds. You might hear a beep, or the keypad’s lights will flash to confirm the reset.
- Reprogram: Once reset, all previous programming, including your forgotten PIN, will be erased. You’ll then need to reprogram the keypad from scratch, following the steps in your universal garage door keypad manual as if it were a brand-new device.
Are universal keypads secure?
Modern universal garage door keypads are very secure, especially those compatible with newer garage door openers. They incorporate several security features to protect your home:
- Rolling Code Technology: This is the gold standard for security. Instead of transmitting the same code every time, rolling code systems (like LiftMaster’s Security+ 2.0 or Genie’s Intellicode) generate a new, random code with each use. This makes it virtually impossible for “code grabbers” to intercept and reuse your access code.
- Personal PIN: Your unique 4-digit (or longer) PIN adds a layer of personalization and security. Only those who know the code can access your garage.
- Keypad Lockout: Many keypads feature a lockout mechanism. If too many incorrect PINs are entered consecutively, the keypad will temporarily disable itself for a few minutes, deterring unauthorized guessing attempts.
- Temporary PINs: As mentioned earlier, the ability to create temporary, limited-use PINs means you never have to share your permanent code, further enhancing security for guests or service providers.
Overall, when properly programmed and maintained, a universal garage door keypad offers a highly secure and convenient way to access your garage.
Your Partner for Secure and Convenient Garage Access
A universal garage door keypad is a powerful tool for convenience and security, offering keyless entry and flexible access management. Understanding your universal garage door keypad manual is the first step to open uping these benefits. By correctly identifying your opener type, following the programming steps diligently, and performing basic maintenance, you can enjoy seamless access to your garage for years to come.
However, we know that sometimes even with the best manual, things can get a little tricky. Wiring can be confusing, compatibility issues can arise, or sometimes the opener itself might be the problem. That’s where we come in! At AA Garage Door, we pride ourselves on being the local experts in garage door systems. Since 2001, our team has been providing fast, reliable 24/7 emergency service with transparent pricing and a satisfaction guarantee to homeowners in St. Paul, Woodbury, Hudson, Baldwin, and throughout the Twin Cities and Western WI.
If you find yourself struggling with a stubborn keypad, a malfunctioning opener, or simply prefer professional installation, don’t hesitate to reach out. We’re here to ensure your garage access is always secure and convenient. For expert assistance with any installation or repair needs, explore our garage door opener repair services. We’re always ready to help!