Why Knowing How to Sync Your Garage Door Remote Control Matters
Knowing how to sync garage door remote control devices correctly is the difference between a door that opens every time and one that leaves you stuck in the driveway. For homeowners looking for trusted garage door help, maintaining a synchronized system is the first step in home security. Start with expert garage door solutions in the Twin Cities to identify your opener type, remote compatibility, and the safest programming method.
Quick Answer: How to Sync a Garage Door Remote
- Locate the Learn button on your garage door opener motor unit.
- Press and release the Learn button — the indicator light will turn on.
- Within 30 seconds, press and hold the button on your remote.
- Release when the opener’s light blinks or you hear two clicks.
- Test the remote to confirm the door responds.
Most modern openers use rolling-code technology — a system that generates a new access code every single time the remote is used. Over 80% of garage door openers sold in the U.S. since 1995 use this standard, which means syncing requires this specific Learn-button process rather than a simple frequency match.
This process applies to the most popular brands — LiftMaster, Chamberlain, Genie, and more. If your remote still isn’t responding after following these steps, there are a few common causes worth checking, all covered in this guide.
Whether you just bought a new remote, moved into a new home, or your existing remote suddenly stopped working, AA Garage Door can help you get back on track fast.
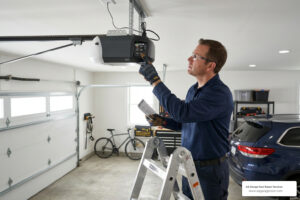
I’m David Sands, owner of AA Garage Door LLC, with over 23 years of hands-on experience helping Twin Cities homeowners with opener systems, remote programming, and everything in between — including the most common mistakes people make when figuring out how to sync garage door remote control devices on modern rolling-code systems. This guide walks you through every scenario, step by step.

Preparation and Locating the Learn Button
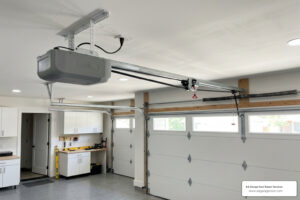
Before you climb a ladder, preparation is key. The “Learn” button is the brain of your programming operation. It is the physical interface that tells the motor unit to listen for a new radio frequency.

The Learn button is typically located on the motor unit mounted to your garage ceiling. You may need to remove a plastic light cover or check the back panel near where the thin antenna wire hangs down. These buttons are color-coded, and that color isn’t just for aesthetics—it identifies the frequency and technology your opener uses. For example, a yellow button often indicates Security+ 2.0 technology (310, 315, and 390 MHz), while a purple button indicates a 315 MHz frequency.
For a deeper dive into hardware specifics, check our Garage Door Opener Remote Complete Guide.
Safety and Tools
Before starting, ensure your ladder is stable and positioned on a flat surface. We recommend using a self-standing step ladder rather than leaning one against the wall. Check your remote’s batteries; weak batteries are the number one reason syncs fail. If you’re in the Twin Cities or Western Wisconsin during the winter, extreme cold can sap battery life faster than you’d expect.
Identifying Your Opener Type
Understanding your technology is the first step in how to sync garage door remote control systems.
- Rolling Code: Most units made after 1995. The code changes every time you click the button, making it nearly impossible for hackers to “grab” your code.
- Fixed Code / DIP Switches: Common in units from the 1980s and early 90s. These use a row of 8 to 12 small switches inside the remote and the motor that must match exactly.
- Brand Compatibility: While universal remotes exist, most homeowners find the best success using brand-specific remotes (e.g., using a LiftMaster remote with a LiftMaster opener).
For more on identifying your specific model, see Programming Your Garage Door Opener: A Step-by-Step Guide.
How to Sync Garage Door Remote Control: Step-by-Step
Once you’ve located the Learn button and have your remote ready, the actual syncing process is remarkably fast. In fact, most homeowners can complete the task in under two hours, though the actual “sync” happens in seconds.
| Brand | Learn Button Color | Confirmation Signal |
|---|---|---|
| LiftMaster / Chamberlain | Yellow, Purple, Orange, Green | Opener lights flash or two clicks heard |
| Genie / Overhead Door | Often Black or Grey | Status LED blinks or stays solid |
| Craftsman | Red, Orange, or Green | Opener light blinks |
The Programming Sequence
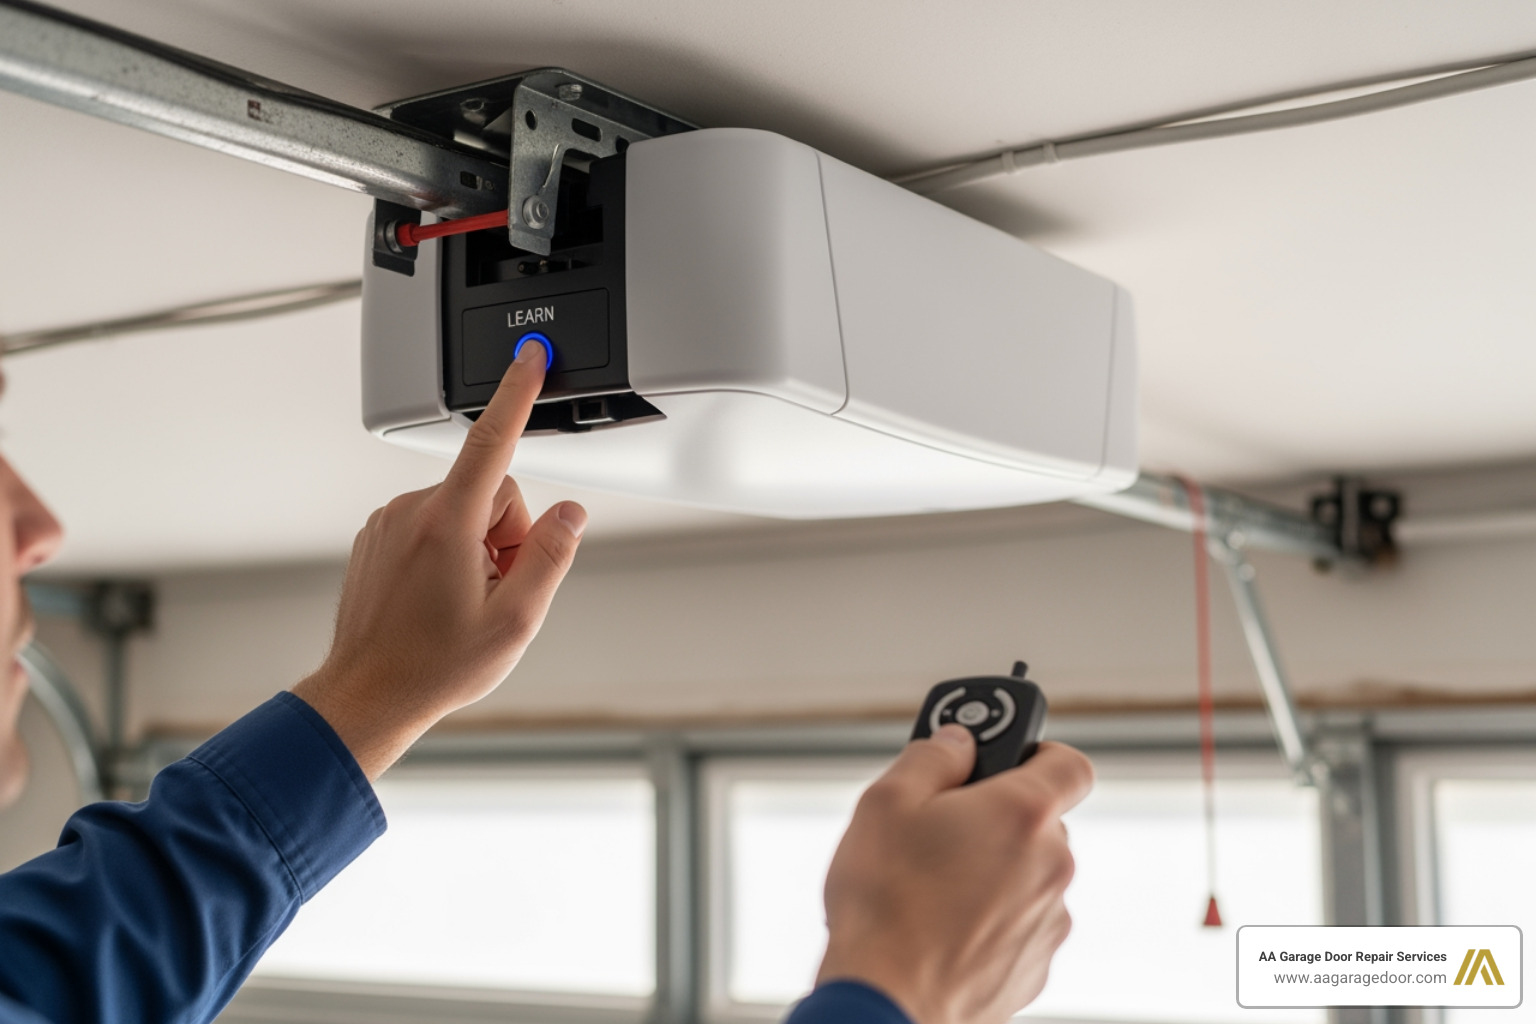
- Enter Programming Mode: Press and release the Learn button on the motor unit. Do not hold it down for too long (holding for 6+ seconds usually erases all memory).
- Observe the Light: An indicator light near the button will glow steadily. This signals that the unit is now “listening.”
- The 30-Second Window: You have exactly 30 seconds to reach your remote and press the button. This is why having a helper can be useful.
- Press the Remote Button: Press and hold the button on your handheld remote.
- Watch for the Signal: The opener’s work lights will flash, or you will hear two distinct clicks. This is the unit saying, “I’ve got it!”
For a visual walkthrough, The Home Depot’s guide on how to program a garage door opener offers excellent additional context. If you are working with an older unit that needs a refresh, you might need to learn how to reprogram garage door opener settings entirely.
Testing the Connection
Don’t just walk away once the light flashes. Step back about 10 feet and test the remote. Then, try it from the end of the driveway. Ensure there is a clear line of sight. Sometimes, LED bulbs installed in the opener can cause signal interference; if your range is poor, try unscrewing the bulbs temporarily to see if the signal improves. For more tips on signal strength, refer to our Garage Door Opener Programming Guide.
Syncing Car Systems and Wireless Keypads
Modern convenience means you shouldn’t have to carry a plastic remote at all. Most vehicles built in the last 15 years come equipped with HomeLink or Car2U systems, usually located on the sun visor or rearview mirror.

How to Sync Garage Door Remote Control to Your Car
Syncing your car is a two-part process: the car must learn the remote’s code, and the motor must then recognize the car.
- Clear the Car’s Memory: Hold the two outer buttons on your car’s console until the indicator light flashes rapidly (usually about 20 seconds).
- Pair Remote to Car: Hold your handheld remote 1-3 inches away from the car buttons. Press both the remote button and the car button simultaneously until the car’s light flashes rapidly.
- Pair Car to Motor: Press the Learn button on your garage motor. Within 30 seconds, return to the car and press the programmed button three times (or hold it until the door moves).
Note: Some newer “smart” cars require the ignition to be in the “on” or “accessory” position for the transmitter to function.
For more on managing these digital signatures, see our Garage Door Opener Codes Complete Guide. You can also find brand-specific car pairing steps through Chamberlain’s support site.
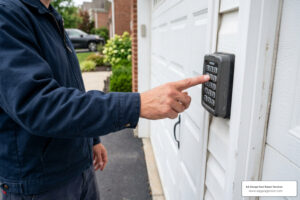
Programming Wireless Keypads
Keypads are essential for letting the kids in after school or going for a jog without keys.
- Press the Learn button on the motor.
- Enter your desired four-digit PIN on the keypad.
- Press and hold the Enter button until the motor lights blink.
If you ever need to revoke access for a former roommate or service worker, follow our guide on changing the garage door opener code.
Troubleshooting and Smart Home Integration
If you’ve followed the steps for how to sync garage door remote control and nothing is happening, don’t panic. There are usually simple fixes.
Common Syncing Obstacles
- LED Interference: Many modern LED bulbs emit a frequency that “jams” garage door signals. If your remote only works when you’re inches away, swap your bulbs for “Garage Door Compatible” LEDs.
- Antenna Issues: Ensure the small wire hanging from the motor isn’t tucked inside the metal casing. It needs to be exposed to receive signals.
- Memory Maxed Out: Most openers can only hold 5 to 8 remotes. If you try to add a 9th, it won’t sync. You’ll need to clear the memory and start fresh.
Clearing Existing Memory
If you lose a remote or move into a new house in St. Paul, we always recommend a factory reset for security. To do this, press and hold the Learn button for about 6 seconds until the indicator light goes out. This wipes all remotes and keypads from the system. You will then need to re-sync the remotes you still have. Check our Garage Door Remotes page for replacement options if you’ve lost yours.
Smart Home Integration
In 2026, many homeowners prefer using a smartphone app like MyQ or integrating their door with Alexa or Google Home. This usually involves connecting a “Smart Bridge” to your Wi-Fi and then syncing that bridge to the motor using the same Learn button process described above. This allows you to check if the door is closed from anywhere in the world. If you’re having trouble with smart setups in the Apple Valley area, we offer specialized garage door repair in Apple Valley to help bridge the tech gap.
Universal Remotes and Legacy Systems
What if you have a 30-year-old opener or a mix of different brands? Universal remotes are the answer. These are brand-agnostic and can be programmed to work with almost any system made after 1993.
Identifying Compatibility
Before buying a universal remote, check your opener’s manufacture date and Learn button color. Most universal remotes have a “compatibility chart” on the back. For a detailed list of methods, Garagean’s 2026 guide covers six distinct ways to handle various hardware ages.
How to Sync Garage Door Remote Control for Older Models
If your unit was made before 1995 and lacks a Learn button, it likely uses DIP switches.
- Open the battery cover of your remote and the side panel of your motor.
- You will see a row of 8-12 tiny switches.
- Flip them so they match exactly (e.g., if switch 1 is “up” on the motor, it must be “up” in the remote).
- These systems operate on older frequencies (390MHz). If you struggle with range, you may need to install an external receiver to upgrade the unit to modern standards.
Frequently Asked Questions about Garage Remote Syncing
Why is my garage door remote not syncing?
The most common reasons are dead batteries, signal interference from household electronics (like Wi-Fi routers or LED bulbs), or the opener’s memory being full. Ensure you are completing the process within the 30-second window.
Can I sync multiple remotes to one opener?
Yes. You can typically sync multiple handheld remotes, a wireless keypad, and several car systems to a single motor. However, most motors have a limit (usually around 8 devices).
How do I sync a remote if my opener has no Learn button?
For older models without a Learn button, you must use the DIP switch method. Match the physical switches inside the remote to those on the motor unit. If your unit is very old (pre-1980), it may not be compatible with modern universal remotes and might require a hardware upgrade for safety and security.
Conclusion
Mastering how to sync garage door remote control devices is a vital skill for any homeowner, ensuring your home remains both secure and accessible. Whether you are dealing with the latest rolling-code technology or a legacy DIP-switch system, the steps are straightforward once you know where to look.
At AA Garage Door Repair Services, we’ve been the Twin Cities’ trusted experts since 2001. We provide comprehensive garage door openers installation and maintenance across St. Paul, Woodbury, Baldwin, and Hudson. We understand the local climate and the specific challenges it poses to your garage door hardware.
If you’ve tried these steps and your door still isn’t responding, or if you’d rather have a professional handle the setup and ensure your safety sensors are perfectly aligned, we are here for you. We offer 24/7 emergency support and a 100% satisfaction guarantee.
Ready to get your garage door back in sync? Visit our website to schedule a service. We’ll make sure your “welcome home” button works every single time.