Lost Your Garage Remote? Here’s How to Sync Your Car Directly to the Opener
Knowing how to program a garage door opener without remote access to a transmitter is simpler than most homeowners expect — and you can do it in under 10 minutes using your car’s built-in system, with help from the team at AA Garage Door, your trusted source for local garage door repair.
Here’s the quick answer (4 steps):
- Clear your car’s existing memory — hold the two outer HomeLink or Car2U buttons for 10-20 seconds until the indicator light flashes rapidly.
- Press and release the Learn button on your garage door opener motor unit — you have a 30-second window.
- Press and hold your desired car button within that 30-second window until the opener light blinks or you hear two clicks.
- Test the system by pressing the programmed car button from your driveway.
That’s it for most modern openers. Keep reading for brand-specific details, older opener alternatives, and troubleshooting tips.
Losing a garage remote is one of the most common service calls our team receives — especially after a move or a vehicle upgrade. The good news: over 70% of vehicles made after 2010 come with a built-in garage door integration system like HomeLink or Car2U, which means most homeowners can bypass the remote entirely by pairing their car directly to the opener’s motor unit.
Our garage door opener services cover everything from new installations to programming support, so we’ve seen every variation of this process across dozens of opener brands and vehicle types.
I’m David Sands, owner of AA Garage Door LLC, and with over 23 years of hands-on experience programming and troubleshooting garage door opener systems across Wisconsin and Minnesota, I’ve helped hundreds of homeowners program their garage door opener without a remote — often in a single visit. The steps below reflect what actually works in the field, not just what the manuals say.
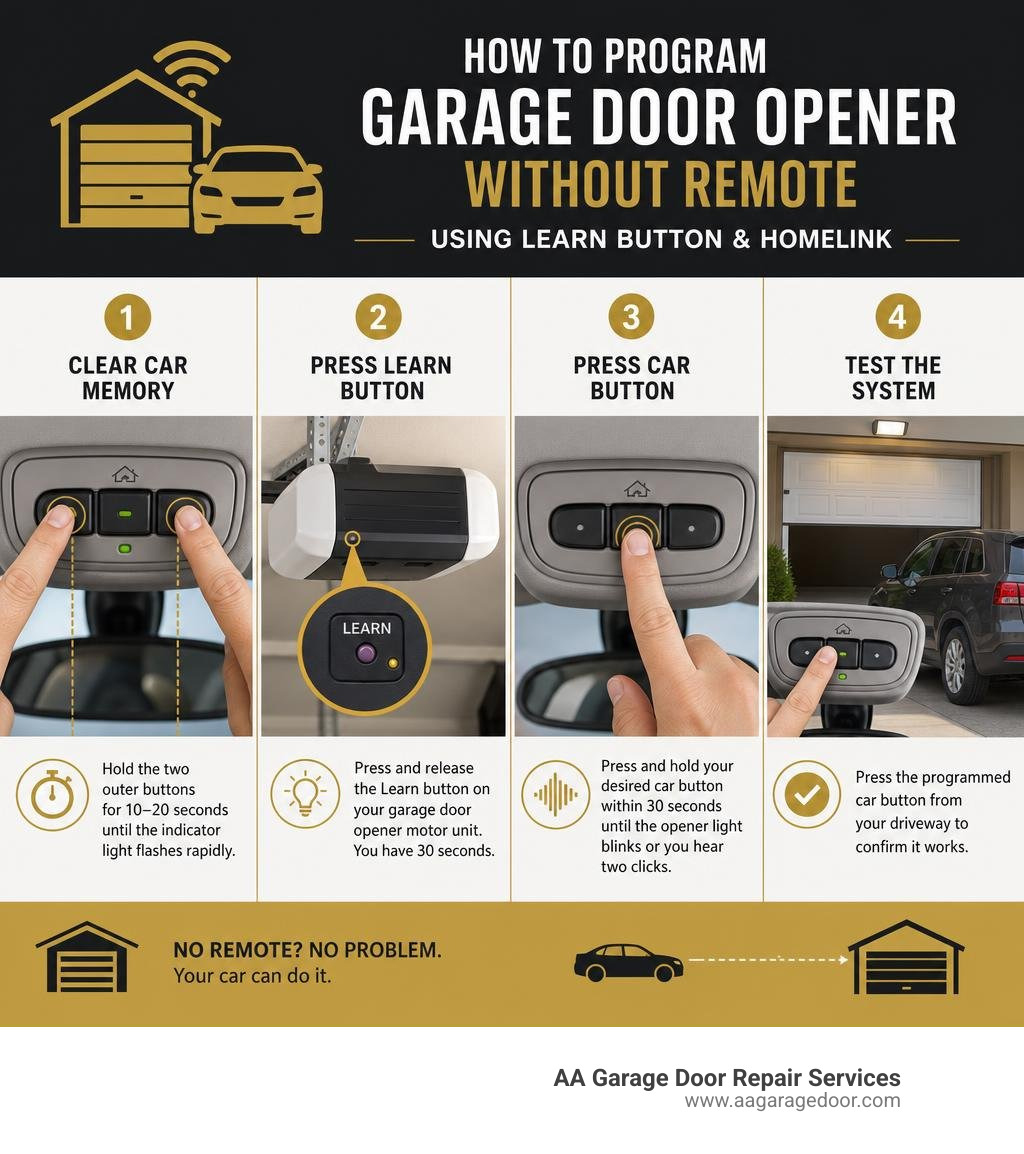
Simple guide to how to program garage door opener without remote terms:
Why Program a Garage Door Opener Without a Remote?
There are several highly practical reasons why you might need to know how to program a garage door opener without remote devices. The most obvious scenario is a lost or broken transmitter. Whether your old remote took a terminal swim in a coffee cup, got lost during a hectic move to a new home in Woodbury, or simply stopped working due to ancient internal circuitry, you do not have to buy a replacement remote to regain keyless access to your home.
Beyond emergencies, programming your vehicle directly to the overhead motor unit offers massive advantages in daily convenience and security:
- Lower Signal Failure Rates: Direct pairing with the garage door opener’s Learn button reduces signal failure rates by up to 25% compared to cloning a handheld remote’s signal. By bypassing the physical remote during setup, your vehicle establishes a cleaner, more direct radio frequency connection with the receiver.
- Enhanced Home Security: Handheld remotes left on a car visor are prime targets for vehicle break-ins. If a thief breaks into your car parked in the driveway, they have instant access to your home. Programming your car’s built-in HomeLink or Car2U system keeps your access code safely integrated inside the vehicle’s computer, which often deactivates when the ignition is completely off.
- Rolling Code Technology: Modern garage door openers manufactured after 1993 use rolling code technology. This security feature changes the encrypted signal code every single time you press the button, making it virtually impossible for hackers to grab your code. Directly syncing your car to the motor ensures this rolling code synchronization is handled flawlessly.
- A Clean Aesthetic: No more bulky plastic remotes clipping to your visor, rattling around while you drive, or sliding under the passenger seat.
If you want to understand the full history and technical specs of traditional transmitters, take a look at our Garage Door Opener Remote Complete Guide. However, if you are ready to ditch the plastic clicker entirely, let’s dive into how direct motor-to-car programming works.
How to Program Garage Door Opener Without Remote in 4 Steps
Direct pairing bypasses the need for a physical remote transmitter by utilizing the receiver chip inside your garage door motor. This process works with nearly all major modern brands, including Chamberlain, LiftMaster, Craftsman, and Genie.
Before you begin, make sure your car is parked inside or directly in front of the garage. You will need a secure, stable ladder to reach the overhead motor unit safely, and we highly recommend having a helper nearby to assist with the timing.
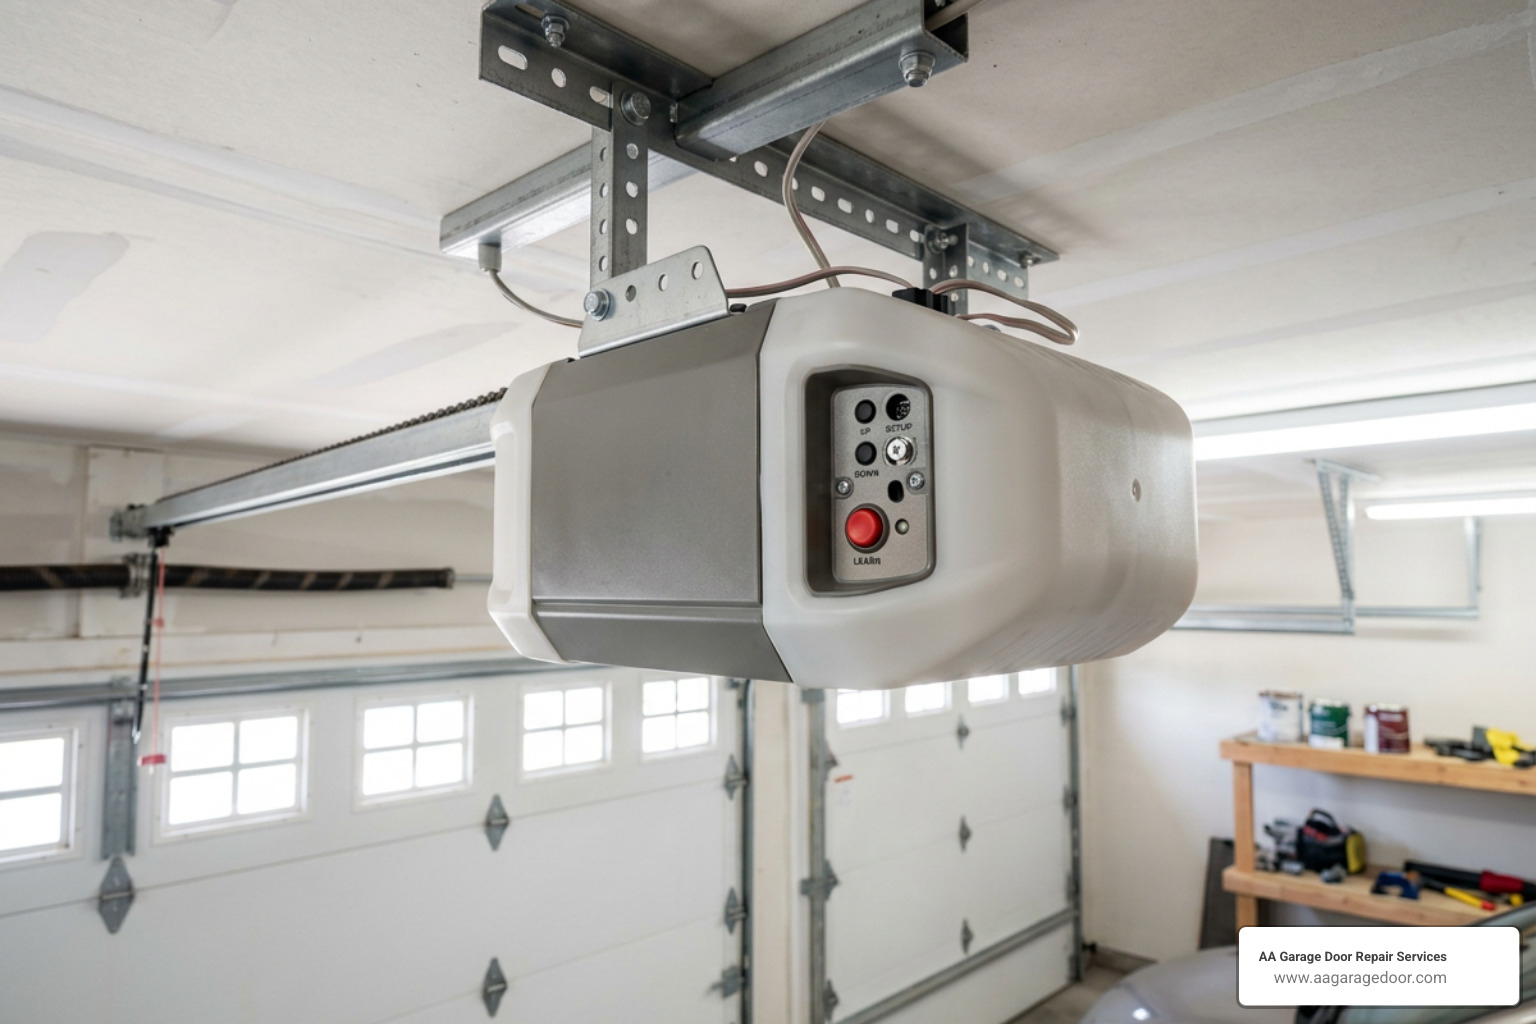
Follow this highly reliable 4-step method outlined in our Garage Tips Pro Guide to pair your car directly to your garage door opener.
Step 1: Clear the Existing Memory on Your Vehicle’s System
Before attempting to sync your car to a new opener, you must clear out any old codes stored in your vehicle’s built-in console. This is especially critical if you have just purchased a used car or moved into a new home in St. Paul, as the buttons may still be paired to a previous owner’s garage.
To reset your vehicle’s system (assuming it uses the standard HomeLink interface):
- Turn your car’s ignition to the “Accessory” or “ON” position (do not start the engine).
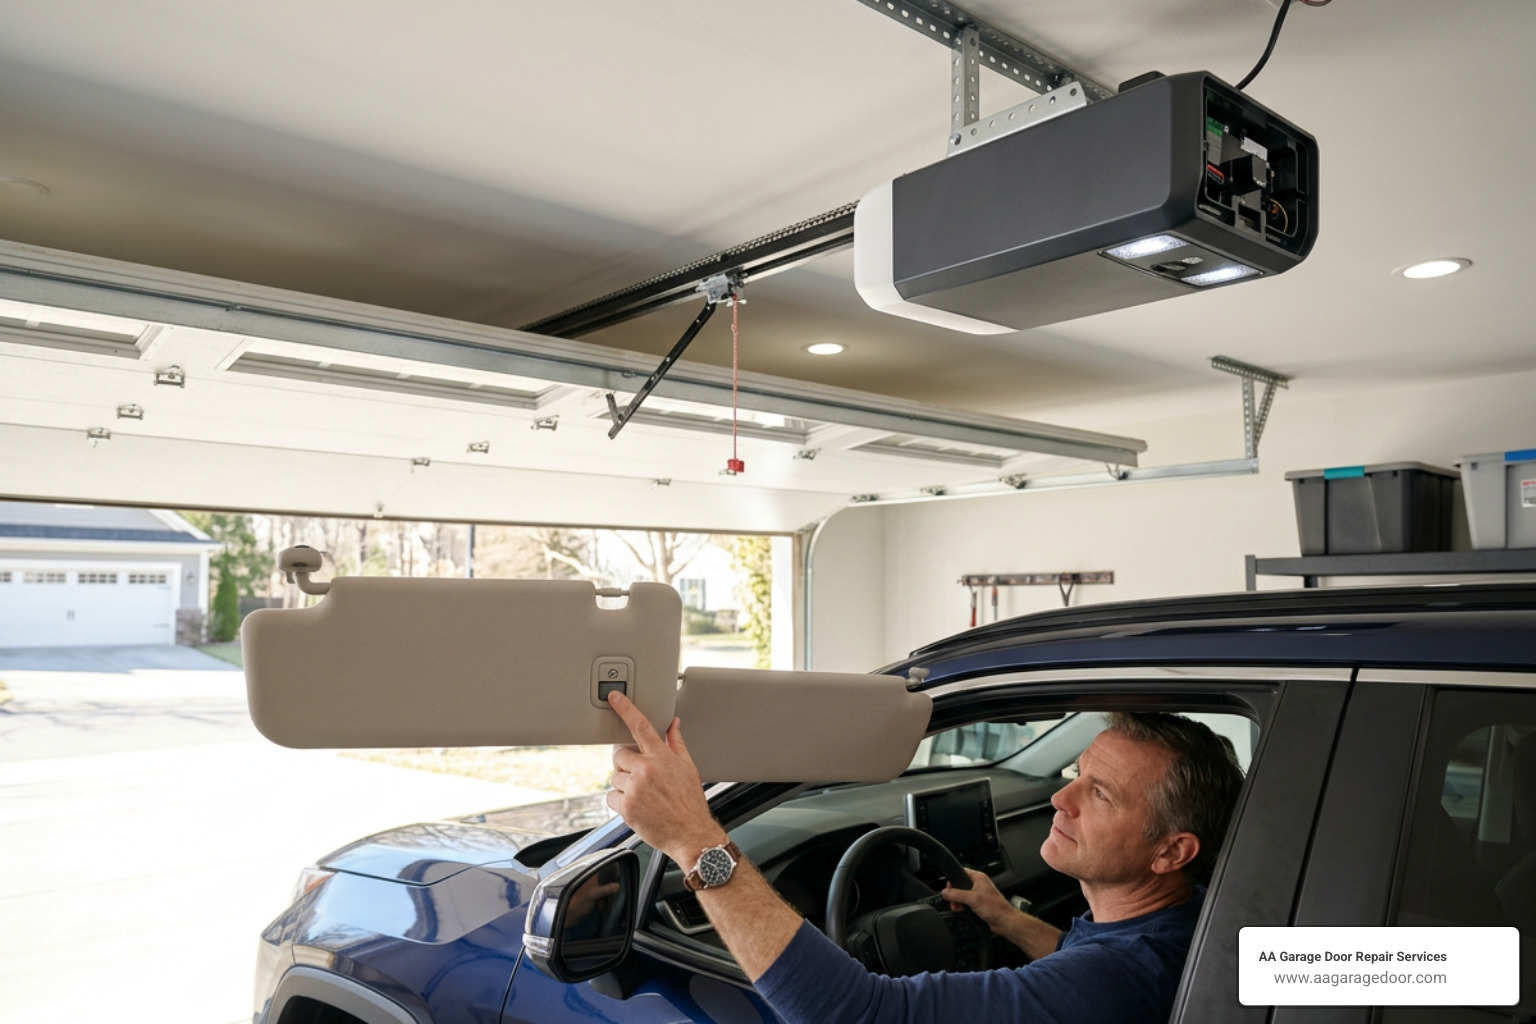
- Locate the HomeLink buttons, which are typically found on your rearview mirror, overhead console, or driver-side sun visor.
- Press and hold the two outer buttons (buttons 1 and 3) simultaneously.
- Keep holding them for 10 to 20 seconds.
- Watch the indicator light closely. It will transition from a slow, steady glow to a rapid, continuous flash. Once it flashes rapidly, release both buttons.
Your vehicle’s built-in transceiver is now completely cleared and ready to accept a new frequency. For more details on clearing and resetting garage systems, read our guide on How to Reprogram Garage Door Opener.
Step 2: Locate and Press the Learn Button on the Opener Motor
Next, you need to access the overhead motor unit. Grab your ladder and position it safely beneath the powerhead.
- Locate the “Learn” button. On Chamberlain, LiftMaster, and Craftsman openers, this button is usually hidden behind the light cover lens or on the back panel near the hanging antenna wire. On Genie systems, it may be labeled “Program” or “Set.”
- Note the color of the Learn button. These buttons are color-coded (yellow, purple, orange, green, or red) to indicate the specific radio frequency the system uses.
- Press and immediately release the Learn button. Do not hold it down. Holding the Learn button down for more than 6 seconds will erase all programmed remotes, keypads, and vehicles from the opener’s memory.
- Once pressed, an indicator LED next to the button will light up and glow steadily. This indicates that the opener is now in “Learning Mode.”
You now have a strict 30-second window to return to your vehicle and complete the next step. To learn more about identifying different motor configurations, consult our Garage Door Opener Programming Guide.
Step 3: Program Your Car Button Within the Time Limit
With the opener in learning mode, quickly return to your vehicle’s driver’s seat.
- With the ignition still in the “Accessory” or “ON” position, press and hold the specific HomeLink button you wish to use to control your garage door.
- Hold the button firmly for 2 full seconds, then release it.
- Press and hold the same button again for 2 seconds, then release it.
- On some vehicle models or rolling code systems, you may need to repeat this press-and-hold sequence a third time to complete the synchronization.
- Watch the overhead motor unit’s light bulb. If the pairing is successful, the garage door opener light will blink once, or you will hear two distinct clicking sounds from the motor unit.
This action tells the rolling code receiver inside the opener to register your vehicle’s unique transmitter ID. For brand-specific variations of this timing, you can also check out the official HomeLink Programming Help resources.
Step 4: Test the System for Successful Pairing
Once you hear the clicks or see the light bulb flash, your programming is complete.
To verify everything is working perfectly:
- Step away from the ladder and ensure the path of the garage door is completely clear of tools, vehicles, and people.
- Press the newly programmed button in your car once. The garage door should smoothly activate, opening or closing.
- Perform a range test. Back your car out into the driveway and try operating the door from a normal distance.
If the door responds consistently, congratulations! You have successfully mastered how to program a garage door opener without remote controls. For a deeper dive into adjusting your opener’s settings after pairing, refer to Programming Your Garage Door Opener: A Step-by-Step Guide.
Alternative Methods: Programming Without a Learn Button
What happens if you climb up your ladder, open the light cover, and discover your garage door opener doesn’t have a modern “Learn” button? This is highly common in homes with older systems manufactured before 1993.
While modern openers rely on software-based pairing, older models use hardware-based physical switches or external keypads to establish a secure connection. Let’s look at how these systems compare:
| Feature / Method | Learn Button Method (Post-1993) | DIP Switch Method (Pre-1993) |
|---|---|---|
| Technology | Rolling Code (Software-based) | Fixed Code (Hardware-based) |
| Setup Time | Under 10 minutes | 10 to 15 minutes |
| Security Level | High (Code changes every cycle) | Low (Fixed code can be copied) |
| Required Tools | Ladder only | Ladder, small screwdriver |
| Compatibility | HomeLink / Car2U built-in | May require a Compatibility Bridge |
If your opener lacks a Learn button, you can still program it using the alternative methods below, as detailed in the Garage Door Pedia Guide.
Method A: Matching DIP Switch Configurations
If your garage door opener was installed before 1993, it likely uses a fixed-code system regulated by DIP switches. These are a row of 8 to 12 tiny, sliding switches that can be set to three positions: “+”, “0”, or “-“.
To program this type of system without a remote:
- Locate the physical DIP switches on the back of your garage door opener motor unit.
- If you are using a universal remote or a vehicle system that supports fixed-code programming, you must match the switch pattern on your receiver exactly.
- Slide the switches on your new transmitter or input the corresponding code into your vehicle’s system to mirror the physical layout on the overhead motor.
- Test the system. Because these codes are fixed, the door will activate immediately once the physical patterns match.
For a comprehensive walkthrough of hardware-based pairing, read our guide on How to Program a Garage Remote Control the Right Way.
Method B: Using an External Wireless Keypad
If you do not have a handheld remote and do not want to program your car, an external wireless keypad mounted on the garage door frame is an outstanding alternative. Keypads act as a permanent, weatherproof remote control that allows keyless entry via a personal identification number (PIN).
To program a wireless keypad:
- Access the Learn button on your overhead motor unit and press it once.
- Within 30 seconds, walk to the exterior keypad and enter your desired 4-digit PIN.
- Press and hold the “Enter” button on the keypad until the overhead light bulb blinks.
- Test the keypad by entering your PIN and pressing “Enter” to see if the door operates.
This is a fantastic backup option for kids coming home from school or for times when you are working in the yard without your car keys. For step-by-step instructions on configuring these devices, see our guide on Garage Door Keypad Programming.
Troubleshooting Common Programming Issues
Even with clear instructions, programming wireless systems can sometimes feel like trying to solve a puzzle in the dark. If your car and opener refuse to talk to each other, don’t panic.
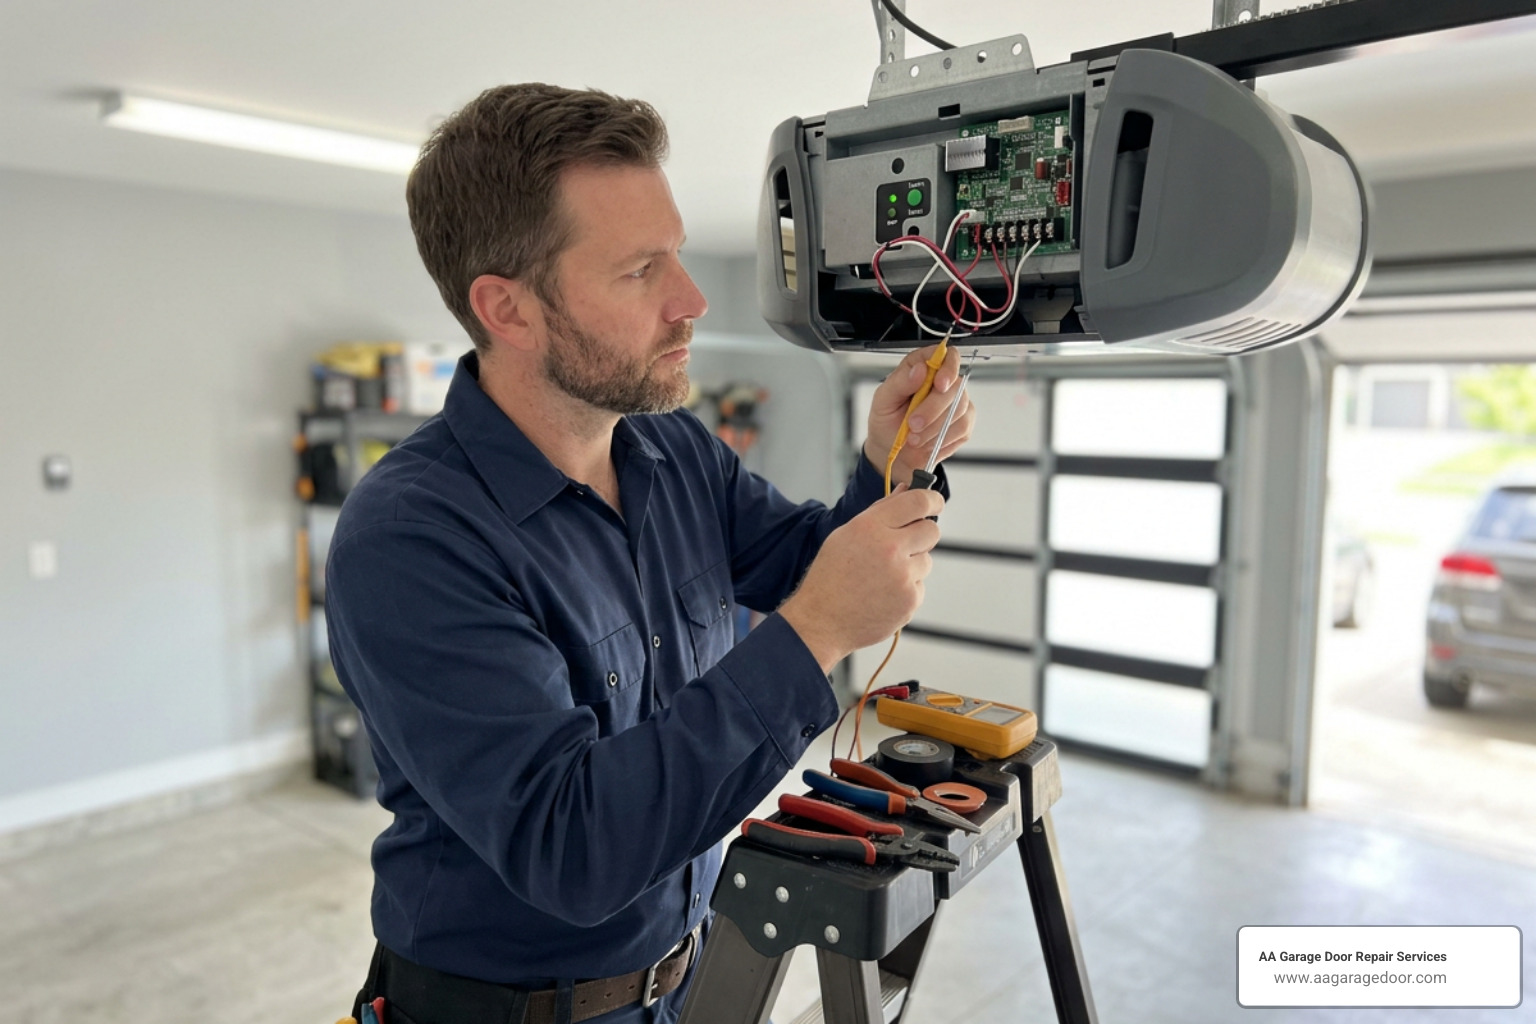
Most pairing failures are caused by minor, easily correctable issues. Let’s look at how to resolve the most common roadblocks, with insights backed by the JustAnswer Expert Q&A.
What to Do If Your Car Won’t Sync
If your vehicle simply refuses to pair with the opener after multiple attempts, check the following:
- The 30-Second Window: The most common issue is timing. It takes time to climb down a ladder, walk to your car, and perform the press-and-hold sequence. If you exceed 30 seconds, the opener will exit learning mode. Have a helper stand on the ladder to press the Learn button while you sit in the car ready to program.
- Weak Vehicle Battery: If your car’s battery is old or weak, the built-in HomeLink transmitter may not emit a strong enough signal to reach the overhead receiver during programming. Try running the engine while programming to ensure maximum voltage.
- The Need for a Compatibility Bridge: Some newer vehicles use updated HomeLink protocols that cannot communicate directly with older garage door openers. In these cases, you may need to purchase a “Compatibility Bridge” (also known as a HomeLink Repeater), which accepts your car’s modern signal and translates it into a frequency your older opener can understand.
Resolving Signal Interference and Range Problems
If your programming was successful but the system only works intermittently or requires you to park inches from the garage door, you are likely dealing with signal interference:
- LED Bulb Emissions: Many modern LED light bulbs emit radio frequency interference that directly clashes with the 315 MHz and 390 MHz frequencies used by garage door openers. If you recently installed “smart” LED bulbs or cheap off-brand LEDs in your opener motor, replace them with specialized, shielded garage-door-safe LED bulbs or traditional incandescent bulbs.
- Antenna Alignment: Ensure the thin antenna wire hanging from your motor unit is hanging straight down and is not damaged, cut, or wrapped around the metal ceiling brackets.
- Memory Is Full: Most garage door openers can only store between 5 and 10 paired devices (including remotes, keypads, and cars) in their active memory. If you have lived in your home for a long time or have paired multiple cars over the years, the memory may be completely full. Perform a hard reset of the opener’s memory (see the FAQ section below) and program your current devices fresh.
Frequently Asked Questions About Programming Without a Remote
Can you program a garage door opener without remote using HomeLink?
Yes, you can absolutely program your vehicle’s built-in HomeLink system directly to your garage door opener without using a handheld remote. This is done by putting the garage door opener’s motor unit into “Learning Mode” via the physical Learn button and then pressing your desired HomeLink button in your vehicle within 30 seconds to establish a direct, secure connection.
This direct-to-motor method is highly recommended because it bypasses the need to clone an intermediate remote signal, resulting in a more secure and reliable connection. For more tips on remote-free vehicle integration, check out the Angus Post HomeLink Guide.
Is it possible to program garage door opener without remote on older cars?
Yes, but it depends on the age of both the car and the opener. Vehicles manufactured between 2000 and 2010 may feature older versions of HomeLink or the Car2U system, which operate on fixed frequencies or older rolling code protocols.
If you are trying to pair an older vehicle with a modern, high-security garage door opener, the systems may speak different “languages.” To bridge this gap, you will likely need to install a HomeLink Compatibility Bridge (repeater) or upgrade your opener’s receiver. For official compatibility guidelines, you can consult the Overhead Door HomeLink Instructions.
How do I clear the memory on my garage door opener?
To perform a hard reset and wipe all programmed remotes, keypads, and vehicles from your garage door opener’s memory:
- Locate the “Learn” button on your overhead motor unit.
- Press and hold the Learn button down continuously.
- Keep holding the button for approximately 6 seconds until the indicator LED light next to it goes out.
- Release the button.
All previous programming is now completely erased, which is an excellent safety step to take when moving into a new home. That you will need to reprogram any keypads or other remotes you still use after doing this. To keep your system in top shape year-round, read our Garage Door Maintenance Complete Guide.
Conclusion
Programming your garage door opener to operate directly from your vehicle’s console is a fantastic weekend project that enhances your home’s security, declutters your car’s interior, and ensures you are never locked out of your home due to a lost plastic remote.
While the 4-step process is highly straightforward, older openers, complex vehicle menus, or radio frequency interference can occasionally turn a quick DIY project into a frustrating headache. If you are struggling to get your vehicle to sync, or if your older opener is showing signs of wear and tear, we are here to help.
At AA Garage Door Repair Services, we have been serving homeowners across St. Paul, Woodbury, Baldwin, Hudson, and the surrounding Twin Cities metro area since 2001. We provide fast, reliable 24/7 emergency service, transparent pricing, and a total satisfaction guarantee. Whether you need a simple programming assist, an opener repair, or a complete garage door replacement, our local technicians have the expertise to get the job done right.
If you live in Apple Valley, MN, or the surrounding communities, check out our dedicated Apple Valley Garage Door Repair page to book an appointment.
Ready to get your garage operating flawlessly? Contact us today at 651-255-5187 to schedule your service!