What You Need to Know Before You Program a MyQ Garage Door Opener
Learning how to program myQ garage door opener systems is simpler than most homeowners expect — and you can complete the full setup in under an hour. If you need assistance with your setup, you can always rely on AA Garage Door Repair Services for professional support. Here’s the short answer:
How to program a MyQ garage door opener (quick overview):
- Check compatibility — confirm your opener has a purple, orange, or yellow learn button
- Mount the MyQ Smart Garage Hub near your opener and plug it into an outlet
- Download the myQ app, create an account, and scan the hub’s QR code
- Connect to your 2.4 GHz Wi-Fi network through the app
- Press the learn button on the motor unit to pair the hub
- Install and align the door sensor, then test open/close from the app
That’s the full process. The sections below walk through each step in detail, including troubleshooting and reset procedures.
The myQ system — made by Chamberlain Group and also used on LiftMaster openers — lets you open, close, and monitor your garage door opener remotely from your phone. The myQ app has over 10 million downloads and is compatible with iOS 16.0 or later. Most of the core features, including remote open/close and real-time alerts, are completely free.
One important thing to know upfront: myQ devices only connect to 2.4 GHz Wi-Fi networks, not 5 GHz. This single detail is the most common reason setups fail.
I’m David Sands, owner of AA Garage Door Repair Services, with over 23 years of hands-on experience installing and programming garage door opener systems across Wisconsin and Minnesota — including hundreds of myQ setups throughout the Twin Cities. In this guide, I’ll walk you through exactly how to program myQ garage door opener systems the right way, so you avoid the common pitfalls I see on almost every other install.
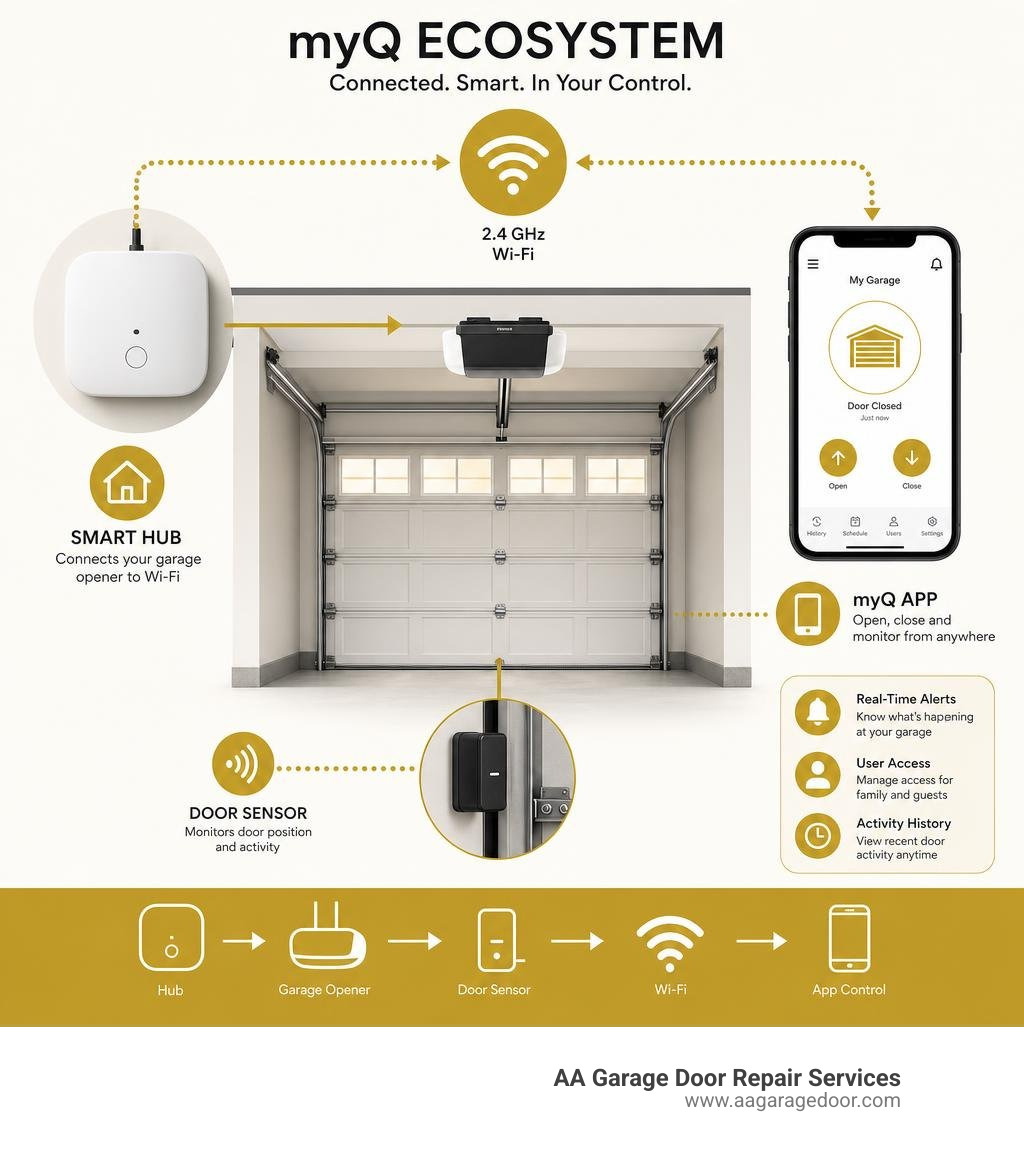
How to program myq garage door opener terms to remember:
Compatibility Check: How to Program MyQ Garage Door Opener Systems
Before you purchase a retrofit kit or begin the programming process, you must verify that your overhead motor unit is compatible with the myQ ecosystem. The easiest way to determine this is by looking at the colored “Learn” button on the back or side of your garage door motor.
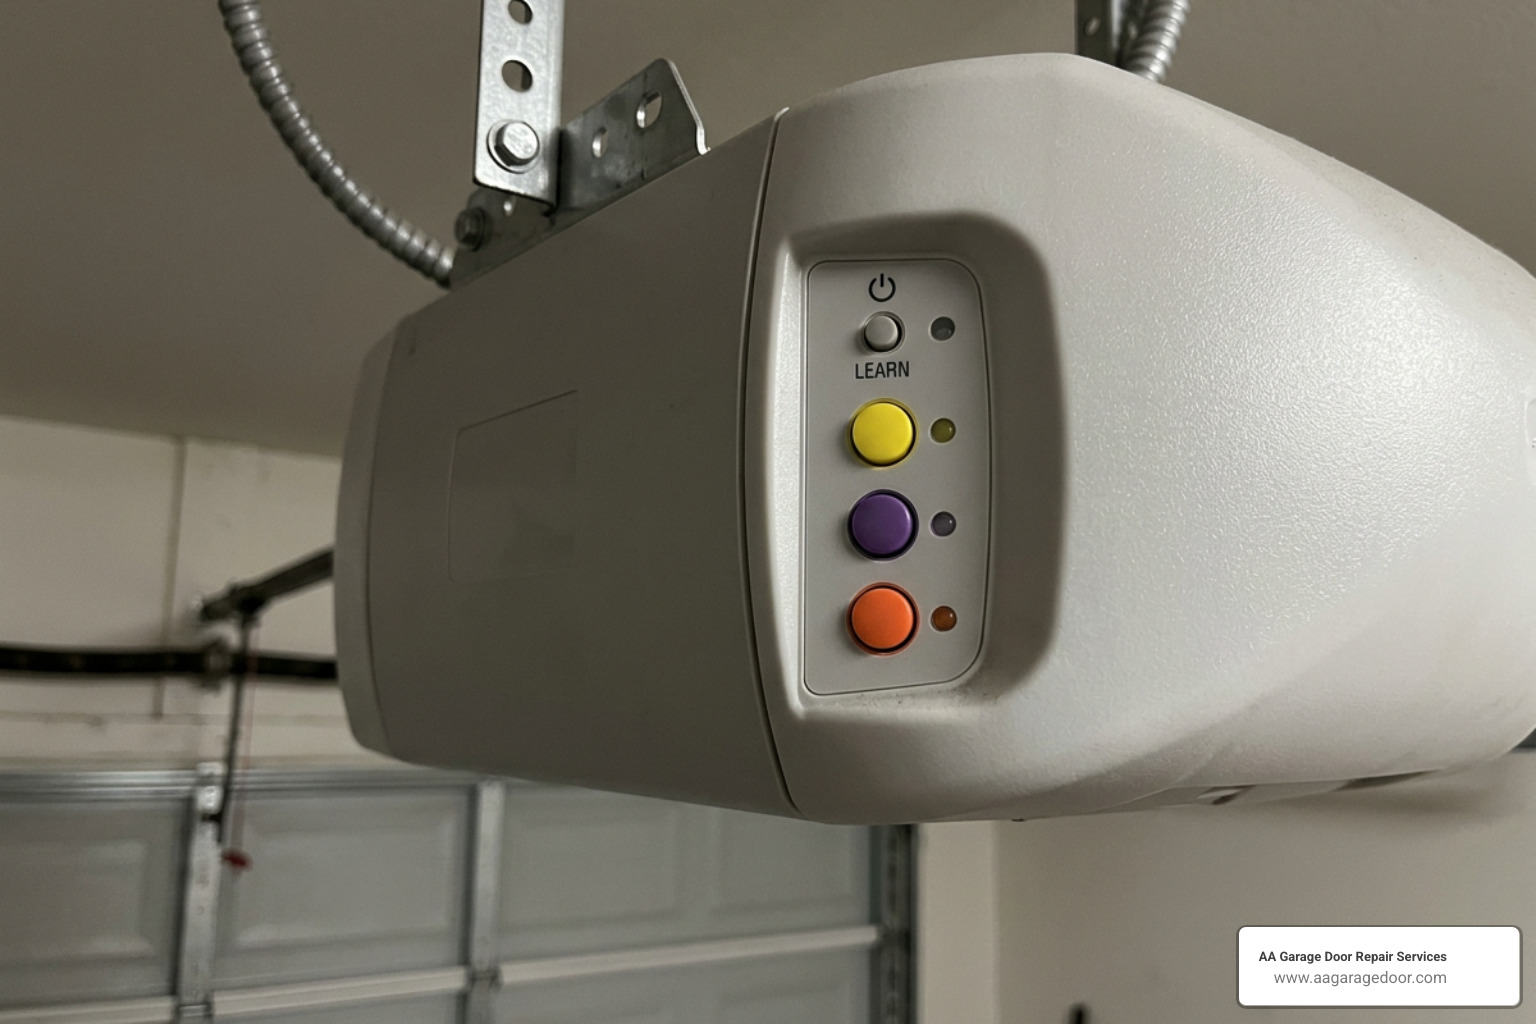
The color of this button identifies the radio frequency and encryption protocol your system uses:
- Yellow Learn Button (Security+ 2.0): Manufactured between 2011 and 2024. These are natively compatible with myQ and often have built-in Wi-Fi. However, there is a documented compatibility gap for certain yellow button models built between 2010 and 2021 when trying to pair with older external smart hubs.
- Purple Learn Button (Security+ 315 MHz): Manufactured between 2005 and 2015. Extremely common in the Twin Cities. These work perfectly with the myQ Smart Garage Hub. (Note: Purple buttons can sometimes fade and look brown over time).
- Orange/Red Learn Button (Security+ 390 MHz): Manufactured between 1997 and 2005. Fully compatible using the standard retrofit hub.
- Green Learn Button (Billion Code): Manufactured between 1993 and 1997. While some universal contact-closure kits can make these smart, official myQ smart hubs do not natively pair with green learn buttons.
- White Learn Button (Security+ 3.0): Introduced in 2025. This advanced protocol utilizes high-security encryption which blocks most third-party wireless retrofits, requiring official native Chamberlain/LiftMaster hardware.
To explore how these protocols interact with different smart home ecosystems, you can read our garage door opener programming guide or consult the comprehensive How to Make Your Garage Door Opener Smart: 2026 Retrofit Guide.
Beyond the motor unit, your home network is the second major compatibility gate. Your garage must have a reliable 2.4 GHz Wi-Fi signal. If your smartphone drops to one bar of Wi-Fi when you stand next to the opener, the myQ hub will struggle to maintain a connection. We highly recommend installing a dedicated 2.4 GHz Wi-Fi extender (like a TP-Link RE220) in the garage if your signal is weak.
Step-by-Step Guide: Programming Your MyQ Device
Whether you are configuring a brand-new native Wi-Fi opener or retrofitting an older unit with a myQ Smart Garage Hub or Smart Garage Control (such as the MYQ-G0301 or MYQ-G0401), the programming sequence remains highly consistent.
To help visualize this process before diving into the physical steps, you can watch this video on How To Connect MyQ Smart Garage Door Opener.
Step 1: Install the MyQ Smart Garage Hub or Control
If you are using an external retrofit hub to make your non-Wi-Fi opener smart, you must first mount the hardware.
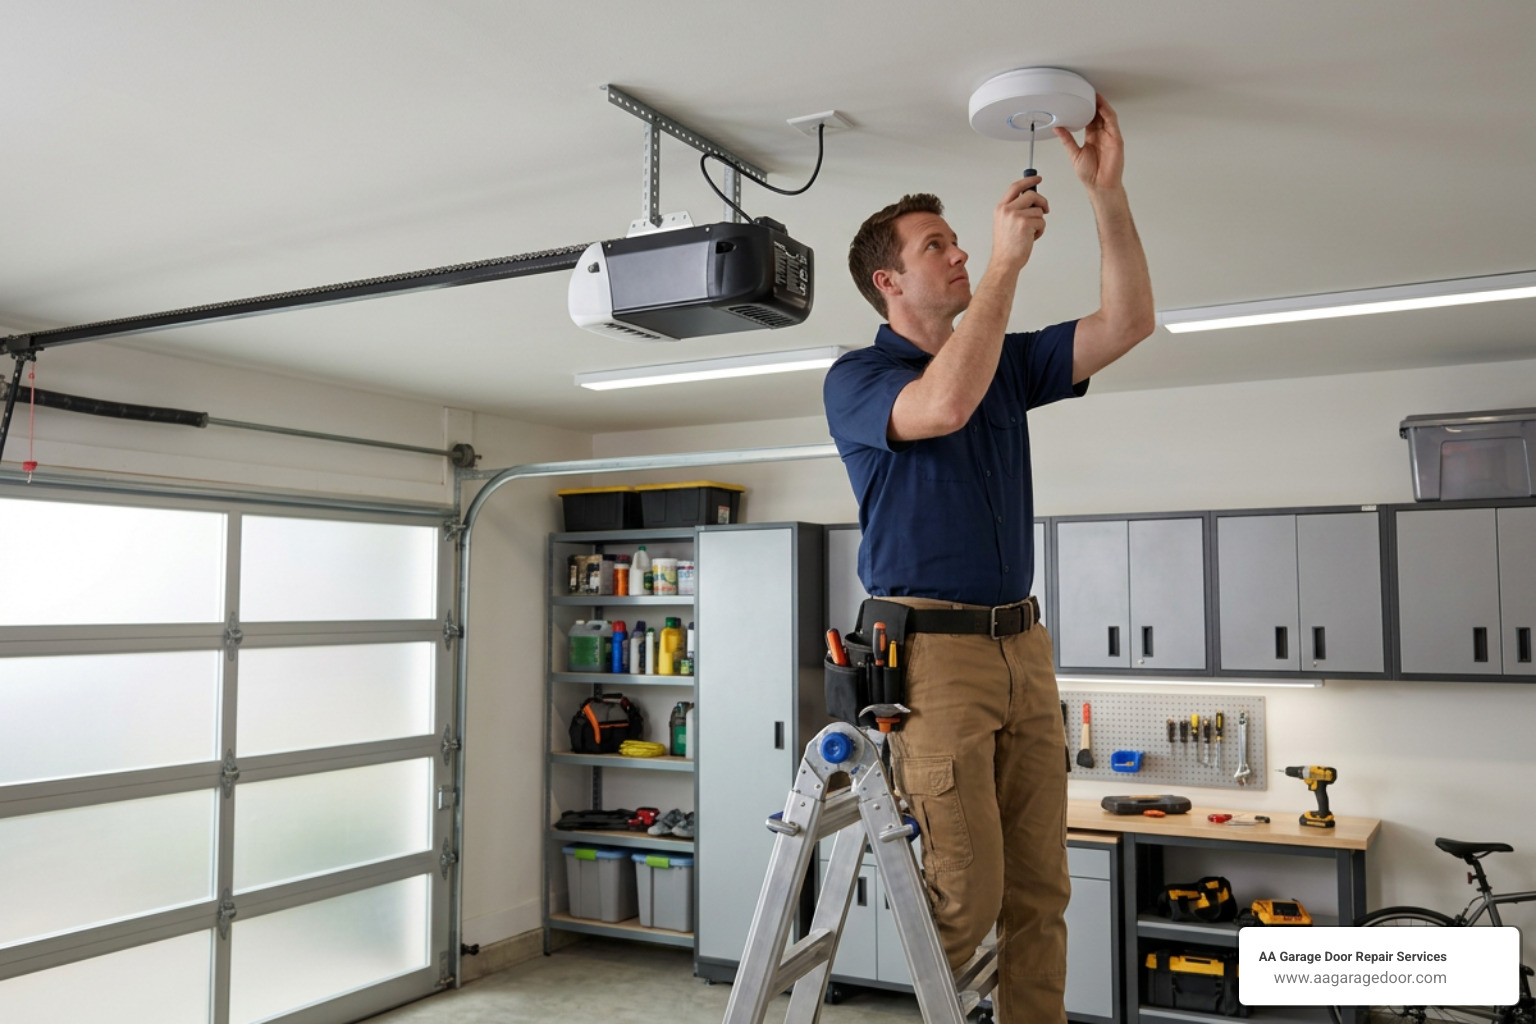
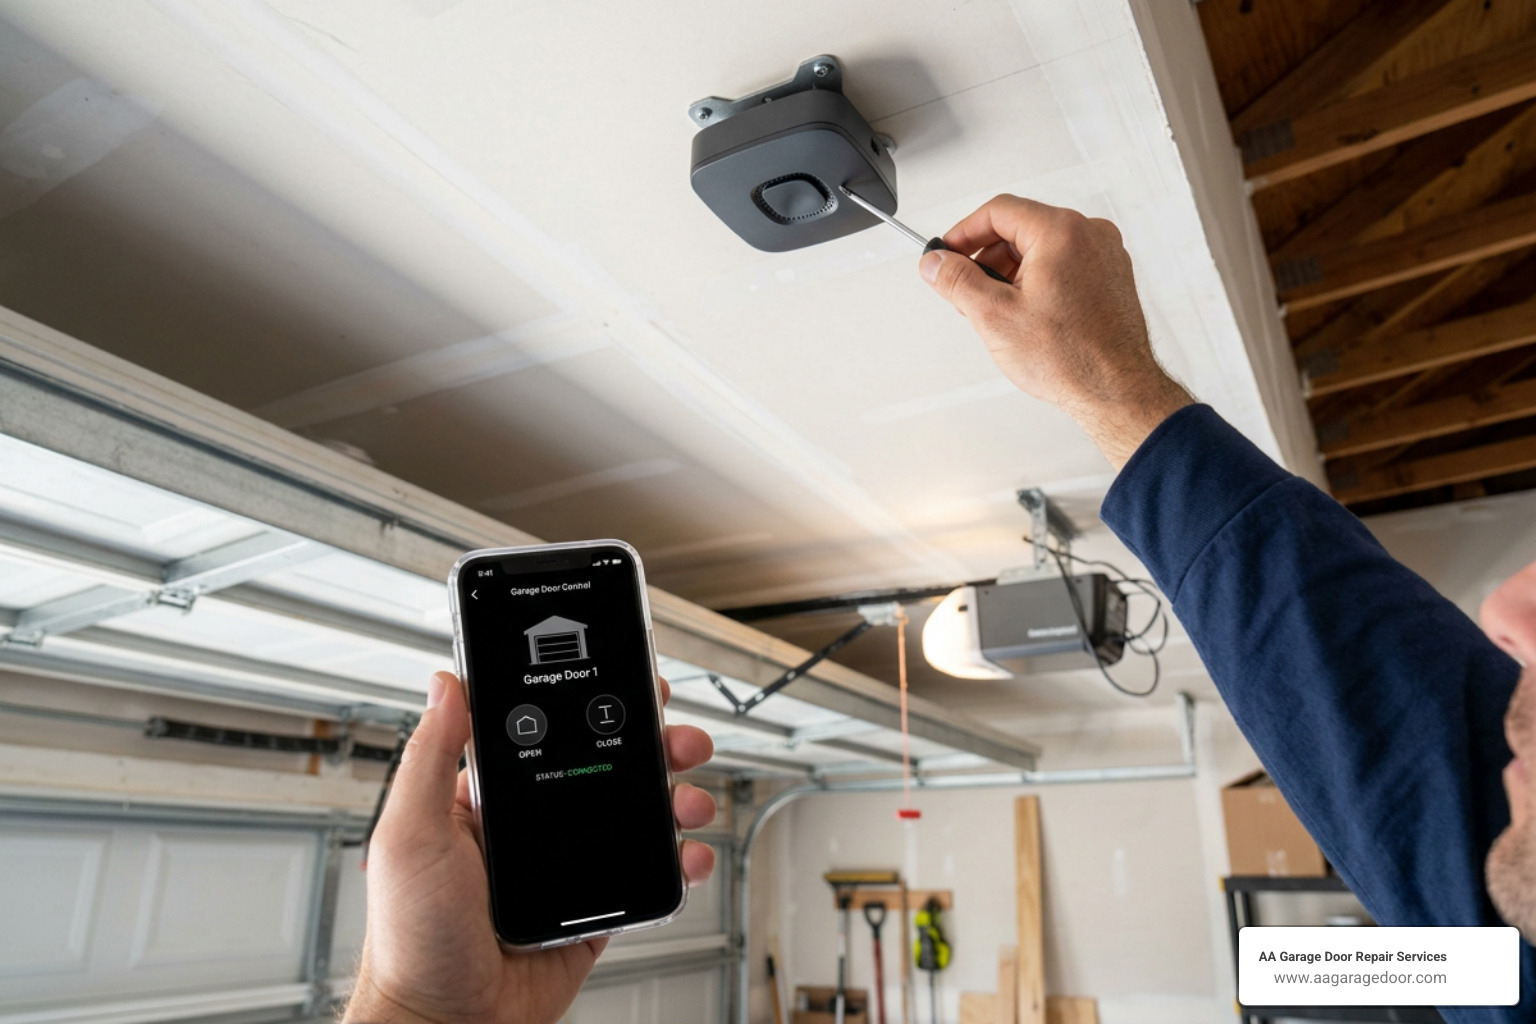
- Select a Location: Mount the hub on the ceiling, ideally within 6 feet of your garage door opener and near a power outlet. It must be visible from the garage floor and positioned so its warning light can be seen when the door is closing.
- Mount the Bracket: Secure the mounting bracket to the ceiling using the included screws. If you are drilling into drywall, use the provided wall anchors.
- Slide and Lock: Slide the myQ hub onto the bracket until it clicks into place.
- Plug in the Power: Connect the power supply to the hub and plug it into the ceiling outlet. The LED light on the hub will begin flashing blue, indicating it is ready for setup.
Pro Tip: Unplug your actual garage door opener motor from the outlet while mounting the hub to prevent any accidental activation while you are working on the ceiling.
Step 2: How to Program MyQ Garage Door Opener App Settings
Once your physical hub is powered up, it is time to connect it to your smartphone and your home network.
- Download the App: Download the official myQ app from the Apple App Store or Google Play Store. Ensure your phone is running iOS 16.0 or later or a modern version of Android.
- Create an Account: Launch the app and sign up for a free account. If you already have an account, log in.
- Add a Device: Tap the + (plus) icon on the app dashboard and select “Device.” Choose “Smart Garage Control” or “Smart Garage Hub.”
- Scan the QR Code: Use your phone’s camera to scan the unique QR code on the back of the hub. You can also enter the 10-digit serial number manually if the camera has trouble focusing.
- Connect to Wi-Fi: The app will prompt you to join a temporary myQ Wi-Fi network. Once connected, select your home’s 2.4 GHz Wi-Fi network from the list and enter your password.
- Confirm Connection: Wait for the LED indicator on the hub to turn solid green. This indicates that the hub has successfully obtained an IP address and connected to the Chamberlain cloud servers. For official manufacturer support, you can review the Easy Setup for Smart Access Solutions portal.
Step 3: How to Program MyQ Garage Door Opener Motor Unit
With the app connected to the hub, you must now establish a wireless link between the hub and your actual garage door motor unit. This step essentially teaches the hub to act as a remote control for your door.
- Follow the App Prompts: The app will ask you to select the brand of your garage door opener (Chamberlain, LiftMaster, Craftsman, Genie, etc.) and the color of its Learn button.
- Locate the Learn Button: Safely climb a ladder to access your overhead motor unit. Locate the Learn button on the back or side panel.
- Initiate Pairing: In the app, tap “Next.” The app will instruct you to press and release the Learn button on the motor unit. Do not hold the button down, as holding it for more than 6 seconds will erase all your existing remotes and keypads!
- Watch for the Flash: Within 30 seconds of pressing the Learn button, the myQ hub will send a pairing signal to the motor. Your garage door opener’s light bulbs will flash, or you will hear two distinct clicking sounds. This confirms that the remote code has been accepted.
- Complete the Link: Tap “Next” in the app to finalize the connection. If you want to read more about managing this connection and understanding accessory limits, check out How Do I Set Up My MyQ Garage Door Opener and Manage the Subscription?.
Step 4: Mount and Align the Door Sensor
The door sensor is a critical safety component. It acts as a tilt sensor, telling the hub whether the garage door is physically open or closed. Without it, the app will only show a “Monitor Door Only” status and won’t let you trigger the door remotely.
- Prepare the Sensor: Pull the plastic battery tab out of the door sensor to power it on.
- Identify Mount Location: The sensor must be mounted on the inside of the top panel of your garage door. It must be positioned vertically, with the “Up” arrow pointing toward the ceiling when the door is closed.
- Clean the Surface: Wipe down the mounting area on the metal door panel with rubbing alcohol to ensure the adhesive strips stick properly.
- Attach the Sensor: Use the included double-sided fastening strips to mount the sensor to the door. For a more permanent installation, you can use the small mounting screws included in the box.
- Test the Battery: Press the test button on the front of the sensor. The hub should beep and flash its light, proving that the RF signal is strong and the sensor battery is active.
Step 5: Test and Verify the Smart Connection
Before packing up your tools, you must test the system to ensure it operates safely and reliably from outside your home network.
- Perform a Test Cycle: Stand clear of the garage door path. Open the myQ app and tap the garage door icon.
- Observe the Safety Features: When closing the door via the app, the myQ hub will flash its strobe light and beep loudly for several seconds before the door moves. This is a federal safety requirement designed to warn anyone in the garage that the door is about to close remotely.
- Verify Status Updates: Verify that the app’s status correctly changes from “Opening” to “Open,” and “Closing” to “Closed.”
- Set Up Alerts: We highly recommend setting up real-time push notifications. You can configure the app to alert you if the garage door is left open for more than 15 minutes, or if it opens during late-night hours.
- Remote Programming: If you need to pair physical remotes alongside your smart setup, you can read our guide on how to program a new garage door remote.
Reconnecting and Resetting Your MyQ Device
There are times when you must clear your system’s memory and start fresh. This usually happens when you replace a router, change your Wi-Fi password, replace an opener’s logic board, or clear the motor’s memory to remove an old tenant’s remote access.
If you have cleared your opener’s memory, you will need to re-pair your myQ device because the remote code link has been erased. To learn more about this recovery process, refer to the official Wi-Fi Garage Door Opener Setup documentation.
Performing a Soft Reset vs. a Factory Reset
If your myQ hub goes offline, you can try two different levels of resets:
- Soft Reset (Unplug Method): Unplug the myQ hub from the wall outlet for 30 seconds, then plug it back in. This power-cycling step resolves roughly 90% of temporary offline issues.
- Factory Resetting the Hub: If you are changing your Wi-Fi network entirely or transferring ownership of the hub, a full factory reset is required.
- Press and hold the Settings button (gear icon) on the myQ hub until the blue LED begins to flash (about 6 seconds).
- Immediately press and hold the button again until the hub beeps and the blue LED flashes once more. This completely erases all Wi-Fi settings, paired sensors, and motor codes from the hub’s internal memory.
- If you need to reprogram your standard handheld remotes after clearing your opener’s memory, follow our step-by-step instructions on how to program a garage remote control.
Troubleshooting Common MyQ Programming Issues
Smart home technology is incredibly convenient, but it can occasionally hit a snag. Here are the most common myQ issues we encounter in the field and how to solve them:
1. The App Displays “Monitor Door Only”
This is the most common support call we receive. It means the myQ hub knows whether the door is open or closed (via the tilt sensor), but it cannot send the command to move the motor.
- The Fix: This usually happens because the pairing link between the hub and the motor was broken or cleared. Delete the door sensor from your app settings, run through the “Add Device” wizard again, and carefully re-pair the hub to your motor unit’s Learn button. Additionally, check that the door sensor’s battery (CR2450) isn’t dead.
2. “Device Offline” or Wi-Fi Disconnections
If your hub frequently drops its connection, your garage’s physical structure is likely blocking the signal. Brick, steel, and foil-faced insulation are notorious for killing Wi-Fi.
- The Fix: Move the myQ hub closer to the garage door or install a dedicated Wi-Fi extender. Ensure your router is broadcasting a clear 2.4 GHz signal. If you have a modern “mesh” Wi-Fi network that automatically merges 2.4 GHz and 5 GHz bands under one name, you may need to temporarily disable the 5 GHz band in your router settings during the initial myQ pairing process.
3. The Door Won’t Close from the App (Beeps but Doesn’t Move)
If the hub flashes and beeps but the door refuses to move downward, your physical garage door safety sensors (the infrared eyes near the floor) are likely blocked or misaligned.
- The Fix: Inspect the safety sensors at the bottom of your garage tracks. If the green or amber LED lights on those sensors are blinking or off, gently realign them until they glow steadily. The myQ app will block remote closing commands as a safety precaution if it detects any potential obstruction.
For advanced users and smart home hobbyists looking to bypass official cloud limitations, developers have built open-source integrations. You can explore the python-myq API integration page to see how custom scripts communicate with the myQ platform.
MyQ Free Features vs. Paid Smart Video Subscriptions
Many homeowners worry that they will be locked into a monthly subscription just to control their garage door. Fortunately, basic smart control is 100% free. You do not need a subscription to open, close, or monitor your door.
However, Chamberlain offers paid tiers for advanced video features and third-party delivery integrations. Below is a breakdown of what is free versus what requires a paid plan:
| Feature | Free Tier | Paid Subscription (Smart Video / Access Pass) |
|---|---|---|
| Remote Open & Close | Yes | Yes |
| Real-Time Push Alerts | Yes | Yes |
| Custom Schedules | Yes | Yes |
| Family Access Sharing | Yes | Yes |
| In-Garage Delivery (Amazon Key / Walmart+) | Yes | Yes |
| Video Recording & Storage (For Video Keypads/Cameras) | No | Yes (Starts at ~$4/mo or $40/yr) |
| Smart Vehicle Integration (Tesla, Honda, VW, etc.) | No | Yes (Requires vehicle-specific plans) |
If you are a developer looking to integrate your myQ system with local smart home platforms like Homebridge, you can reference the myQ GitHub API documentation to understand how the OAuth-based v6 API handles device sharing and communication protocols.
Frequently Asked Questions About MyQ Programming
Can I program multiple garage doors with one MyQ Hub?
Yes, a single myQ Smart Garage Hub can control up to three compatible garage door openers. However, you must purchase an additional myQ door sensor for each extra door. During the setup wizard in the app, simply select “Add Device,” add the new door sensor, and pair it with the corresponding motor unit.
Why does my MyQ app say “Monitor Door Only”?
This status occurs when the myQ app can read the position of the door sensor but cannot communicate with your garage door opener motor. It is typically caused by a dead battery in the door sensor, poor alignment of the sensor, or because the opener’s memory was cleared, which deleted the hub’s programmed remote code. Re-running the motor-pairing steps in the app usually resolves this.
Does MyQ require a monthly subscription for basic functions?
No. Standard features—including remote opening, closing, scheduling, and real-time status alerts—are completely free. Paid subscriptions are only required if you want to store video footage from a myQ Smart Garage Camera or integrate the system directly with certain vehicle infotainment screens.
Conclusion
Programming your myQ garage door opener is an excellent, budget-friendly way to upgrade your home security and bring modern convenience to your daily routine. By carefully verifying your opener’s compatibility, ensuring a strong 2.4 GHz Wi-Fi connection, and following the simple step-by-step pairing process, you can easily control your garage door from anywhere in the world.
While many smart garage upgrades are straightforward DIY projects, mechanical issues with your garage door are not. If your garage door is making unusual noises, struggling to lift, or has a broken spring, attempting to install a smart opener can strain the system and cause severe damage.
At AA Garage Door Repair Services, we have been serving homeowners across St. Paul, the Twin Cities metro area, and Western Wisconsin (including Baldwin and Hudson, WI) since 2001. We provide fast, reliable 24/7 emergency service with transparent pricing and a 100% satisfaction guarantee.
Whether you need help troubleshooting a tricky smart hub installation, require professional garage door openers repair, or need an emergency technician in your area, we are here to help. If you live near Apple Valley, MN, visit our dedicated garage door repair near me Apple Valley page to schedule a local service call.
Don’t let garage door headaches keep you locked out. Contact our friendly local team today to schedule an appointment!