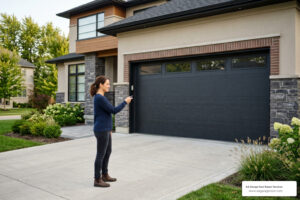
Why Securing Your Garage Door Entry Matters
Changing the garage door opener code is one of the simplest yet most effective ways to protect your home from unauthorized access. Whether you’ve just moved into a new house, lost a remote, or simply want to refresh your security, updating your code takes just minutes and provides invaluable peace of mind.
Quick Answer: How to Change Your Garage Door Opener Code
- Locate the ‘Learn’ button on your garage door opener motor unit (usually on the back or side)
- Press and hold the ‘Learn’ button until the indicator light turns off (about 6-10 seconds) to clear old codes
- Press the ‘Learn’ button again until the light turns on
- Enter your new 4-digit PIN on the keypad within 30 seconds
- Press ‘Enter’ – the opener light will flash to confirm
- Test your new code by entering it and operating the door
Your garage is often the most vulnerable entry point to your home. According to security experts, it’s recommended to change your garage door code every three to six months to maintain optimal security and reduce the risk of unauthorized entry. Previous owners, lost remotes, shared access with contractors, or even sophisticated “code grabbing” technology can all compromise your home’s safety.
As David Sands, Owner of AA Garage Door LLC with over 23 years of experience in garage door services, I’ve helped countless homeowners in the Twin Cities secure their properties through proper changing the garage door opener code procedures and comprehensive opener maintenance. Whether you’re dealing with a LiftMaster, Chamberlain, or Genie system, the process is straightforward when you know the right steps.
 Moving into a new home with icon of house keys and moving boxes, 2) Lost or stolen remote with icon of broken remote control, 3) Routine security update every 3-6 months with icon of calendar and shield - changing the garage door opener code infographic")
Changing the garage door opener code terms at a glance:
Why and When to Change Your Garage Door Code
We often take our garage doors for granted, relying on them daily for convenience. However, overlooking the security of your garage door opener code can create significant security vulnerabilities for your home. Changing the garage door opener code regularly is a fundamental step in ensuring home safety and maintaining your peace of mind.
Think of your garage door code like a password for your digital accounts. You wouldn’t use the same password for years, or share it freely, would you? The same logic applies here. An unchanged code leaves your home susceptible to unauthorized access, potentially exposing your vehicles, valuables, and even direct entry into your house.
Industry experts recommend changing your garage door code periodically, ideally every three to six months, to improve security and reduce the risk of potential breaches. This proactive approach helps protect your property from evolving threats. For routine reprogramming, provided there are no other safety or security concerns, it’s best to reset once every six months. We believe in empowering homeowners to take control of their security, and this simple act is a great place to start. For more insights on securing your home, you can refer to resources like How to Reset Garage Door Opener and Secure Your Home.
Key Moments to Update Your Code
While routine changes are important, certain life events or situations demand an immediate update to your garage door code. These are critical moments when you should prioritize changing the garage door opener code:
- Moving into a new home: This is paramount. You have no idea who the previous owners shared the code with, or if it was a simple, easily guessable sequence. Resetting it immediately ensures only you and your trusted family members have access.
- Lost or stolen remote: If a garage door remote goes missing, it’s a direct threat to your home’s security. Changing the code renders the lost remote useless.
- After giving access to service providers: Whether it’s a contractor, pet sitter, or house cleaner, if you’ve shared your code, it’s a good practice to change it once their service is complete.
- After a neighborhood break-in: If there’s been an increase in local burglaries or suspicious activity, especially involving garage doors, updating your code can provide an extra layer of protection.
- As part of routine maintenance: Even without a specific incident, a regular refresh every few months keeps your security robust.
- If you suspect the code has been compromised: Trust your instincts. If something feels off, or you believe someone untrustworthy might know your code, change it right away.
The Security Risks of an Unchanged Code
Neglecting to update your garage door code can lead to several serious security implications:
- Old codes known by previous owners: This is a common oversight when buying a new home. Without changing the code, previous residents, or anyone they shared it with, could still enter your garage.
- Stolen remotes providing direct access: A lost or stolen remote is essentially a key to your home. If the code isn’t changed, the thief has an open invitation.
- “Code grabbing” technology used by thieves: While modern openers use “rolling codes” that change with each use, older models or less secure systems can be vulnerable to devices that “grab” and replay your code, gaining entry.
- Predictable factory-default codes: Some older or basic keypads might come with default codes (like 0000 or 1234) that are rarely changed by homeowners, making them incredibly easy targets.
- Forgetting who has the code over time: Over the years, you might share your code with various people. Keeping track of who knows the current code becomes impossible, and you lose control over who can access your home.
An automatic garage door opener offers immense convenience, but its security features are just as vital. Learn more about the 10 benefits of an an automatic garage door opener for improved security and daily living.
The Step-by-Step Process for Changing the Garage Door Opener Code
Changing the garage door opener code doesn’t have to be intimidating. We’re here to walk you through the basic steps, ensuring you feel confident and secure in your home. The core of this process involves your opener’s “Learn” button, which allows you to put the system into programming mode and link new codes or remotes.

Pre-Change Checklist: Safety and Tools
Before you start, a little preparation goes a long way. Safety is our top priority, so please take a moment to gather these items and follow our precautions:
- Sturdy ladder: You’ll need to reach the motor unit, which is typically mounted on the ceiling.
- Flashlight: The area around the motor might be dimly lit, making it hard to find the ‘Learn’ button.
- Your opener’s user manual: This is your best friend! While we provide general instructions, your specific model’s manual will have precise details. If you can’t find it, a quick online search for your brand and model number usually yields results.
- Working batteries for remotes and keypads: Ensure all devices you plan to reprogram have fresh batteries.
- Ensure the garage door is closed and clear of obstructions: This prevents accidental movement during programming.
- Disconnect power if instructed by manual: Some manufacturers recommend temporarily unplugging the opener during certain steps. Always follow your manual’s guidance.
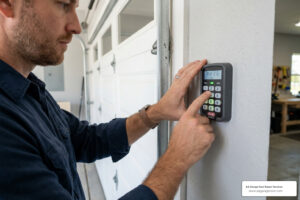
Locating and Using the ‘Learn’ Button
The ‘Learn’ button is your gateway to reprogramming your garage door opener. It’s designed to be easily accessible but not accidentally pressed.

The ‘Learn’ or ‘Program’ button is the key to reprogramming your opener. It is typically a square or round button located on the back or side of the motor unit, often near the antenna wire that hangs down. The color of this button can vary significantly by brand and model, but common colors include red, orange, purple, green, or yellow.
When you press this button, it puts your opener into “learning mode,” ready to accept a new code from a keypad or a signal from a remote. The indicator light next to it will usually illuminate or flash to confirm it’s in programming mode.
A General Guide to Changing the Garage Door Opener Code
While specific steps can vary slightly between brands like LiftMaster, Chamberlain, Genie, and Craftsman, the general principle for changing the garage door opener code remains consistent. Here’s a generalized process:
- Clear Existing Codes (Optional but Recommended): For maximum security, especially if you’re moving into a new home or suspect a code compromise, it’s best to clear all old codes from the opener’s memory first. To do this, press and hold the ‘Learn’ button on the motor unit for approximately 6-10 seconds until the indicator light goes out. This effectively erases all previously programmed remotes and keypads.
- Initiate Programming Mode: Press and immediately release the ‘Learn’ button. The indicator light will come on, signaling that the opener is ready to learn a new code. You typically have about 30 seconds to complete the next step.
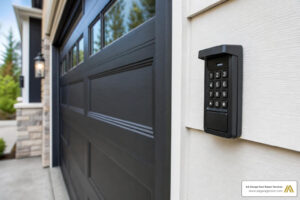
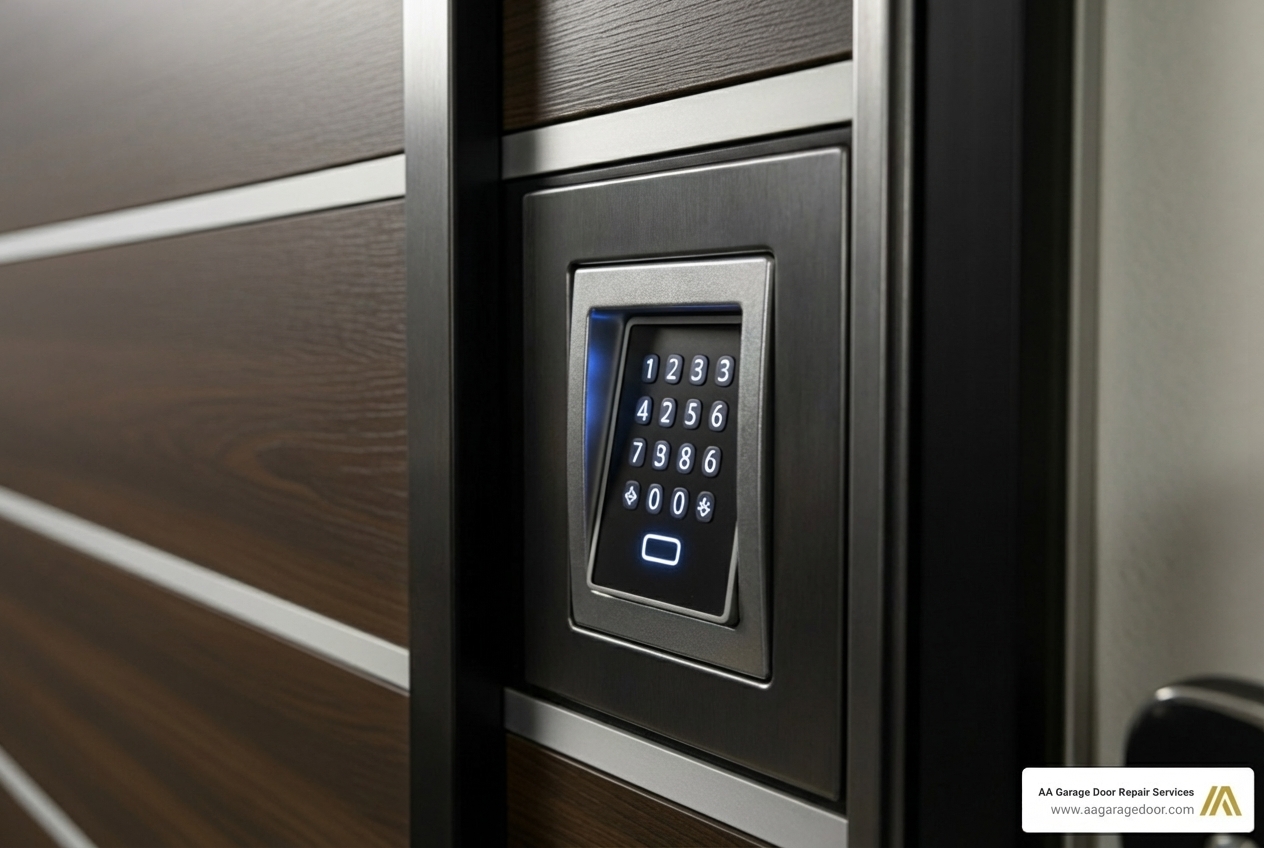
- Enter Your New Code on the Keypad: Go to your garage door keypad. Enter your chosen new 4-digit (or more, depending on your keypad) PIN.
- Confirm the New Code: Press the ‘Enter’ or ‘Program’ button on your keypad. The opener’s light will usually blink once or twice, or you might hear a click, confirming that the new code has been accepted.
- Test Your New Code: Step away from the opener and enter your new code on the keypad. The garage door should open or close. If it doesn’t, wait a few seconds and try again.
Specifics can vary. For instance:
- Chamberlain, LiftMaster, and Craftsman often use similar processes with red, orange, purple, yellow, or green ‘Learn’ buttons.
- Genie openers might have a ‘Learn’ button that you press until an LED blinks, then you press the remote button.
- Sommer Direct Drive openers may involve pressing a ‘P’ button.
Always consult your specific owner’s manual for the most accurate instructions.
Reprogramming Remotes and Keypads After a Code Change
If you chose to clear all existing codes from your opener’s memory (Step 1 above), then all your remotes and keypads will need to be reprogrammed. If you only changed the keypad code without clearing the memory, your existing remotes should still work, but it’s always a good idea to test them.
Here’s how to reprogram your devices:
- For Remotes: Press and immediately release the ‘Learn’ button on the motor unit. The indicator light will come on. Within 30 seconds, press and hold the button on your handheld remote that you wish to use. Release the remote button when the opener’s light blinks or you hear a click, confirming it’s programmed. Repeat for all other remotes.
- For Keypads: After you’ve cleared the memory or changed the main code, you’ll need to link your keypad again. Press and immediately release the ‘Learn’ button on the motor unit. Within 30 seconds, enter your new PIN on the keypad and press the ‘Enter’ or ‘Program’ key. The opener’s light will flash to confirm.
For detailed instructions on programming your keypad, including specific models and features, refer to our comprehensive garage keypad programming guide.
Advanced Security and Best Practices
Once you’ve mastered changing the garage door opener code, you can explore more advanced security measures and best practices to further safeguard your home. Modern garage door technology offers innovative solutions, from smart features to temporary access codes.
How to Choose a Secure and Memorable PIN
A secure PIN is your first line of defense. While we want codes that are easy for us to remember, we also need them to be difficult for others to guess. Here are our tips for creating a strong garage door code:
- Avoid common sequences: Stay away from obvious choices like 1234, 0000, 1111, or sequential numbers. These are the first things a potential intruder will try.
- Don’t use personal information: Birthdates, anniversaries, house numbers, or phone number digits are easily findable and should never be used.
- Use a longer PIN if your system allows: While most keypads default to four digits, some allow for longer codes. The more digits, the harder it is to guess.
- Mix in less common numbers: Instead of 1, 2, 3, try incorporating numbers that don’t follow an obvious pattern.
- Change the PIN periodically: Even a strong PIN can become a vulnerability if it’s used indefinitely. Make it a habit to refresh your code every few months.
- Don’t write it down near the keypad: This might seem obvious, but we’ve seen it happen! Keep your code in a secure, memorable place.
How to Set a Temporary Code for Guests
One of the most convenient and secure features of many modern keypads is the ability to set temporary PINs. This is incredibly useful for:
- Service providers: Grant access to a contractor or repair person for a specific duration or number of uses without giving them your permanent code.
- Short-term guests or family: If relatives are visiting for a week, you can provide them with a temporary code that expires after a set time.
- Deliveries: Some systems allow for one-time use codes for package deliveries into your garage.
The process typically involves entering your master PIN, then pressing a specific key (like ‘*’ or ‘#’), then entering the temporary PIN and setting the parameters (e.g., number of hours, number of uses). For example, some systems allow you to set a temporary code to work up to 255 times. Once the parameters are met, the temporary code automatically becomes invalid. This gives you complete control over who accesses your garage and when.
Changing Codes on Smart Garage Door Openers
Smart garage door openers have revolutionized home access and security. For homeowners with smart systems, like those from LiftMaster, changing the garage door opener code often takes on a digital dimension.
Smart openers are typically managed via a smartphone app (like myQ for LiftMaster). This means:
- App-based code changes: You can often change or create new keypad codes directly within the app’s settings, eliminating the need to climb a ladder to the motor unit.
- User management: The app allows you to add and remove users, assign unique codes to each person, and even set access schedules (e.g., a cleaner’s code only works on Tuesdays between 10 AM and 2 PM).
- Remote control and monitoring: You can open/close your garage door from anywhere, receive alerts if the door is left open, and review activity logs to see when the door was used and by whom. This provides real-time control and activity logs for superior security.
This level of control offers unparalleled convenience and peace of mind, allowing you to manage your garage access with just a few taps on your smartphone.
Troubleshooting Common Code Change Issues
Even with the clearest instructions, sometimes things don’t go exactly as planned. If you encounter a snag while changing the garage door opener code, don’t fret! Many common problems have straightforward solutions. However, if you’re facing persistent issues or feel overwhelmed, it might be time for a professional garage door opener repair.
What to Do if You Forget Your Garage Door Opener Code
Forgetting your PIN can be frustrating, but it’s a common issue. If you forget the PIN, you must perform a full reset of your garage door opener system. This involves clearing the opener’s memory entirely.
To do this:
- Locate the ‘Learn’ button on your garage door opener motor unit.
- Press and hold the ‘Learn’ button for about 6-10 seconds until the indicator light goes out. This action erases all previously programmed codes and remotes from the opener’s memory.
- After the reset, you will need to reprogram all your remotes and keypads from scratch, following the steps outlined in the “Reprogramming Remotes and Keypads After a Code Change” section above. Think of it as starting fresh!
Common Problems and Solutions When Changing the Garage Door Opener Code
Here’s a quick rundown of issues we often see and how to tackle them:
- Keypad is unresponsive:
- Solution: The most common culprit is a dead or weak battery. Check and replace the keypad’s battery, typically a 9-volt. Also, ensure the keypad isn’t physically damaged or obstructed.
- New code won’t save:
- Solution: Ensure you are following the correct programming sequence precisely and completing the steps within the 30-second time limit after pressing the ‘Learn’ button. If you hesitate or take too long, the opener will exit programming mode. Try again, moving quickly and accurately.
- Remote won’t sync:
- Solution: First, check the remote’s battery. Next, ensure the remote is compatible with your garage door opener model. Not all remotes work with all openers. Make sure you are pressing the correct button on the remote and holding it long enough for the opener to register.
- Opener light blinks but door doesn’t move:
- Solution: This often indicates a safety sensor issue. The photo-eye sensors, located near the bottom of your garage door tracks, must be perfectly aligned and free of obstructions. Check for dirt, spiderwebs, or objects blocking the beam. Realign them until both indicator lights on the sensors are solid.
- The ‘Learn’ button doesn’t seem to work:
- Solution: Ensure you are pressing it correctly and holding it for the recommended duration. If the light never comes on or goes out, there might be an electrical issue or a faulty circuit board. In such cases, it’s best to call a professional.
- The remote works, but the keypad doesn’t:
- Solution: This suggests the issue is specific to the keypad. Try replacing its battery first. If that doesn’t work, you may need to clear the keypad’s memory (if it has one) or perform a full reset and reprogram it.
If these troubleshooting tips don’t resolve your issue, or if you’re uncomfortable performing these steps, please don’t hesitate to contact us. Our skilled technicians at AA Garage Door Repair Services are always ready to assist homeowners in St. Paul, the Twin Cities, and Western WI.
Frequently Asked Questions about Changing Garage Door Codes
How often should I change my garage door opener code for optimal security?
For routine security, it is best practice to change your garage door code every three to six months. You should change it immediately if you lose a remote, move into a new home, or suspect the code has been compromised. This regular refresh significantly improves your home’s security posture.
Do I need to reprogram my car’s built-in remote after changing the code?
Yes. If you have a universal remote built into your vehicle (like HomeLink or similar integrated systems), you will need to clear its previous setting and reprogram it to the opener after you have set the new code. The process for in-car remotes typically involves holding down certain buttons in your car until the indicator light flashes, then pressing the ‘Learn’ button on your garage door opener, and finally pressing the car’s remote button again. Always refer to your vehicle’s owner’s manual for specific instructions.
Can I change the code without the ‘Learn’ button?
Most modern garage door openers (manufactured after 1993) use a ‘Learn’ button for programming. However, older models (pre-1993) may use DIP switches instead of a ‘Learn’ button. This involves matching a series of 8-12 small switches inside the remote and on the motor unit. If your opener has these small switches, you’ll need to physically change the switch positions in both the remote and the motor unit to create a new code. Modern systems almost exclusively use ‘Learn’ button technology for rolling codes, which offer improved security. For more information on reprogramming older remotes, you can see this guide to reprogramming a remote.
Conclusion: Take Control of Your Home’s Security
Changing the garage door opener code is a simple yet powerful step to secure your home and family. It’s a fundamental aspect of home maintenance that directly impacts your safety and peace of mind. By following this guide, you can confidently manage access to your property, whether you’re moving into a new home, replacing a lost remote, or simply updating your security for the season.
Regular updates and secure PINs are your first line of defense against unauthorized entry. Taking a few minutes to update your code can prevent a world of trouble.
For any complex issues, if you’re unsure about your specific garage door opener model, or if you need professional assistance with your garage door opener, the expert team at AA Garage Door Repair Services is here to help. We’re proud to serve homeowners in St. Paul, the Twin Cities, Baldwin WI, Woodbury MN, and Western WI, including Hudson, WI. Our team is ready to provide fast, reliable service to ensure your garage door security is always at its best.