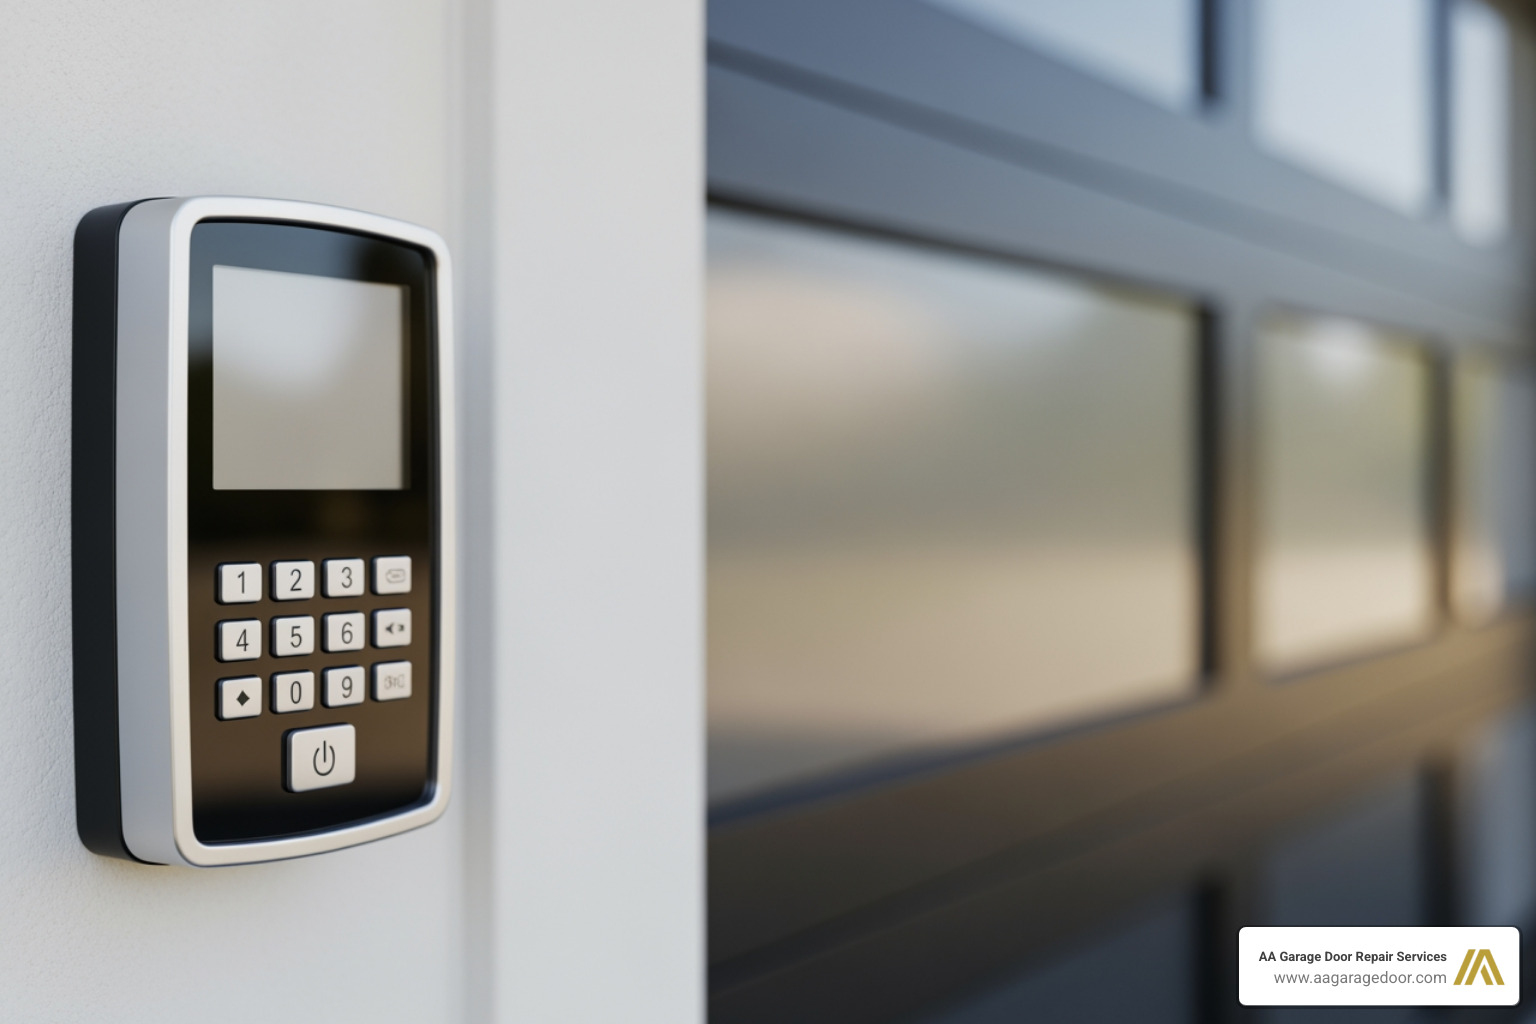
When Your Keypad Won’t Open Your Door
A universal garage door keypad reset is often the quickest solution when your keypad stops responding, rejects your PIN, or simply won’t sync with your opener. As a leading provider of reliable garage door services in the Twin Cities, we know how frustrating a faulty keypad can be. Fortunately, whether you’re dealing with a dead battery, a forgotten code, or a system glitch, most keypad problems can be resolved in just a few minutes without professional help.
Quick Answer: How to Reset a Universal Garage Door Keypad
- Locate the ‘Learn’ button on your garage door opener motor unit (usually on the back or side panel)
- Press and hold the ‘Learn’ button for 6-10 seconds until the LED light turns off (this clears the memory)
- On the keypad, press and hold * and # until the lights stop blinking
- Enter your new 4-digit PIN and press #
- Press the ‘Learn’ button once on the opener
- Within 30 seconds, enter your new PIN on the keypad and press Enter
- Test the code – the opener lights should flash or you’ll hear clicks
If you’re experiencing persistent issues with your opener system, our team provides comprehensive garage door opener repair throughout the Twin Cities metro area.
I’m David Sands, owner of AA Garage Door LLC, and over 23 years I’ve guided countless homeowners through universal garage door keypad reset procedures for every major brand, from simple battery swaps to complete system reprogramming. This guide walks you through the entire diagnostic and reset process, ensuring you regain secure access to your home quickly and safely.

First, Diagnose the Problem: Why Did Your Keypad Stop Working?
Before diving into a full universal garage door keypad reset, it’s wise to play detective for a moment. Many common keypad failures are surprisingly simple to fix and don’t always require a complete system overhaul. While the average lifespan of a garage door keypad is estimated to be between 5 to 10 years, performance issues can crop up at any time due to various factors. We’ve seen it all, from minor annoyances to complete keypad shutdowns.
Check the Simple Stuff First
Sometimes, the solution is right under our noses, or in this case, under the keypad cover!
- Dead Batteries: This is by far the most common culprit. A dead or weak battery is responsible for the majority of malfunctioning garage door keypads. We’ve found that battery replacement is the most common fix for a malfunctioning garage door keypad. Most models use either 9-volt or 12-volt batteries, so check your specific model’s requirements. If your keypad lights are dim, flickering, or not lighting up at all, it’s a strong indicator that the battery needs to be replaced. For more insights on this power source, check out our guide on Garage Door Opener Battery.

Stuck or Dirty Keys: Over time, dirt, dust, and grime can accumulate under the keys, causing them to stick or become unresponsive. Imagine trying to type on a keyboard with crumbs under every key – it’s frustrating! Dirt and debris trapped under the keys are a common reason for keys sticking to the pads in garage door keypads. A good cleaning can often resolve this. We recommend using a soft brush and a gentle cleaning solution (like rubbing alcohol on a cloth) to carefully clean around and under the buttons.
Minor Signal Interference: While less common, sometimes external factors can interfere with the keypad’s signal to the opener. This could be anything from a new Wi-Fi router to nearby radio frequencies. Testing the keypad from different distances or angles might help rule this out.
Physical Damage: Has your keypad taken a beating from the elements or an accidental bump? Cracks, missing buttons, or obvious signs of wear and tear can certainly prevent it from working correctly. If you spot significant physical damage, a repair might be impossible, and replacement could be the best option.
Deeper System Glitches
If the simple checks don’t yield results, we might be looking at something a bit more complex, though still often fixable without a professional call-out.
Incorrect PIN Entry Lockout: Modern keypads are designed with security in mind. If an incorrect PIN is entered too many times consecutively, the keypad might temporarily lock you out. Reprogramming the PIN is often necessary after changing batteries or if the PIN has expired or been entered incorrectly too many times. Think of it as your keypad taking a time-out!
Frayed Wiring: For some keypads, especially older or wired models, internal wiring can become frayed or loose. This can lead to specific keys malfunctioning. Frayed wiring inside the remote is a common cause of specific key malfunctions in garage door keypads. If you’re comfortable opening the keypad (usually just a few screws), carefully inspect for any disconnected wires and gently reattach them if possible. These wires typically carry very low voltage, so there’s no shock risk.
System Memory Issues: Just like your computer, your garage door opener can sometimes experience system memory glitches. A simple reboot by unplugging the garage door opener for five minutes can resolve system memory issues and allow for a fresh start. This is often an easy fix and can save you a lot of headache. To learn more about how to do this, check out this video: reboot the whole thing.
Expired Temporary PIN: If you’ve set up a temporary PIN for a delivery person or a guest, it might have a set expiration or a limited number of uses. Once these limits are reached, the PIN will no longer work. This isn’t a malfunction, but rather the keypad working as intended, requiring you to program a new temporary or permanent code.
How to Perform a Universal Garage Door Keypad Reset: A Step-by-Step Guide
Performing a universal garage door keypad reset effectively erases its current programming and allows you to sync it afresh with your garage door opener motor. This process is usually straightforward and typically takes only a few minutes, turning a frustrating lockout into a quick fix. Let’s walk through it together.
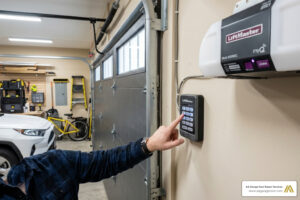
Step 1: Locate the ‘Learn’ Button on Your Opener
This little button is the key to all programming. It’s usually found on the back or side of the garage door opener motor unit, which is mounted on your garage ceiling.
- What to look for: It’s often a square button, and its color can vary depending on the brand and age of your opener. Common colors include purple, red, orange, or green.
- Where to find it: You’ll typically find it near the antenna wire that hangs down from the motor unit. Sometimes it’s under a light cover or a small access panel.

Understanding your opener’s programming functions is crucial for any keypad or remote setup. For more detailed insights into opener programming, we’ve put together a comprehensive resource: More info about opener programming.
Step 2: Clear the Opener’s Memory
Before you can program a new PIN or sync a keypad, it’s a good practice to clear any existing codes from your opener’s memory. This is especially important if you’ve lost a remote or keypad, as it ensures unauthorized access is revoked.
- How to clear: Press and hold the ‘Learn’ button on your opener for approximately 6-10 seconds.
- Confirmation: The LED indicator light next to the ‘Learn’ button will typically turn off, or you might hear a click, indicating that all previously programmed remotes and keypads have been erased from the opener’s memory. This is an essential security step, especially if you’ve lost a remote or keypad, as it ensures no one else can use that old code to access your garage.
Step 3: The Universal Garage Door Keypad Reset Process
Now that your opener’s memory is clear, we can proceed with the universal garage door keypad reset and programming. This sequence will link your keypad to your opener.
- Prepare the keypad: On your universal garage door keypad, press and hold both the
*(star) and#(pound) keys simultaneously. Hold them until the keypad lights stop blinking and remain steadily illuminated. This puts the keypad into programming mode. - Enter your new PIN: While the keypad lights are steady, enter your desired new 4-digit Personal Identification Number (PIN). Choose something memorable but not easily guessable.
- Confirm PIN: After entering your new PIN, press the
#key. The keypad lights should start blinking again, indicating it’s ready to pair. - Initiate pairing on opener: Go back to your garage door opener motor unit. Briefly press and release the ‘Learn’ button once. Do not hold it down this time; a quick press is all that’s needed. The LED light on the opener should come on, indicating it’s in pairing mode for a short period (usually around 30 seconds).
- Complete pairing on keypad: Quickly return to your keypad. Within 30 seconds of pressing the ‘Learn’ button on the opener, enter your new 4-digit PIN again, and then press the
Enterbutton (or the large button often marked with an arrow). - Confirmation: The lights on your garage door opener should flash, or you’ll hear a couple of clicks, confirming that the keypad has successfully been programmed with your new PIN.
Safety and Model-Specific Instructions
Safety should always be our top priority when working with garage doors.
- Safety precautions: When testing your newly programmed keypad, always keep the garage door in sight. Ensure no children or pets are near the door’s path. If you’re performing extensive testing, consider disconnecting the garage door from the opener by pulling the emergency release cord. This allows you to test the opener’s function without the door moving.
- Find specific instructions: While these steps cover most universal keypads, specific models from brands like Chamberlain, LiftMaster, or Genie might have slight variations. If you encounter difficulties, we highly recommend checking the manufacturer’s website for your exact model’s manual. You can often find detailed programming instructions there. For a visual guide, this YouTube video can also be helpful: How to reset your garage door keypad pin number.
Programming Your New PIN and Advanced Features
Once your universal garage door keypad reset is complete and the keypad is successfully synced with your opener, the next step is to ensure your personal access code is set up just the way you like it. Many modern universal keypads also come with additional features that can improve convenience and security.
How to Program a New PIN After a Universal Garage Door Keypad Reset
After clearing your opener’s memory and linking the keypad, you’ve essentially given your keypad a fresh start. Now, it’s time to solidify your personal access code.
- Enter the new 4-digit PIN: This is the code you just chose and entered during the reset process.
- Press the ‘Enter’ or ‘#’ key: This confirms your PIN entry.
- Test the code: Stand clear of the garage door and enter your new PIN, then press the ‘Enter’ key. The garage door should activate, either opening or closing. If it works, congratulations! You’ve successfully programmed your new PIN. If not, repeat the steps carefully, ensuring you’re within range of the opener and pressing the buttons precisely.
For a comprehensive walkthrough on programming various keypad models and understanding different programming modes, our Complete keypad programming guide is an excellent resource. It covers everything from initial setup to troubleshooting common programming hiccups.
Using Temporary PINs and Other Features
Universal keypads aren’t just for primary access; they often offer a suite of convenient features designed to make your life easier.
- Programming a temporary PIN: This is a fantastic security feature. If you have a guest staying over, a contractor working at your home, or need to grant temporary access for a delivery, you can program a temporary PIN. This code can be set to expire after a certain number of uses or after a specific time period. This means you don’t have to give out your permanent code, and you can easily revoke access once it’s no longer needed. Check your keypad’s manual for specific instructions on setting temporary codes, as this process can vary.
- One-touch close feature: Many keypads offer a quick-close option, often by pressing a single button (like ‘0’ or a dedicated ‘Close’ button) without needing to enter your full PIN. This is super handy when you’re rushing out the door and just want to secure the garage quickly.
- Wired vs. wireless keypad differences: While most modern universal keypads are wireless (making installation and placement incredibly flexible), some older or specialized models might be wired. A wireless keypad communicates via radio frequency with your garage door opener, whereas a wired keypad has a physical connection. The reset and programming steps are largely similar for both, but wireless keypads require battery maintenance, while wired ones draw power from the opener system. For the purposes of a universal garage door keypad reset, we’re primarily focusing on wireless models, which are the most common.
Troubleshooting: What to Do if the Reset Fails
So you’ve gone through the universal garage door keypad reset process, changed the batteries, and still, your trusty keypad isn’t cooperating? Don’t fret! Sometimes, deeper issues are at play. We’ve encountered these situations countless times in our service areas of St. Paul, Baldwin, Woodbury, and Hudson, and we can guide you through the next steps.
Common Post-Reset Problems
If your keypad is still giving you the cold shoulder after a reset, consider these possibilities:
- Keypad blinks but doesn’t operate the door: This often indicates that the keypad is powered on and receiving your input, but it’s not successfully communicating with the garage door opener. It could be a programming error where the keypad didn’t fully sync with the opener, or it might be related to signal issues.
- Incorrect opener frequency selected: Universal keypads are designed to work with various garage door opener brands and their different radio frequencies (e.g., 315MHz, 390MHz). Some universal keypads require you to select the correct frequency or brand during programming. If the wrong one is chosen, the keypad won’t be able to “talk” to your opener. Double-check your opener’s manual for its specific frequency or brand compatibility.
- Out of range: While keypads are usually mounted close to the garage door, sometimes extreme weather or slight shifts in position can affect their range. Ensure the keypad is within optimal signal range of the opener’s motor unit.
- Signal interference from LED lights or metal surfaces: Believe it or not, certain LED light bulbs (especially older, cheaper ones) can emit radio frequency interference that disrupts your garage door opener’s signal. Similarly, mounting a wireless keypad directly onto a large metal surface (like a metal garage door frame) can sometimes block or weaken its signal. If you suspect interference, try temporarily removing any new LED lights or placing a non-conductive buffer (like wood or plastic) between the keypad and a metal surface.
When to Replace Instead of Attempting a Universal Garage Door Keypad Reset
While we love a good DIY fix, there comes a point where a replacement is the more practical and cost-effective solution.
Visible physical damage: If your keypad looks like it’s been through a battle – cracked casing, missing buttons, or a completely faded display – it’s likely beyond a simple reset.
Water damage or corrosion: Keypads are exposed to the elements. If moisture has seeped in, it can corrode the internal electronics, leading to intermittent or complete failure. Once corrosion sets in, repairs are often futile.
- Unresponsive after all troubleshooting steps: If you’ve diligently followed all the diagnostic and reset steps, replaced batteries, checked for interference, and the keypad still refuses to work, it’s a strong indicator of an internal component failure.
- Keypad is over 10 years old: As mentioned earlier, the average lifespan of a garage door keypad is 5 to 10 years. If yours is on the older side, its components may simply be worn out. Universal keypads are available that can work with any garage door opener, offering a solution when a specific keypad has worn out, and they are generally a cost-effective replacement. When it’s time for a full upgrade, our Guide to opener replacement can help you choose the best option.
If You’re Locked Out
We understand that sometimes, troubleshooting can take time, and you need immediate access to your garage. If you’re stuck and the keypad isn’t cooperating, you can always manually open your garage door from the inside. This is a vital skill for any homeowner. Learn how to manually open your garage door safely and efficiently.
Frequently Asked Questions about Universal Keypad Resets
We often hear similar questions from homeowners struggling with their garage door keypads. Here are some of the most common ones, answered to help you regain control.
How do I find the instructions for my specific keypad model if I lost the manual?
Lost manuals are a common occurrence, but thankfully, manufacturers have made it easier to find this information. Most major garage door opener manufacturers, such as Chamberlain, LiftMaster, Genie, and Sears Craftsman, post their complete product manuals and programming instructions directly on their official websites. To find yours, simply look for the model number on the back of your keypad or on the garage door opener motor unit itself. Once you have the model number, a quick search on the manufacturer’s website (or even a general web search) will usually lead you to a downloadable PDF manual. These digital manuals are often more detailed and easier to steer than the paper versions.
What is the difference between resetting the keypad and clearing the opener’s memory?
This is a crucial distinction that often confuses people!
- Resetting the keypad: This process (often initiated by pressing a combination of keys like
*and#on the keypad) primarily clears the PIN and any other specific settings from the keypad itself. It essentially wipes the keypad’s internal memory clean, preparing it to be programmed with a new PIN and linked to an opener. The keypad forgets its previous code. - Clearing the opener’s memory: This involves pressing and holding the ‘Learn’ button on the garage door opener motor unit (usually for 6-10 seconds). This action erases all synced devices from the main motor unit’s memory. This means all previously programmed remotes, keypads, and even smart home devices will no longer operate the garage door. This is a critical security step, especially if a remote or keypad has been lost or stolen, as it ensures that nobody can use those old devices to gain access to your garage. After clearing the opener’s memory, you’ll need to reprogram all your devices that you want to use with that opener.
Resetting the keypad fixes the keypad’s internal programming, while clearing the opener’s memory fixes the opener’s recognition of all devices. For a universal garage door keypad reset, you typically perform both steps to ensure a fresh, clean connection.
Can I program one universal keypad to control multiple garage doors?
Yes, absolutely! Most modern universal garage door keypad models are designed for convenience and versatility, allowing them to control up to two or even three different garage door openers. This is a fantastic feature for homes with multiple garage doors.
The process usually involves programming each door separately. You’ll typically:
- Initiate the programming sequence on the keypad for the first door.
- Follow the steps to link it to the ‘Learn’ button of your first garage door opener, assigning it a unique PIN.
- Then, you’ll repeat a similar process, often using a different button or a specific multi-door programming mode on the keypad, to link it to your second (and third) garage door opener, assigning each its own distinct PIN.
Always refer to your specific universal keypad’s manual for precise instructions, as the exact sequence for programming multiple doors can vary between brands and models. This multi-door capability is one of the key benefits of choosing a universal keypad, simplifying access control for your entire garage system.
Get Your Access Back Today
Performing a universal garage door keypad reset is a highly effective, straightforward DIY task that can resolve most common access issues. By diligently following our step-by-step guide—from accurately diagnosing the problem and replacing batteries to clearing your opener’s memory and reprogramming your PIN—you can typically restore convenient, secure access to your garage in just a few minutes.
However, we understand that sometimes, despite your best efforts, the keypad still won’t cooperate. Or perhaps you suspect a more significant underlying issue with the garage door opener itself. When you’ve tried everything and the frustration mounts, it’s time to call in the professionals.
For fast, reliable garage door repair and service in the St. Paul, Twin Cities, Baldwin WI, Woodbury MN, and Hudson WI areas, our expert team at AA Garage Door Repair Services is here to help. We offer 24/7 emergency service, transparent pricing, and a satisfaction guarantee, backed by our local expertise since 2001. Don’t let a stubborn keypad keep you locked out – contact AA Garage Door Repair Services online for prompt and professional support.