Why Changing Your Garage Door Keypad Code Is Essential
Change code garage door keypad is a simple security task that takes just minutes but makes a huge difference in protecting your home. As a primary access point, your garage door’s security is paramount, and managing its keypad code is a critical step in the overall safety of your property. For comprehensive garage door services that ensure your home is secure, it’s important to understand these basic maintenance tasks. Here’s the quick answer to changing your code:
How to Change Your Garage Door Keypad Code:
- Locate the Learn button on your garage door opener motor unit (usually red, yellow, or purple).
- Press and release the Learn button until the indicator light blinks.
- Enter your new 3-5 digit code on the keypad within 30 seconds.
- Press Enter/Program to save.
- Test the new code to confirm it works.
Whether you’ve just moved into a new property, recently had service workers in your garage, or simply want to maintain strong security habits, changing your code regularly protects your family and belongings. Most security experts recommend changing your PIN at least twice a year—even if you haven’t shared it with anyone.
The good news? The process is straightforward and works similarly across most brands, including LiftMaster, Chamberlain, Genie, and Overhead Door. If you’re upgrading your entire system, modern garage door openers offer improved security features like rolling codes and smartphone integration.
I’m David Sands, owner of AA Garage Door LLC, and over 23 years of helping homeowners across Wisconsin and Minnesota, I’ve guided countless customers through change code garage door keypad procedures and security best practices. As an authorized LiftMaster dealer and IDA member, I’ve seen how proper keypad management prevents unauthorized access while maintaining the convenience you expect.
 After moving into a new home to prevent previous owners or tenants from accessing your garage, 2) After giving temporary access to contractors, delivery workers, or service personnel, and 3) Every 6 months as routine security maintenance to prevent unauthorized access - change code garage door keypad infographic pillar-3-steps")
Change code garage door keypad basics:
The ‘Why’ and ‘When’: Best Practices for Keypad Security
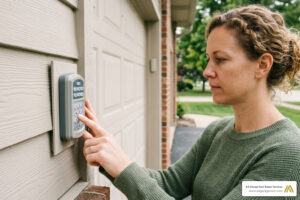
A keyless entry keypad is a primary access point to your home, making code management a critical aspect of your security strategy. For optimal home security, it is a best practice to change code garage door keypad at least twice a year, even if you haven’t shared it. Think of it like changing the locks on your front door—you wouldn’t leave an old key floating around, so why leave an old code active?
The convenience of a garage door keypad is undeniable. It eliminates the need for physical keys or fumbling for a remote, making it easy for family members to come and go. Children can access their bikes, you can quickly move garbage cans, or let in a trusted neighbor when you’re away. However, this convenience also means that anyone with your code has access to your home. That’s why managing your codes wisely is paramount.
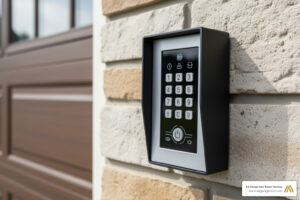
Choosing a Secure PIN
When it comes to selecting a new PIN, security and memorability are key. The typical length for a garage door keypad code is between 3 and 5 digits, though some models, like certain Overhead Door keypads, can accommodate 3 to 8 characters. While you want a code that’s easy for you and your family to remember, it should be difficult for strangers to guess.
Here are some best practices for choosing a secure PIN:
- Avoid easily guessable numbers: This includes obvious choices like your street address, birthdate, phone number, or sequential numbers (e.g., 1234, 1111). These are the first things a potential intruder might try.
- Use unique combinations: Opt for a combination that isn’t publicly available information.
- Vary digits: Instead of using the same digit repeatedly, mix them up for better security.
- Make it memorable for you: A good trick is to use numbers that have personal significance but aren’t obvious to others, like a specific anniversary year or a favorite jersey number combined with another non-sequential digit.
By following these tips, you can create a strong code that protects your home without becoming a hassle to remember.
The Benefits of a Keyless Entry System
Beyond security, keyless entry systems offer a multitude of advantages that improve your daily life. We’ve seen how these systems transform how homeowners in St. Paul, the Twin Cities, MN, and Western WI interact with their garages.
- Convenience: Imagine leaving the house for a run without needing to carry keys or a remote. Or, when your hands are full of groceries, simply punching in a code to open the door. This hands-free access is a game-changer.
- No Keys to Lose: Forgetting or losing a garage remote is a common frustration. With a keypad, that worry disappears.
- Granting Access with Ease: You can give the access code to family members who don’t need to carry a remote control around with them. This is especially helpful for kids coming home from school or for letting a trusted friend water your plants while you’re on vacation.
- Temporary Access: For service workers, delivery personnel, or house guests, a temporary PIN allows limited access without compromising your main code. We’ll dive into this feature later.
- Lost Remote Solution: If your remote control ever malfunctions or goes missing, your keypad provides a reliable backup entry method.
- Improved Security: Modern keypads often integrate with smart home systems, allowing for remote monitoring and control, adding an extra layer of security and peace of mind.
- No Wires Required: Wireless keyless entry systems eliminate the hazards associated with electrical wiring, such as rodent damage or complex installation.
For a deeper dive into how an automatic garage door opener can simplify your life, explore our guide on the 10 benefits of an automatic garage door opener.
How to Change Code on Garage Door Keypad: A Step-by-Step Guide

The process for changing your keypad code is straightforward and typically takes only a few minutes. While methods vary slightly by brand, the core principle involves putting the opener motor into “learn” mode and then programming the new code on the keypad. We’ll walk you through the general steps, then cover some brand-specific nuances.
General Steps to Change Code on a Garage Door Keypad
Here are the universal steps to change code garage door keypad:
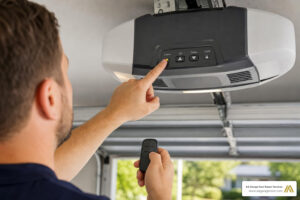
- Locate the Learn Button on Your Garage Door Opener: This is the most crucial first step. The “Learn” or “Program” button is almost always located on the motor unit itself, which is mounted to your garage ceiling. Look on the back or side panel of the motor head. It’s typically a small square or round push button and is often colored red, orange, purple, yellow, or green, depending on your opener’s brand and age. If you can’t find it, consult your owner’s manual or look for a label on the opener.
- Enter Programming Mode: Once you’ve located the button, press and release it firmly. You’ll usually see an indicator light on the motor unit start to blink, signaling that the opener is now in programming mode. You typically have about 30 seconds to complete the next step before the programming mode times out.
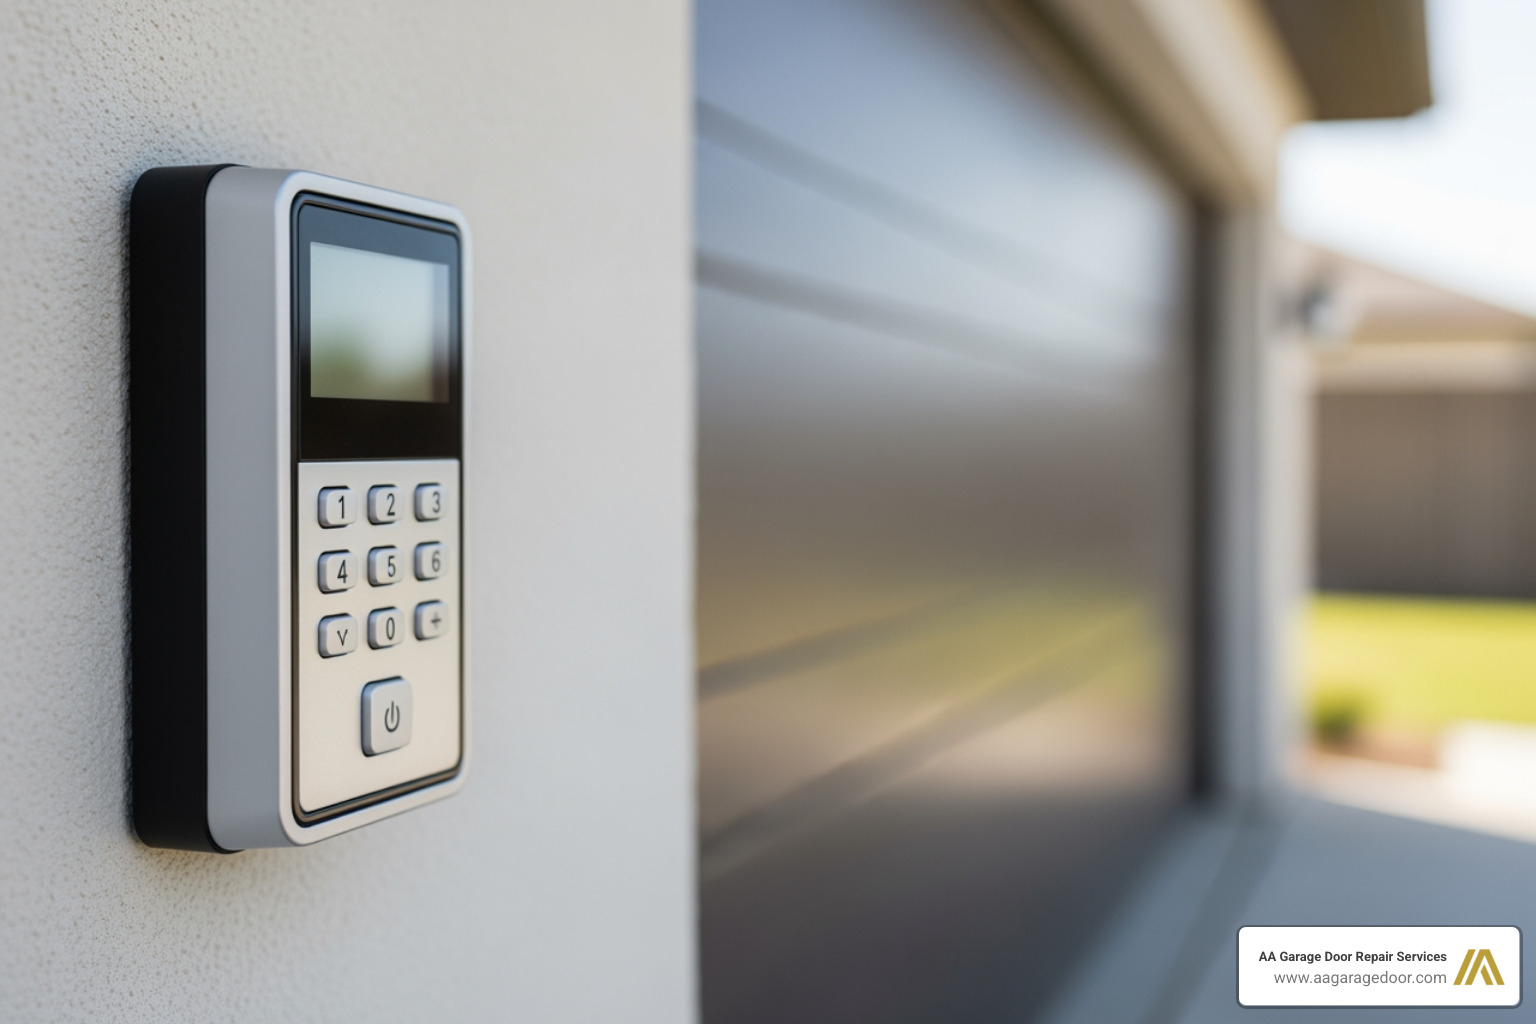
- Enter Your New Code on the Keypad: Quickly move to your exterior keypad. Enter the new 3-5 digit code you’ve chosen. Remember to choose a secure, memorable combination as discussed earlier.
- Confirm & Save the New Code: After entering your new code, press the “Enter” or “Program” key on the keypad. The garage door opener’s lights might flash, or you might hear a click, indicating that the new code has been accepted and saved. On some models, you might need to press the “Learn” button again on the motor unit until the light stops blinking to fully exit programming mode and save the code.
- Test the New Code: Wait approximately 10 seconds. Then, enter your new code on the keypad and press “Enter.” The garage door should open or close. If it doesn’t, don’t panic! We’ll cover troubleshooting next, but often it just means repeating the steps carefully.
Brand-Specific Programming Guides
While the general steps work for many models, some brands have unique procedures or specific button sequences. Always consult your owner’s manual for the most accurate instructions custom to your specific garage door opener model.
LiftMaster, Chamberlain, and Craftsman Keypads
These brands, often produced by the same manufacturer (Chamberlain Group), share many similarities in their programming processes. The key differentiator is often the color of the “Learn” button on the motor unit, which indicates the frequency and security technology used.
- Yellow Learn Button: Often found on newer Security+ 2.0 openers. Press and release the yellow Learn button once. For openers equipped with a MyQ Control Panel, you might need to press and release the Learn button twice.
- Purple Learn Button: Common on Security+ 315 MHz systems. Press and release once.
- Red/Orange Learn Button: Typically found on older Security+ 390 MHz systems. Press and release once.
- Green Learn Button: For older Billion Code 390 MHz systems. Press and release once.
After pressing the Learn button (once or twice for MyQ), you’ll have about 30 seconds to enter your new 4-digit code on the keypad and press the “Enter” button. The opener’s lights will blink to confirm successful programming.
For a detailed walkthrough, especially for these popular brands, you can refer to our how to reprogram garage door opener guide. Specifically, if you need to change code garage door keypad for a LiftMaster, the process is similar for most models, including the LiftMaster 877LM Keyless Entry. Simply locate the Learn button on your opener, press and release it, then enter your new PIN on the 877LM keypad and press the ENTER button.
Overhead Door and Genie Keypads
Overhead Door and Genie keypads often use “CodeDodger®” technology, which employs rolling codes for improved security. This means the code changes with each use, preventing code grabbing. While the core “learn” button concept remains, some steps might differ.
For Overhead Door keypads, such as models OWK-BX and OKP-BX, programming can involve specific sequences for single or multiple garage doors. For example, to program a new PIN on an OWK-BX keypad, you might press 3, 5, 7, PROG, then enter your PIN, and press PROG again. To program the opener to receive this signal, you’d press the “Learn Code” button on the opener, enter your PIN on the keypad, and then press the UP/DOWN arrow button twice, followed by a third press.
These keypads also have unique ways to handle multiple doors or reset a forgotten PIN. To change your PIN on an Overhead Door keypad, you typically enter your current PIN, press PROGRAM, enter your NEW PIN, and press PROGRAM again. If you’ve forgotten your PIN entirely, you might need to perform a hard reset by pressing and holding the PROGRAM button, and while holding it, pressing and holding the UP/DOWN button for 5 seconds. This clears the keypad’s memory, requiring you to reprogram it from scratch.
For the most precise instructions for your Overhead Door or Genie model, we highly recommend consulting the Wireless Keypad Programming Instructions directly from the manufacturer.
Troubleshooting Common Keypad Problems

If your keypad isn’t working after you change code garage door keypad, don’t panic. We understand how frustrating it can be when technology doesn’t cooperate, especially when you’re trying to get into your garage. The issue is often a simple fix, like a dead battery or a minor programming error. We’ve helped countless homeowners in St. Paul, Twin Cities, and Western WI resolve these common issues.
What to Do if the Keypad is Unresponsive
When your garage door keypad refuses to cooperate, here’s a logical troubleshooting sequence to follow:
- Replace the Battery: This is the most common culprit for an unresponsive keypad. Most garage door keypad models use either a 9-volt or a 12-volt battery. A low battery might allow the keypad to light up or even send a signal to close the door (which requires less power) but not enough to initiate the opening sequence. So, if your keypad works to close the door but not open it, a dying battery is usually the reason. Replacing the battery is a quick, inexpensive fix.
- Check for Frayed Wiring Inside the Keypad: While rare for wireless keypads, older or wired models might have internal wiring issues. If you’re comfortable, carefully open the keypad (take pictures before disassembling to aid reassembly) and check for any loose, corroded, or frayed wires. These connections have very low voltage, so there’s no risk of shock.
- Clean the Keypad: Dirt, grime, or stuck keys can prevent the keypad from registering your input correctly. Use a soft cloth and a mild appliance cleaner to clean the exterior. If keys feel sticky or unresponsive, debris might be lodged underneath. A small brush or compressed air can help dislodge it.
- Reset Your PIN (Reprogram): If you suspect a programming error or have forgotten your code, resetting and reprogramming the PIN is the next step. This involves following the programming steps again, ensuring you’re precise with each button press. Consult your owner’s manual for the specific open uping code if needed.
- Reboot the Opener System: As a last resort, if you’re having persistent problems with the system, you may want to reboot the whole thing. This is surprisingly effective for clearing minor glitches. Simply turn off your garage door opener and unplug it from the power outlet for about five minutes. Then, plug it back in. This completely resets the internal memory and can resolve many communication issues between the keypad and the opener. This is a common and easy troubleshooting step, as demonstrated in this helpful video on how to reboot the whole thing.
When to Consider a Replacement
Sometimes, troubleshooting isn’t enough, and it’s time for a new garage door keypad. We recommend considering a replacement if you observe any of the following:
- Visible Damage: Cracks on the casing, missing keys, faded numbers, or water damage are clear signs that the keypad’s integrity is compromised.
- Age of the Unit: Like all electronics, keypads have a lifespan. If your keypad is very old and frequently giving you trouble despite battery changes and reprogramming, it might be at the end of its functional life.
- Persistent Unresponsiveness: If you’ve tried all the troubleshooting steps above and the keypad still refuses to work reliably, it’s likely an internal component failure.
- Security Concerns: If your old keypad uses outdated technology or you’re looking for advanced features like rolling codes or smart home integration, an upgrade can significantly boost your home’s security.
Universal garage door keypads are available that work with various garage door openers, offering flexibility if you have an older or less common model. If troubleshooting fails, it may be time for a new keypad or a full garage door opener repair. Our team at AA Garage Door can help you assess whether a repair or replacement is the most cost-effective solution for your St. Paul, Twin Cities, or Western WI home.
What to do if you are locked out
Being locked out of your garage can be a major inconvenience. If your keypad isn’t working and you need access immediately, you can always manually open your garage door. This is a vital skill for any homeowner, whether due to a power outage or a malfunctioning opener. For detailed instructions on how to manually open your garage door, we have resources that can guide you through the process step-by-step, ensuring you can get into your home in no time.
Advanced Features: Temporary and Guest Access Codes
Many modern keypads allow you to set temporary PINs, a valuable feature for granting limited access to your home without compromising your main security code. This is particularly useful for homeowners in our service areas who might have contractors working on their homes, need to let a pet sitter in, or host out-of-town guests.
How to set a temporary garage door keypad code
Setting a temporary access code is a fantastic way to maintain security while offering flexibility. The exact steps vary by manufacturer, but the general process involves:
- Enter Your Master PIN: Start by entering your current, permanent garage door code on the keypad.
- Press a Special Key: Most keypads will then require you to press a specific key, often the asterisk (
*) or pound (#) button, to initiate the temporary code programming sequence. You might hold this key until an indicator light blinks. - Enter the Temporary PIN: You will then enter the desired temporary PIN. This is typically a 4-digit code.
- Set Duration or Number of Uses: Some advanced keypads allow you to specify how long the temporary code will be active (e.g., for a certain number of hours or days) or how many times it can be used (e.g., up to 255 uses for some models). This ensures the code expires automatically, enhancing security.
Temporary PINs are ideal for repair persons, meter readers, or house guests. Once they no longer need access, you can easily delete the temporary code by following a similar programming sequence and setting the duration or number of uses to zero. This allows you to maintain strict control over who enters your garage without constantly having to change code garage door keypad for your primary access.
Frequently Asked Questions about Changing Your Garage Door Keypad Code
We often receive questions from homeowners in St. Paul, Twin Cities, and Western WI about their garage door keypads. Here are some of the most common ones:
How do I find the ‘Learn’ button on my garage door opener?
The ‘Learn’ or ‘Program’ button is almost always located on the motor unit mounted to your garage ceiling. Look on the back or side panel; it’s typically a small square button, often colored red, orange, purple, yellow, or green. The color often indicates the opener’s frequency and security technology. If you have trouble locating it, check your owner’s manual—it will have a diagram showing the exact location for your specific model.
What should I do if I forget my keypad code and can’t change it?
If you’ve forgotten your PIN, you’ll need to clear the opener’s memory and reprogram the keypad from scratch. This usually involves pressing and holding the ‘Learn’ button on the motor unit for about 6-10 seconds until the indicator light goes out. Be aware that this action will erase all previously programmed remotes and keypads, so you’ll need to reprogram everything afterward. Once the memory is cleared, you can follow the steps in this garage keypad programming guide to set a new code for your keypad and any remotes.
Why does my keypad work to close the door but not open it?
This issue often indicates that the keypad’s battery is low. The keypad may have just enough power to send the signal to close (which typically requires less power) but not enough to initiate the opening sequence. Replacing the battery is almost always the first and most effective troubleshooting step for this particular problem. If a new battery doesn’t resolve it, then you might be looking at a programming error or a more significant issue requiring professional attention.
Secure Your Home with Confidence
Regularly updating your garage door keypad code is a simple yet powerful step in securing your home. By following this guide, you can confidently manage access, troubleshoot common issues, and take full advantage of the convenience your keyless entry system offers. We believe that a secure home is a happy home, and proactive maintenance of your garage door access points is a key part of that.
If you encounter persistent problems or feel it’s time for an upgrade to a more advanced, secure keypad or a smart garage door opener, the experts at AA Garage Door are here to help. We provide fast, reliable 24/7 emergency service with transparent pricing and a satisfaction guarantee for homeowners in St. Paul, the Twin Cities, and Western WI. For professional assistance backed by local expertise since 2001, contact us today.