What It Actually Takes to Code a Garage Remote (And Why Most People Can Do It Themselves)
Learning how to code a garage remote is simpler than most homeowners expect. If you need professional assistance, you can always contact our team for expert garage door repair to get your system back in order. In most cases, you only need three things: your remote, your opener’s Learn button, and about two minutes.
Here’s the quick answer:
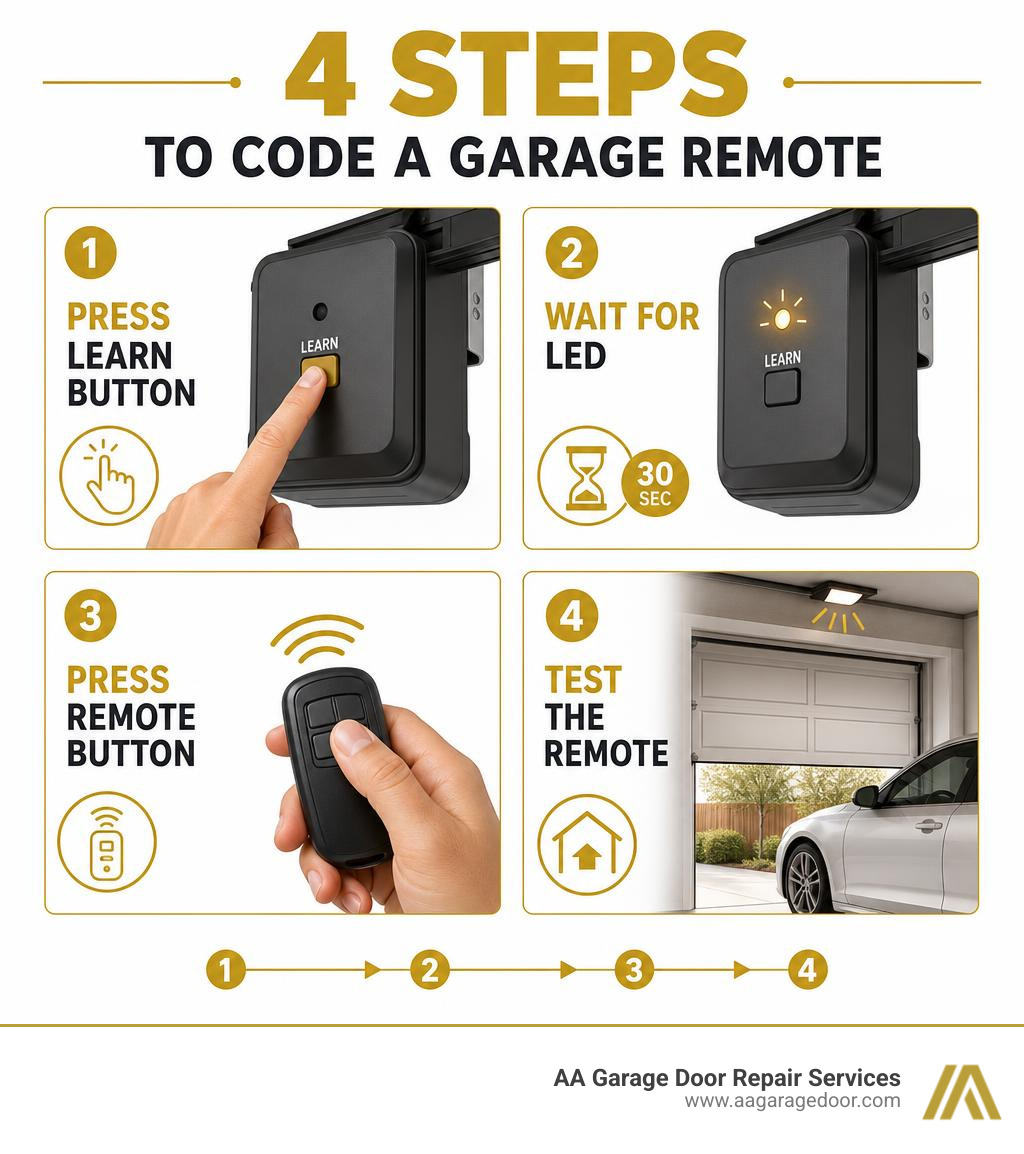
- Find the Learn button on your garage door opener motor unit, usually on the back or side panel.
- Press and release it. The LED indicator light will glow steadily for 30 seconds.
- Within those 30 seconds, press and hold the button on your remote until the opener’s lights blink or you hear two clicks.
- Test the remote to confirm it works.
That’s the core process for most modern openers. The full guide below covers keypads, HomeLink, smart home apps, troubleshooting, and security.
With over 100 million garage doors in use across the US, and four out of five American housing units featuring a garage, a malfunctioning or unpaired remote is one of the most common frustrations homeowners face. Whether you’ve just moved into a new home, lost a remote, or added a second vehicle, knowing how to re-sync your remote can save you time and the cost of a service call.
That said, not every situation is straightforward. Older openers, rolling-code systems, and smart home integrations each have their own quirks. If you run into a wall, our professional garage door services are always available to help.
I’m David Sands, owner of AA Garage Door LLC, and I’ve been helping homeowners across Wisconsin and Minnesota code, reprogram, and troubleshoot garage remotes for over 23 years. In that time, I’ve seen nearly every scenario, from simple re-pairings to full opener replacements, and I’ll walk you through exactly what you need to know about how to code a garage remote, step by step.
Understanding Remote Technologies: Fixed-Code vs. Rolling-Code
Before we climb up a ladder to press any buttons, we need to understand the language our garage door opener speaks. Garage door remotes communicate with the opener’s receiver using radio frequency (RF) signals, typically operating at either 315 MHz or 390 MHz. How these signals are encrypted determines how we code the remote and how secure our garage remains.
Fixed-Code Remotes (The Vintage Standard)
If your garage door opener was manufactured before 1993, it likely uses fixed-code technology. These systems rely on physical DIP switches, usually 8 to 12 tiny toggle switches, inside both the remote and the opener motor unit.
To code a fixed-code remote, you manually match the physical switch positions on the remote to the positions on the receiver. Because the code never changes, it is highly susceptible to “replay attacks” where an intruder intercepts the signal and plays it back to open the door. Hobbyists often explore these legacy signals using microcontrollers, as detailed in guides like Using Fixed Code Remotes with Arduino, but we strongly advise upgrading these systems due to security vulnerabilities.
Rolling-Code Remotes (The Modern Standard)
Modern systems use rolling-code, or hopping-code, technology. Every time you press the button on a rolling-code remote, a proprietary algorithm generates a brand-new, encrypted security code from billions of possibilities. The opener’s receiver only accepts this specific new code, rendering intercepted signals completely useless.
The most common rolling-code systems include:
- Security+ 1.0: Identified by orange, red, or purple Learn buttons.
- Security+ 2.0: Identified by yellow Learn buttons and yellow antenna wires.
To help you visualize the differences, we have compiled a quick comparison:
| Feature | Fixed-Code Systems (Pre-1993) | Rolling-Code Systems (Post-1993) |
|---|---|---|
| Security Level | Low (Vulnerable to signal copying) | High (Dynamic encryption per press) |
| How to Code | Match physical DIP switches | Electronic pairing via “Learn” button |
| Frequencies | Typically 300 MHz – 310 MHz | 315 MHz or 390 MHz (often dual-frequency) |
| Max Remotes | Unlimited (anyone with the code) | Typically limited to 4 to 8 unique codes |
For a deeper dive into choosing the right hardware for your home, check out our Garage Door Opener Remote Complete Guide.
How to Code Garage Remote Controls: A Step-by-Step Guide
If your garage door opener has a physical “Learn” or “Smart” button, you are working with a modern rolling-code system. Follow this definitive, step-by-step process to sync your handheld remote.
Step 1: Prep Your Workspace
For safety, ensure the garage door is fully closed and the path of the door is entirely clear of pets, children, vehicles, and tools. Set up a sturdy, stable A-frame ladder underneath the overhead motor unit.
Step 2: Locate the Learn Button
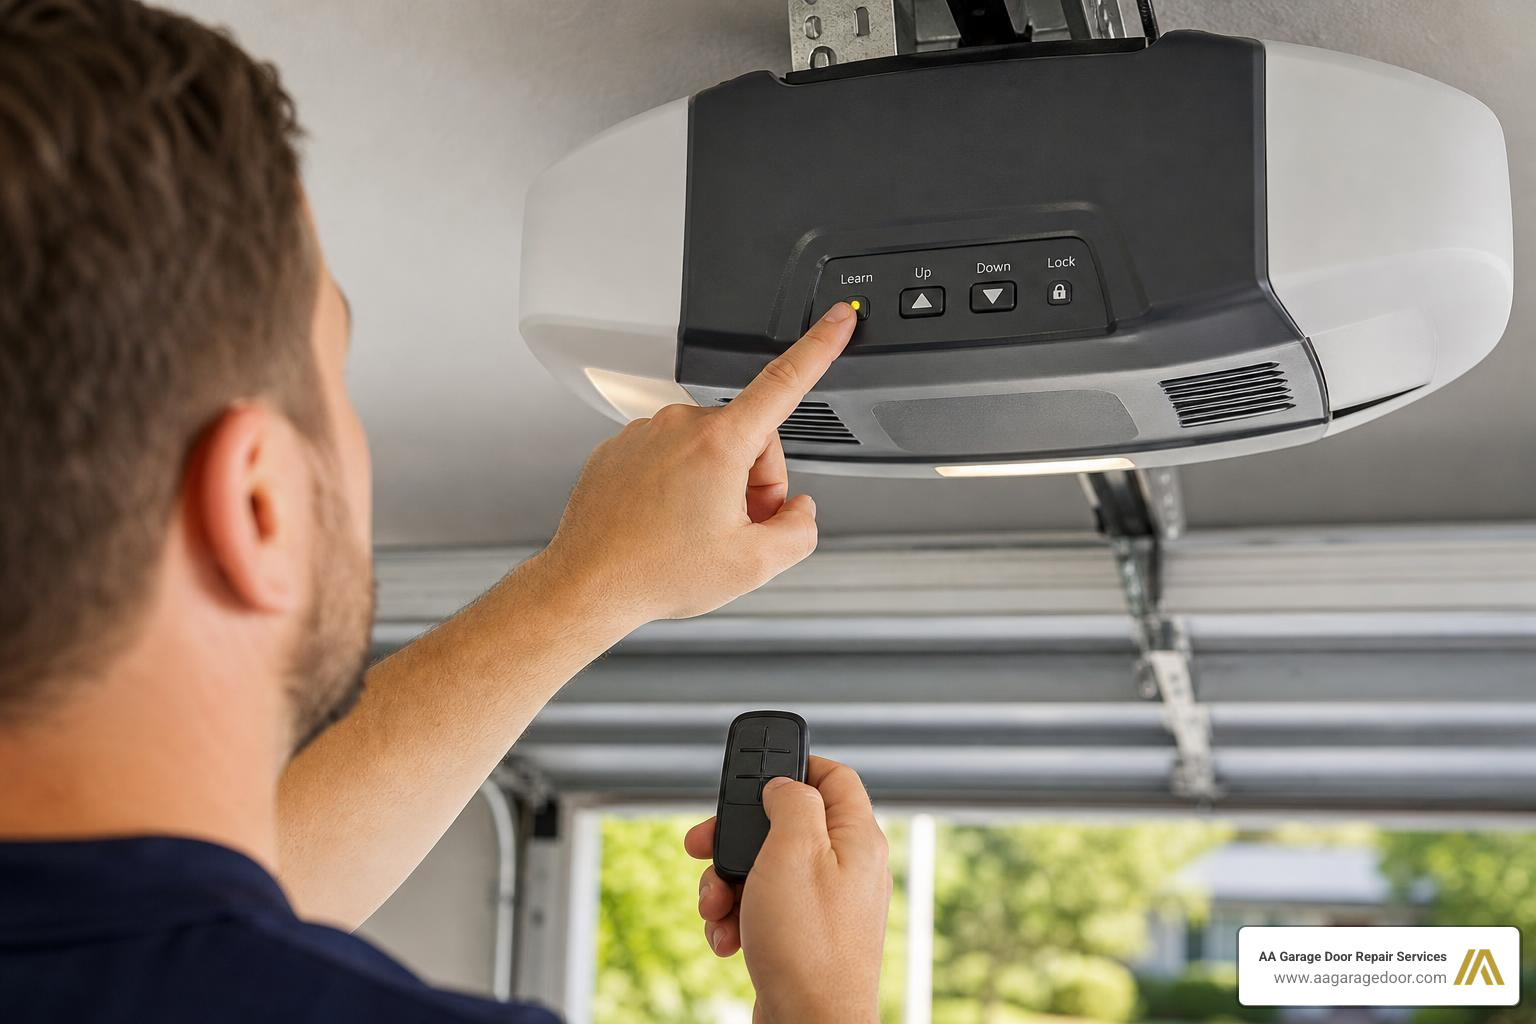
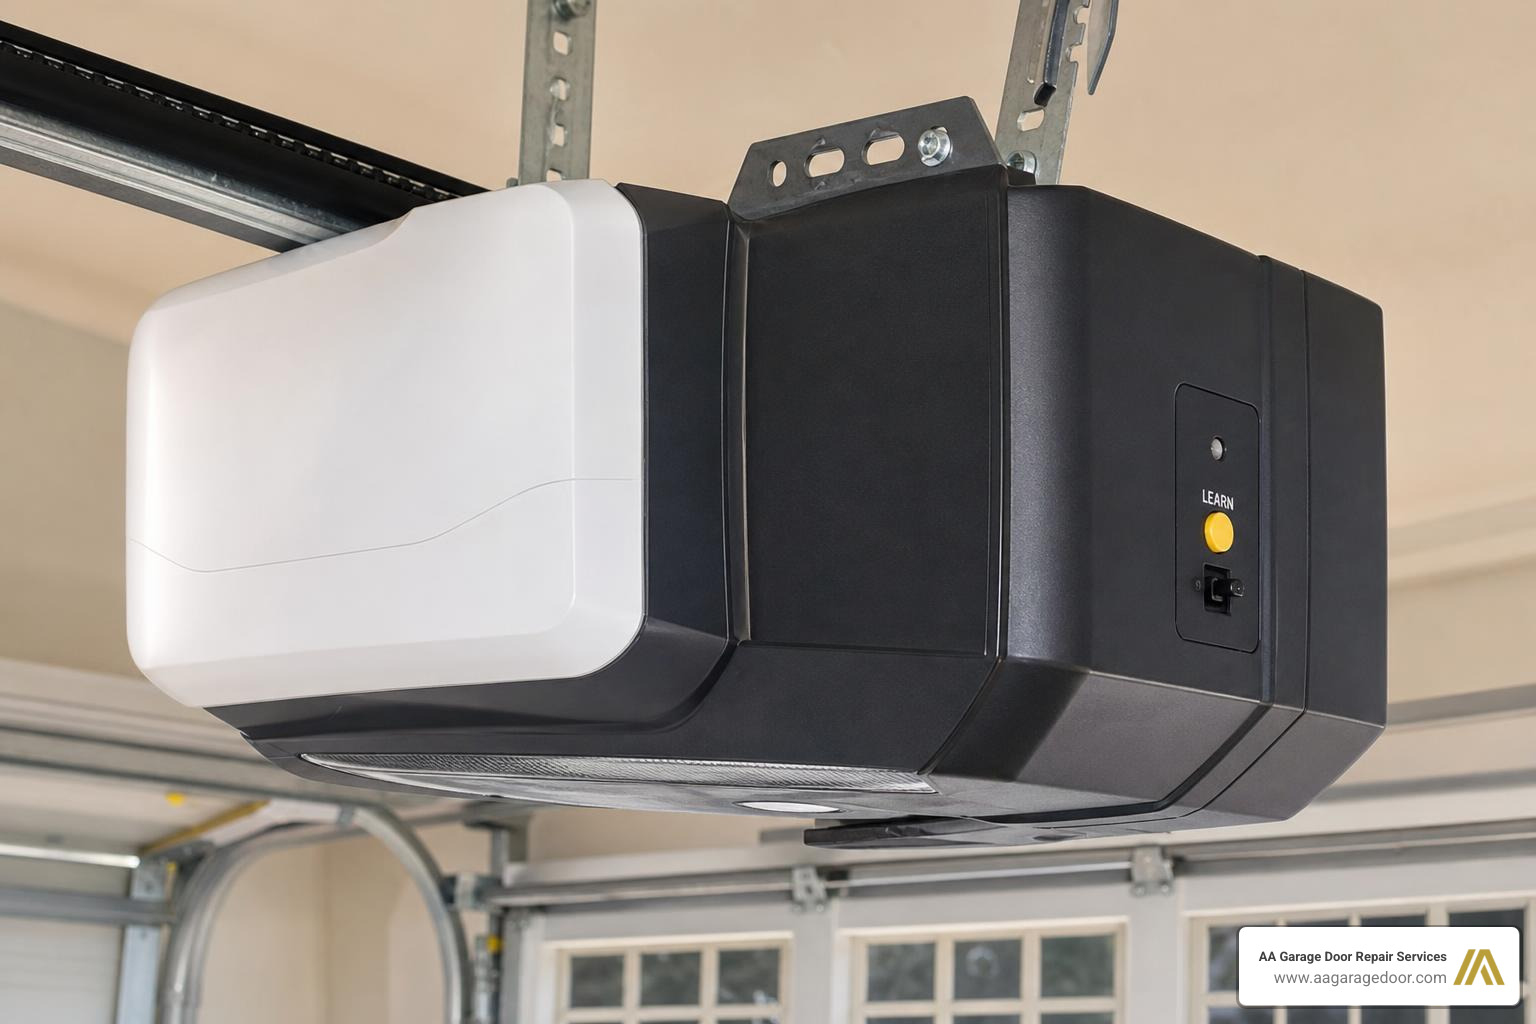
Climb the ladder and locate the “Learn” button on the motor unit. It is usually found on the back or side panel, sometimes hidden behind a protective light lens cover. The button may be square or round and will be colored yellow, purple, orange, red, or green.
Step 3: Activate Learning Mode
Press and release the Learn button once. Do not hold it down, as holding it for more than a few seconds will erase all programmed remotes from the unit’s memory. Once pressed, the adjacent LED indicator light will glow steadily. This opens a strict 30-second programming window.
Step 4: Code the Remote
Within that 30-second window, step away from the physical motor unit, standing at least 3 to 5 feet away to prevent signal overload, and press the button on your handheld remote that you wish to program.
Step 5: Confirm Successful Pairing
Watch the overhead unit for confirmation.
- If your opener has a built-in light, the lightbulbs will blink twice.
- If the lightbulbs are not installed, you will hear two distinct clicking sounds from the motor unit.
- The Learn indicator LED on the opener will turn off.
Step 6: Test the System
Step back to a safe distance and press the newly programmed remote button. The garage door should smoothly open or close.
For more visual assistance, you can refer to the general steps on How to Program a Garage Door Opener or read our detailed Programming Your Garage Door Opener: A Step-by-Step Guide.
Programming Multiple Devices: Keypads, HomeLink, and Smart Hubs
A modern garage often requires more than just a single handheld remote. You might need to program wireless keypads for your kids, integrate your vehicle’s built-in HomeLink system, or configure a smart home hub.
Programming a Wireless Keypad
Wireless keypads are coded using a similar process to handheld remotes:
- Press and release the Learn button on the opener motor unit.
- Within the 30-second window, walk to the exterior keypad and enter your desired 4-digit PIN.
- Press and hold the Enter button on the keypad.
- Release the button when the opener lights blink or you hear the double click.
Programming Vehicle HomeLink Systems
HomeLink systems built into car visors or rearview mirrors allow you to operate your garage door without a loose remote. With over 42.4 million Ford vehicles on US roads alongside millions of other equipped cars, this is an incredibly popular convenience.
To program HomeLink with a rolling-code opener:
- Clear old codes: Press and hold the two outer HomeLink buttons in your vehicle for about 20 seconds until the indicator light begins flashing rapidly, then release.
- Train the car to the remote: Hold your original handheld garage remote 1 to 3 inches away from the HomeLink buttons. Simultaneously press and hold both the remote button and the desired HomeLink button. Keep holding both until the HomeLink indicator light changes from a slow blink to a rapid flash.
- Sync with the opener: Press and release the Learn button on your garage door opener motor.
- Finalize pairing: Within 30 seconds, return to your vehicle and press the programmed HomeLink button for two seconds, release it, and press it again for two seconds. Some vehicles require a third press to complete the handshake.
For advanced configurations and brand-specific variations, review our Garage Door Opener Programming Guide.
How to Code Garage Remote Systems for Multiple Cars
If your household has two or three cars, you will need to program a remote button for each vehicle. Most multi-button remotes allow you to assign a different button to a different garage door opener.
When programming multiple remotes, always program them one at a time. Do not attempt to press buttons on multiple remotes simultaneously, as this causes signal collision and will fail to register.
Be aware of security risks regarding signal cloning. Devices like the Flipper Zero are popular among tech enthusiasts for testing RF signals. However, as explained in the Flipper Zero Garage Door Guide, these tools cannot bypass or clone modern rolling-code systems because the security code changes with every single button press. This means your modern rolling-code opener remains completely secure against replay tools.
How to Code Garage Remote Apps and Smart Home Integrations
In 2026, smart garage integration is a standard feature for many homeowners. Converting your garage door into a smart accessory allows you to monitor and control access from anywhere in the world.
Option 1: Wi-Fi Enabled Openers (e.g., myQ)
If you have a modern Wi-Fi-enabled opener, you can code it directly to your phone:
- Download the manufacturer’s app, such as myQ, and create an account.
- Select “Add Device” and choose “Garage Door Opener.”
- Put the wall control panel or the opener motor unit into Wi-Fi setup mode, usually by holding the learn button or a dedicated adjustment button until a tone sounds.
- Connect your phone to the opener’s temporary Wi-Fi network, select your home Wi-Fi network, and enter your password.
Option 2: DIY Open-Source Smart Hubs (e.g., ESP32 & HomeKit)
For tech-savvy homeowners, you can build a highly customized smart controller. Developers often use ESP32 microcontrollers to interface with the garage door’s wall button terminals. By using a relay module to temporarily short the wall button terminals for exactly one second, you can trigger the door programmatically.
Projects like How I Turned My Broken Garage Remote Into a HomeKit Garage Door for Under $22 demonstrate how to build local, private Apple HomeKit integrations without relying on subscription-based cloud services. You can also review open-source documentation like the OpenGarage Firmware Manual to see how ultrasonic sensors are used to detect both door state and vehicle presence.
To optimize your current system without buying new hardware, check out our guide on How to Configure Garage Remote with These 4 Easy Changes.
Troubleshooting, Maintenance, and Security Best Practices
Even with the correct instructions, you might run into a few roadblocks. Here is how to maintain your remote and keep your home secure.
Replacing the Battery Safely
If your remote only works when you are standing right next to the garage door, or if the indicator LED on the remote is dim, it is time to replace the battery.
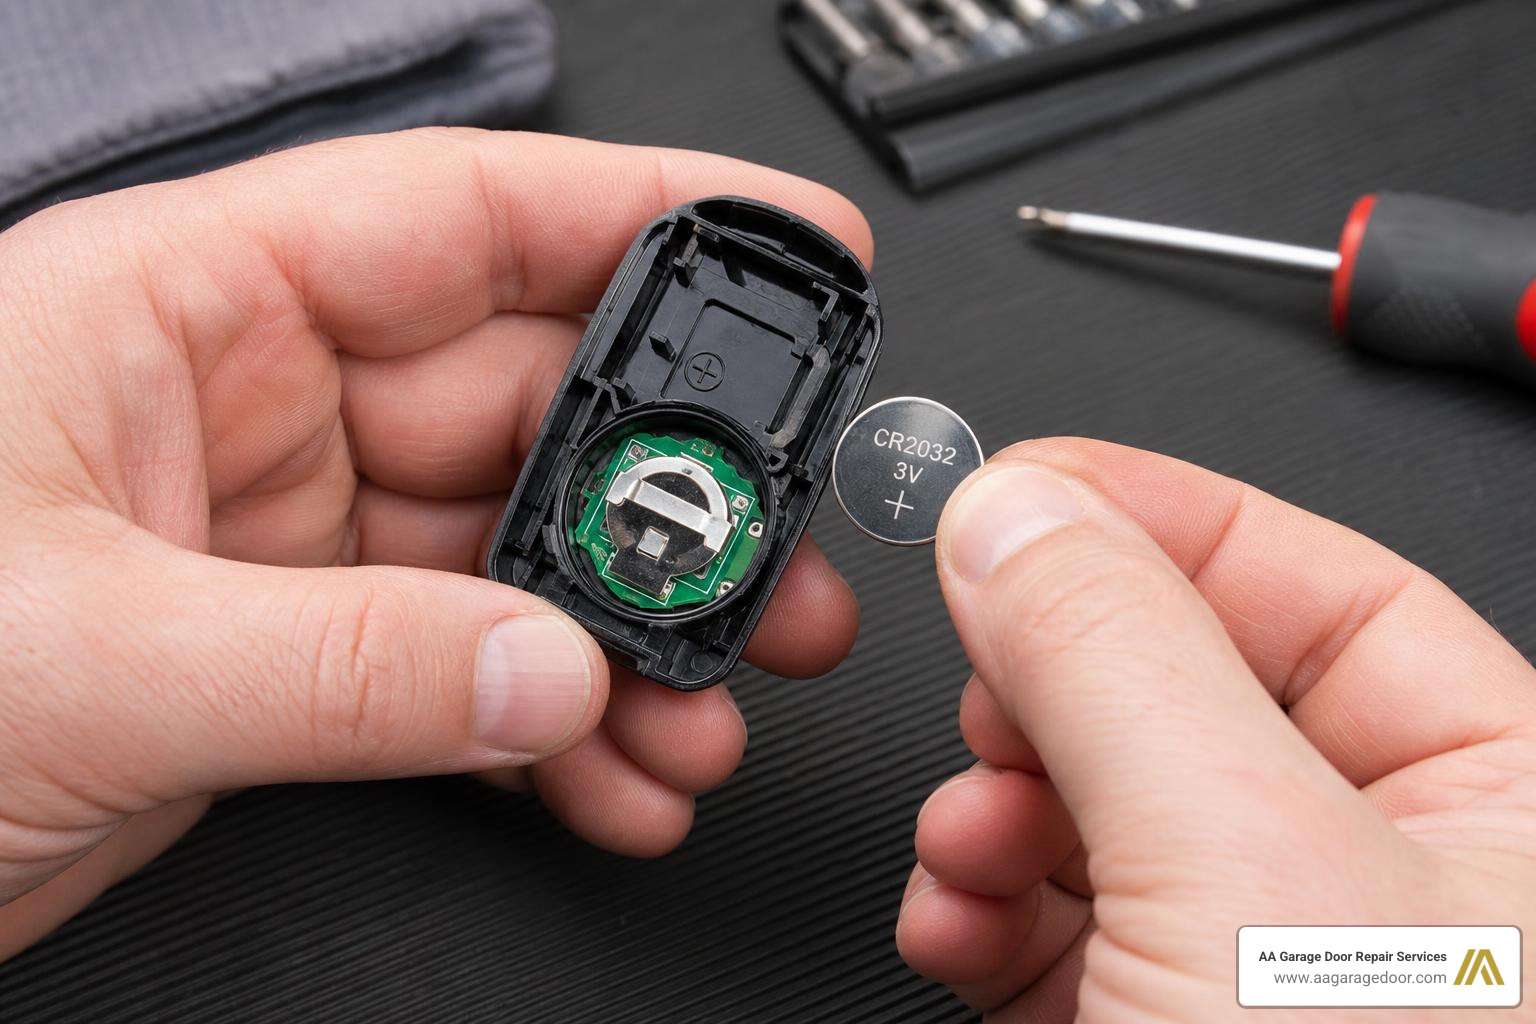
- Locate the slot or small screw on the back of the remote case.
- Use a small flathead screwdriver or coin to gently pry the casing open.
- Note the orientation of the old battery, usually a coin-cell CR2032 or CR2016, and slide it out.
- Insert the new battery with the positive (+) side facing up.
- Snap the casing back together and test the remote. We recommend replacing remote batteries every 1 to 2 years.
Clearing Lost Remotes from Memory
If you lose a handheld remote or if your car is sold, you must immediately erase the opener’s memory to prevent unauthorized entry:
- Locate the Learn button on your overhead motor unit.
- Press and hold the Learn button continuously for approximately 6 seconds.
- Release the button when the indicator LED light goes out.
- This action erases all programmed remotes, keypads, and HomeLink connections from the opener’s memory. You will need to reprogram any remotes you still have.
Vacation Mode
Most modern wall control panels include a “Lock” or “Vacation” button. Pressing this button disables the receiver’s ability to accept signals from any handheld remotes. This is an excellent security measure to use when traveling, ensuring that even if someone manages to clone your signal, they cannot open the door while you are away.
To learn more about maintaining your physical opener system, explore our Garage Door Openers resource page.
Frequently Asked Questions About Coding Garage Remotes
How do I know if my remote is compatible with my garage door opener?
Compatibility is primarily determined by the manufacture year and the color of the Learn button on your opener. For example, Chamberlain, LiftMaster, and Craftsman openers with a yellow Learn button require Security+ 2.0 remotes operating on dual-frequency bands. Always verify that the remote’s listed model number matches your opener’s brand and frequency, such as 315 MHz or 390 MHz, before purchasing.
What should I do if my garage remote only works when I am very close to the door?
This issue is usually caused by a weak battery, radio frequency interference, or a misaligned antenna. First, replace the remote battery. If the issue persists, check that the thin wire antenna hanging from your opener motor unit is pointing straight down and is not damaged. Finally, look for nearby electronic devices, like LED lightbulbs in the opener itself, that might be causing local RF interference.
Can I use a universal remote to control different brands of openers?
Yes, high-quality universal remotes are designed to emulate the signals of multiple brands, including Genie, Chamberlain, Wayne Dalton, and Stanley. During programming, you will typically press a configuration button on the universal remote a specific number of times to select the correct brand protocol before pairing it with the opener’s Learn button.
Conclusion
Coding your garage remote is a quick, empowering DIY project that keeps your home accessible and secure. By matching the right technology to your opener and following the simple step-by-step pairing sequence, you can easily program remotes, keypads, and car integration systems on your own.
However, if you encounter an older system without a Learn button, suffer from persistent signal interference, or need a complete opener replacement, we are here to help. AA Garage Door Repair Services has provided reliable, transparently priced garage door solutions across the Twin Cities and Western Wisconsin since 2001.
We proudly serve homeowners in:
- St. Paul, MN
- Woodbury, MN
- Hudson, WI
- Baldwin, WI
For fast, professional help with your garage door or remote programming, visit our More info about local repair services page to book an appointment online.