When Your Garage Door Remote Stops Working, Here’s What to Do
How to reset the garage door remote is simpler than most homeowners expect — and it usually takes less than 10 minutes from start to finish.
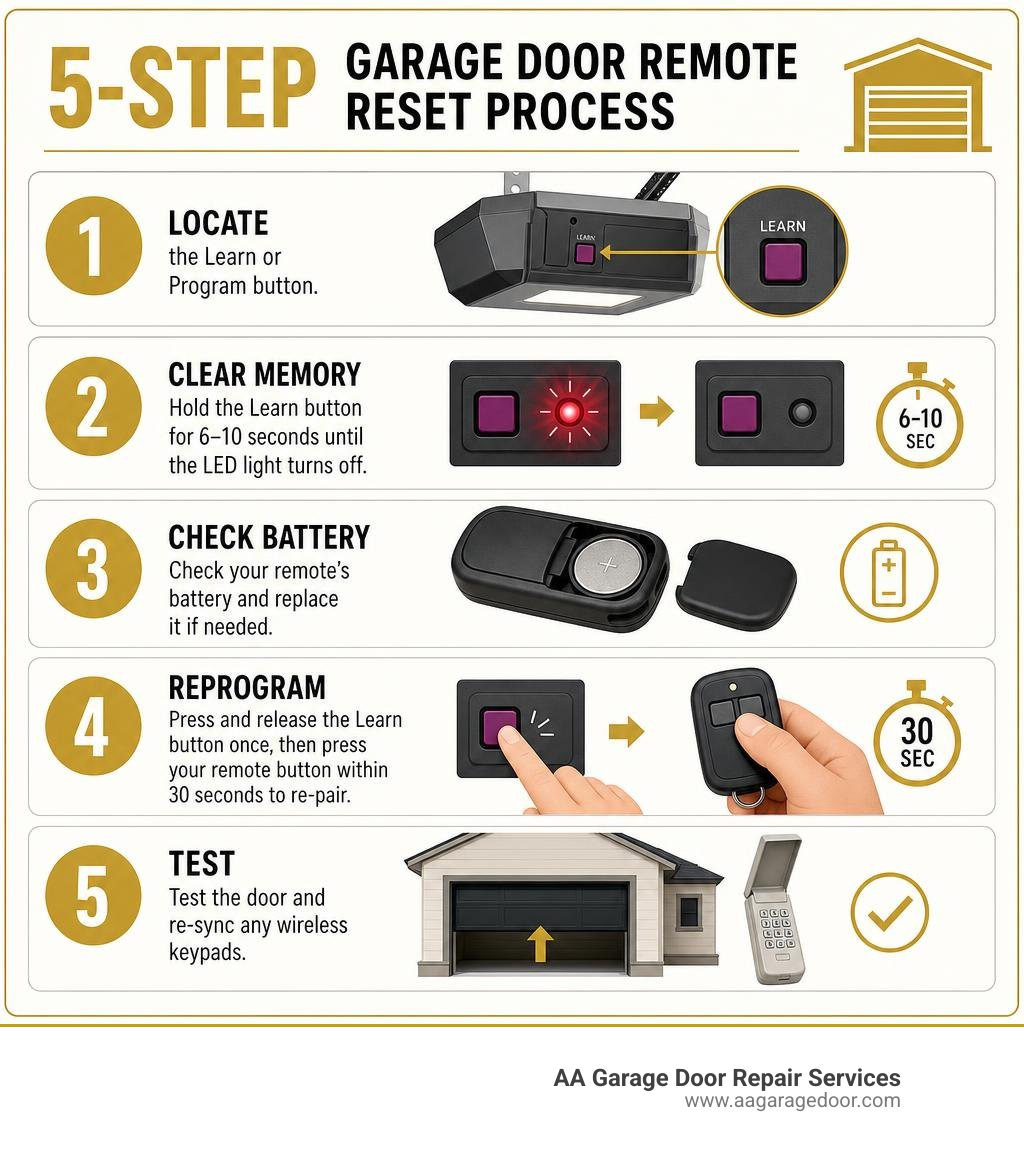
Quick answer: How to reset a garage door remote in 5 steps:
- Locate the Learn or Program button on your opener’s motor unit
- Hold the Learn button for 6-10 seconds until the LED light turns off (this clears all stored codes)
- Check your remote’s battery and replace it if needed
- Press and release the Learn button once, then press your remote button within 30 seconds to re-pair
- Test the door and re-sync any wireless keypads
That’s it. Most homeowners working with professional garage door repair services or doing it themselves resolve this in one try.
Whether your remote suddenly stopped responding, you just moved into a new home, or you lost a remote and need to lock out unauthorized access — a reset is almost always the right first move. About 9% of U.S. home break-ins happen through the garage, which means an unreset opener isn’t just inconvenient — it’s a security gap.
The process is the same core idea across nearly every major brand: clear the motor’s memory, then re-pair your devices. The small differences come down to button colors, LED behavior, and timing.
I’m David Sands, owner of AA Garage Door LLC, with over 23 years of hands-on experience servicing, installing, and troubleshooting garage door opener systems across Wisconsin and Minnesota. I’ve walked hundreds of Twin Cities homeowners through exactly how to reset the garage door remote — and in this guide, I’ll walk you through every step clearly and simply.
Discover more about how to reset the garage door remote:
Why You Need to Know How to Reset the Garage Door Remote
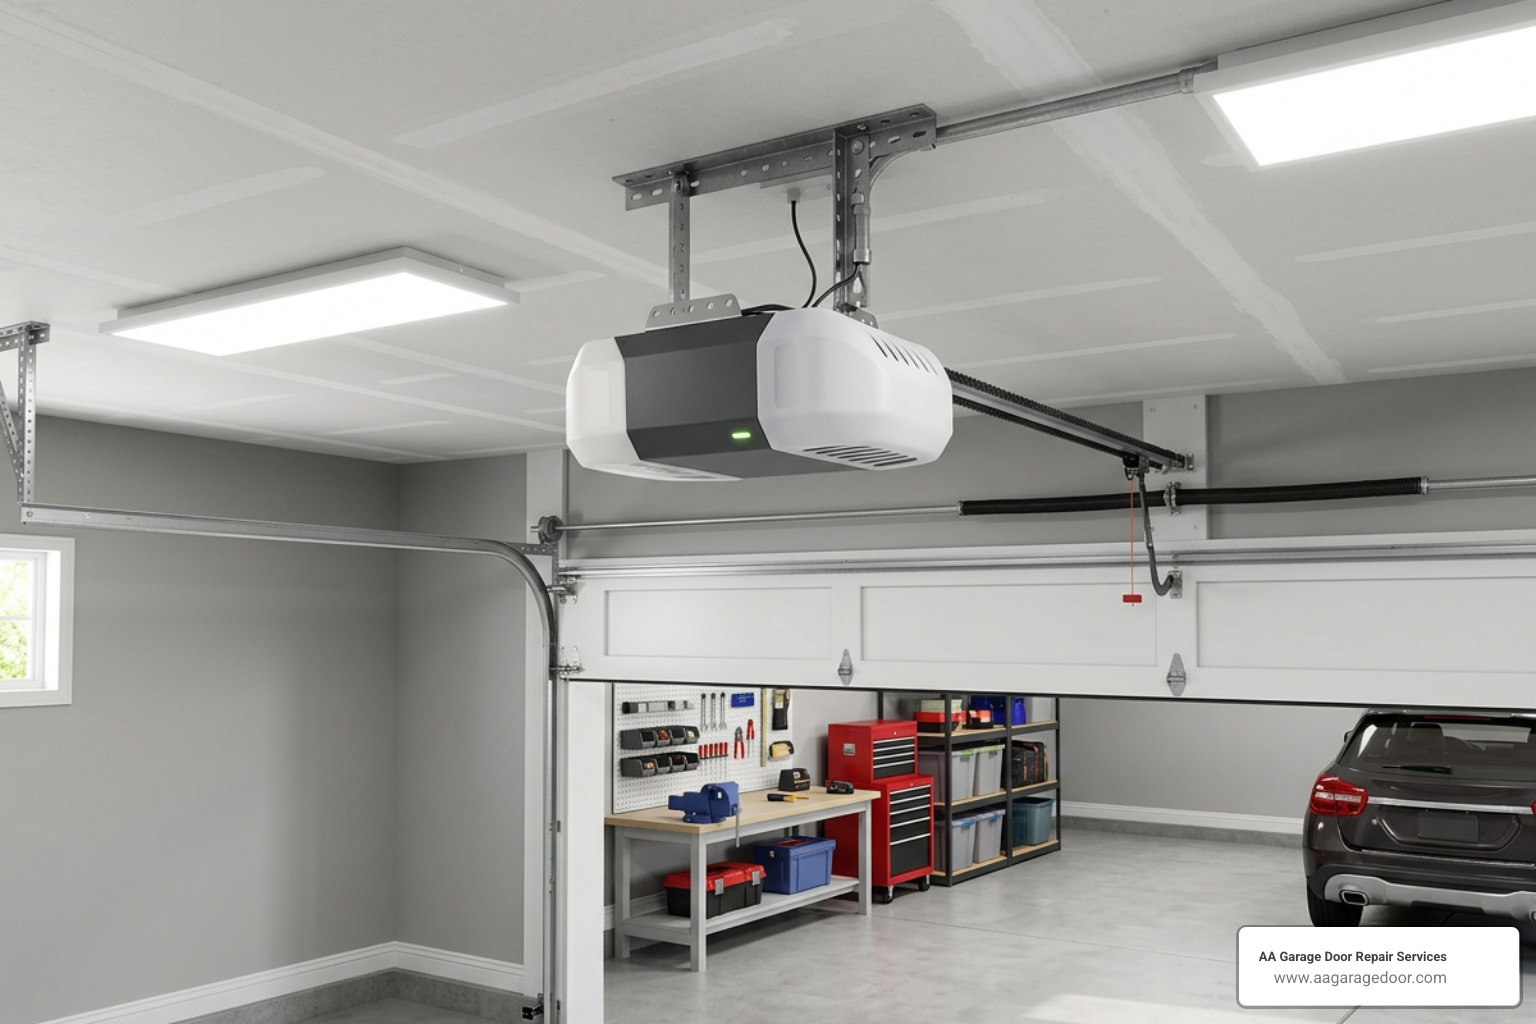
Knowing how to reset your garage door remote is an essential home maintenance skill that directly impacts your home’s security, accessibility, and daily convenience. The garage door is often the primary entryway for modern families. When the connection between your handheld remote and the overhead motor unit breaks down, it can disrupt your entire routine.
While many homeowners assume a non-responsive remote means a broken opener, the root cause is frequently a simple signal desynchronization. Over time, power surges, radio frequency interference, or accidental button presses on the motor unit can cause the opener to “forget” your remote.
Performing a system reset clears the slate, allowing you to establish a clean, secure connection. If you want to explore more about how these devices communicate, check out our Garage Door Remotes overview.
Security Risks of an Unreset Opener
Resetting your garage door opener memory is just as critical as changing the physical locks on your front door when moving into a new home. According to national home security studies, approximately 9% of home break-ins in the United States occur through the garage.
Over 4.5 million U.S. families purchase an existing single-family home each year. If you are one of them, failing to clear the motor memory means anyone who previously had access to the property—including former owners, real estate agents, contractors, neighbors, or friends—could still open your garage door with an old remote.
Additionally, if you ever lose a remote control or have one stolen from your vehicle, performing an immediate reset is the only way to ensure that the missing clicker cannot be used to gain unauthorized entry. To understand the security dynamics further, read this guide on Security statistics on garage door resets.
Troubleshooting When Your Remote Stops Working
Before diving into a full system reset, it is wise to eliminate the most obvious culprit: a dead battery. A weak battery can cause intermittent range issues, requiring you to stand right next to the door or press the button multiple times before it responds.
If the indicator light on your handheld remote is dim or completely dark when pressed, the battery must be replaced. Most modern remotes use standard lithium coin-cell batteries, such as CR2032 or CR2016. Replacing the battery is a quick, inexpensive fix that often restores complete functionality without needing to clear the opener’s memory.
For a complete breakdown of battery types and replacement intervals, consult our Guide to garage door opener batteries.
Step-Step Guide: How to Reset the Garage Door Remote in 5 Steps
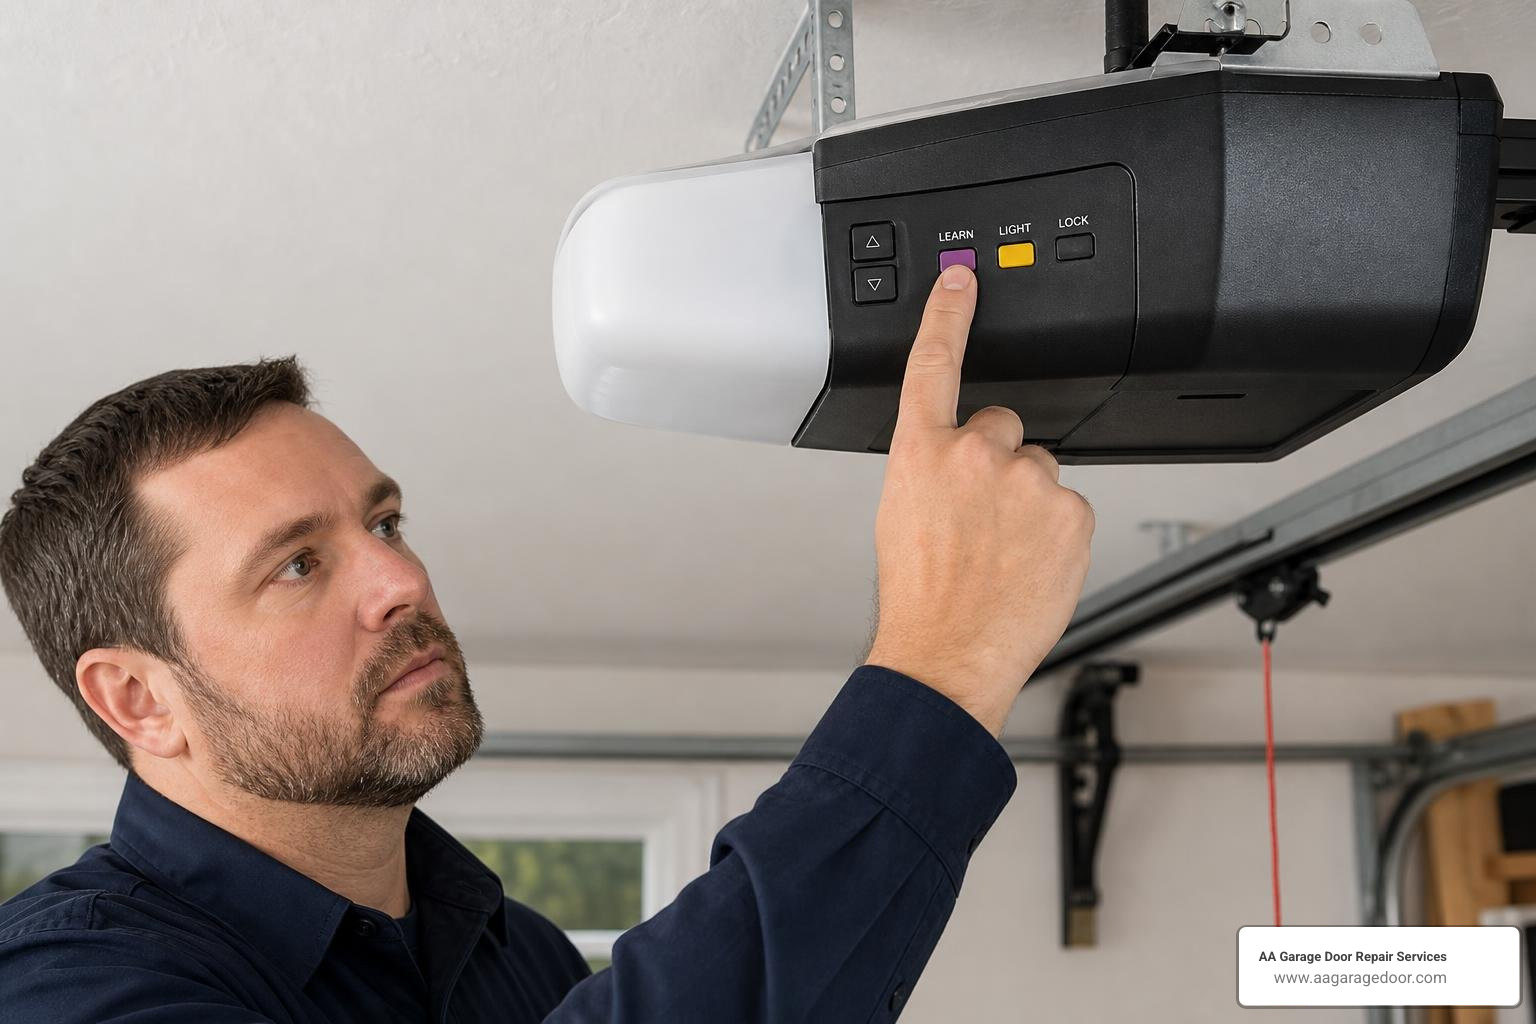
Resetting your garage door remote is a straightforward DIY task. By following these five steps, you can clear old codes and program your remotes safely and efficiently.
Step 1: Locate the Learn or Program Button
To initiate a reset, you must first find the “Learn” or “Program” button on your garage door opener’s overhead motor unit. This button is typically located on the back or side of the motor housing.
On many popular models, it is hidden behind the light lens cover, which can be easily swung open by hand. The button is small, colored (often yellow, purple, red, orange, or green), and will have a small LED indicator light right next to it. You will also see a thin, insulated antenna wire hanging down from the same area of the motor unit.
Step 2: Clear the Opener Motor Memory
Wiping the motor memory is the most important step for security, as it deletes all programmed remotes, wireless keypads, and in-vehicle systems (like HomeLink) from the opener’s computer.
To clear the memory, press and hold the colored Learn button on the motor unit. Keep holding the button down for approximately 6 to 10 seconds. The adjacent LED indicator light will glow steadily and then turn off. Once the light goes out, release the button.
To confirm the memory wipe was successful, try pressing your handheld remote; the garage door should not move. For more detailed insights, view these Instructions for clearing motor memory.
Step 3: Prepare Your Remote Control
Before attempting to pair your remote back to the clean motor unit, ensure the remote itself is ready. Open the battery compartment on the back of the remote to check for any signs of battery corrosion or loose contacts. If the battery is older than a year, insert a fresh coin-cell battery.
If you are using an older DIP-switch style remote (common in units built before 1993), ensure the sequence of tiny plastic switches inside the remote matches the switch pattern on the back of the overhead motor unit. For modern rolling code remotes, simply ensure the remote is in hand and ready to transmit.
Step 4: Reprogram the Remote to the Opener
Once the memory is clear and your remote is prepared, you can pair them back together. Press and release the Learn button on the motor unit once (do not hold it down this time). The LED indicator light next to the button will light up and glow steadily, indicating that the opener is in programming mode.
You have a 30-second window to complete the next step. Walk at least five feet away from the motor unit to prevent signal saturation, then press and hold the button on your handheld remote. Hold it until the overhead garage door light bulbs blink twice or you hear two distinct clicking sounds from the motor unit. This indicates that the receiver has successfully registered the remote’s new rolling code.
For a complete walkthrough of this pairing sequence, read our guide on How to reprogram garage door opener.
Step 5: Test the System and Re-Sync Keypads
After programming, always test the system to ensure everything is working correctly. Press the remote button from inside your garage, and then test the range from your driveway.
If you have a wireless keypad mounted outside your garage frame, keep in mind that clearing the motor memory also cleared the keypad’s PIN. You will need to repeat the programming steps for the keypad by pressing the Learn button on the motor unit, entering your desired 4-digit PIN on the keypad, and holding the “Enter” button until the opener lights blink.
For step-by-step instructions on updating keypad codes, see our resource on Changing the garage door opener code.
Brand-Specific Reset Procedures for Major Manufacturers
While the general steps to reset a garage door remote are highly consistent, minor brand-specific variations exist. Manufacturers utilize different radio frequencies and encryption technologies, which are often color-coded on the physical Learn button.
| Brand | Learn Button Color | Radio Technology | Reset Hold Time | Reprogramming Window |
|---|---|---|---|---|
| LiftMaster / Chamberlain | Yellow | Security+ 2.0 (Tri-Band) | 6 seconds | 30 seconds |
| LiftMaster / Chamberlain | Purple | Security+ 315 MHz | 6 seconds | 30 seconds |
| LiftMaster / Chamberlain | Red / Orange | Security+ 390 MHz | 6 seconds | 30 seconds |
| Genie / Overhead Door | Gray / Black (PRGM) | Intellicode II | 10 seconds | 30 seconds |
| Genie (Older Models) | Red / Pink | Intellicode I | 6 seconds | 30 seconds |
How to Reset the Garage Door Remote for LiftMaster, Chamberlain, and Craftsman
Chamberlain, LiftMaster, and Craftsman openers are built on the same manufacturing platform, meaning they share identical reset protocols. The key to successful programming on these systems lies in identifying the color of your Learn button.
- Yellow Button (Security+ 2.0): Uses tri-band technology to prevent signal jamming.
- Purple Button (Security+ 315 MHz): Introduced in 2005 to comply with military frequency changes.
- Red/Orange Button (Security+ 390 MHz): Common on models manufactured between 1997 and 2005.
- Green Button (Billion Code 390 MHz): Found on vintage systems from 1993 to 1997.
To clear the memory on any of these units, hold the Learn button down for 6 seconds until the indicator LED goes out. To reprogram, press and release the Learn button, then press the remote button the correct number of times corresponding to your opener’s technology. For a deeper look at Chamberlain and LiftMaster compatibility, check out our Garage Door Remote Complete Guide.
How to Reset the Garage Door Remote for Genie and Overhead Door
Genie and Overhead Door openers utilize “Intellicode” rolling-code encryption. The layout of their programming panels differs slightly from Chamberlain models.
Modern Genie openers (Intellicode II, manufactured from 2011 to present) feature a “PRGM/SET” button flanked by “Up” (+) and “Down” (-) arrow buttons. To clear the memory on an Intellicode II unit:
- Press and hold the Up (+) and Down (-) buttons simultaneously until both LED lights turn solid blue.
- Press and hold the PRGM/SET button until the round LED indicator turns blue, then release.
For older Genie models (Intellicode I, 1995 to 2011), locate the red or pink “Learn Code” button. Press and hold this button until the red LED indicator stops flashing and turns off to clear the memory. To learn more about Genie-specific programming, refer to How to reset a Genie garage remote.
Troubleshooting Common Reset and Reprogramming Issues
Sometimes, despite following every step perfectly, a remote refuses to pair or the system behaves unexpectedly. Understanding the common technical issues can save you hours of frustration.
The Remote Won’t Reprogram After Resetting
If your remote refuses to pair after a successful memory wipe, the most common cause is radio frequency (RF) interference.
- LED Light Bulbs: Standard household LED bulbs installed in the garage door opener motor unit can emit electromagnetic interference that blocks the remote’s signal. Always use specialized, garage-door-safe LED bulbs.
- Programming Distance: Standing too close to the motor unit during programming can overwhelm the receiver. Always stand at least 5 to 10 feet away.
- Voltage Drop: A battery might have enough voltage to power the remote’s small LED light, but not enough power to transmit a strong RF signal to the overhead receiver. Try inserting a brand-new battery.
If you are still experiencing difficulties, review our comprehensive troubleshooting guide on Programming your garage door opener.
The Garage Door Opens by Itself or Behaves Erratically
A garage door that opens on its own is a serious security risk. If this happens immediately after a reset, it is rarely a remote control issue.
Instead, it is usually caused by a short circuit in the wired wall button console or the low-voltage wires running from the console to the motor unit. Over time, staples holding these wires to the wall can pinch the insulation, causing a short that mimics a button press.
Additionally, check your safety sensors near the floor. If the sensors are dirty, misaligned, or blocked by cobwebs, the door may reverse and open back up immediately after hitting the floor.
Frequently Asked Questions About Resetting Garage Remotes
Will resetting my garage door opener delete my smart app connection?
No. A standard RF memory reset (holding the Learn button for 6 seconds) only clears handheld remotes, wireless keypads, and in-vehicle HomeLink buttons. It does not erase your Wi-Fi credentials or delete the opener from smart home applications like myQ or Aladdin Connect. To clear Wi-Fi settings, you must perform a separate, dedicated Wi-Fi reset procedure as outlined in your opener’s manual.
How do I reset a garage door remote without a Learn button?
Older garage door openers manufactured before 1993 do not have a Learn button. Instead, they rely on physical DIP switches (a row of 8 to 12 tiny plastic switches) inside both the remote control and on the back of the motor unit. To “reset” or change the security code on these systems, you must manually slide the switches into a new, matching pattern on both the remote and the motor receiver. Because these older systems lack modern rolling-code security, we highly recommend upgrading to a modern, secure opener.
When should I call a professional to reset my garage remote?
You should call a professional technician if the Learn button on your motor unit is physically broken, unresponsive, or if the LED light fails to turn on during the reset process. These symptoms typically point to a failing logic board or an internal electrical failure. Furthermore, if your garage door is making unusual grinding noises, has a visibly broken torsion spring, or moves erratically, do not attempt to program or operate the door.
Conclusion
Resetting your garage door remote is an easy, highly effective way to secure your home and troubleshoot communication issues. Whether you have just moved into a new home in Woodbury, MN, or need to replace a lost remote in Hudson, WI, following these steps will keep your home secure and accessible.
If you run into persistent programming issues, suspect a failing receiver board, or require professional maintenance, we are here to help. At AA Garage Door Repair Services, we have provided fast, reliable garage door repair, installation, and maintenance across St. Paul, the Twin Cities metro, and Western Wisconsin since 2001. We offer 24/7 emergency service, transparent pricing, and a complete satisfaction guarantee.
Ready to get your system working perfectly? Schedule local garage door repair services in Apple Valley to speak with a local expert today.