Why Garage Keypad Programming Matters for Twin Cities Homeowners
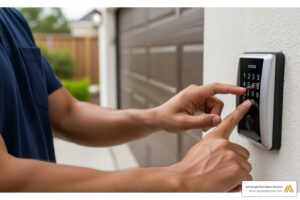
Garage keypad programming is a simple process that grants secure, keyless access to your home. For homeowners in the Twin Cities, having a reliable keypad is essential for convenience and security. If you need assistance with your system, the experts at AA Garage Door Repair Services are always ready to help. Most systems follow the same basic steps: locate the ‘Learn’ button on your garage door opener, press it, enter your PIN on the keypad within 30 seconds, and confirm.
Quick Programming Steps:
- Find the ‘Learn’ button on your garage door opener motor unit.
- Press and release the ‘Learn’ button.
- Enter your new 4-digit PIN on the keypad within 30 seconds.
- Press the ‘Enter’ or ‘Up/Down’ button on the keypad.
- Confirm when the opener lights flash or you hear a click.
If you’re moving into a new home, reprogramming your garage door keypad should be a top security priority. A working keypad means you’ll never be locked out during a harsh Minnesota winter, and you can grant temporary access to guests without sharing a key. For older or malfunctioning systems, professional garage door opener repair ensures your keypad works reliably year-round.
I’m David Sands, owner of AA Garage Door LLC. With over 23 years of experience, I’ve helped thousands of homeowners master their garage keypads. This guide will give you the confidence to program any model yourself.

Terms related to garage keypad programming:
Getting Started: What is a Garage Door Keypad and Why Use One?

A garage door keypad is a wall-mounted device that lets you open your garage door with a secure PIN, eliminating the need for keys or remotes. When you enter the correct code, the keypad sends a radio frequency (RF) signal to your garage door opener’s receiver, activating the motor. It’s a simple and effective way to manage access to your home.
What are the benefits of using a garage door keypad?
The benefits of garage keypad programming extend far beyond simple convenience. Over 70% of homeowners consider keyless entry essential, and for good reason:
- Convenience: No more fumbling for keys or remotes, especially with full hands or during bad weather.
- Improved Security: A customizable PIN is more secure than a physical key that can be lost or stolen. Regularly changing your code can reduce security breaches by up to 40%.
- Temporary Access: Grant temporary codes to guests, service providers, or delivery personnel without compromising your main PIN.
- Family-Friendly: Children can easily remember a PIN, giving them safe access without the risk of losing a key.
- Emergency Backup: A keypad provides a reliable way to get in if a remote is lost, broken, or left inside a vehicle.
The many benefits of an automatic garage door opener are amplified when paired with the convenience of a keypad.
What are the different types of garage door keypads available?
Choosing the right keypad makes programming easier. Here are the main types:
- Brand-Specific Keypads: Designed by manufacturers like Chamberlain, LiftMaster, and Genie for seamless integration with their openers.
- Universal Keypads: Engineered to work with multiple brands, offering flexibility for older or less common models.
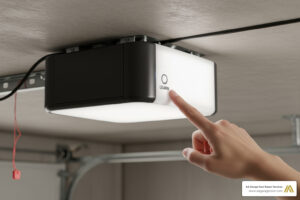
- Smart Keypads: These Wi-Fi-enabled devices integrate with your smart home system, allowing you to control and monitor your garage door from a smartphone app.
- Wireless vs. Wired: Wireless keypads are the standard for residential use, as they are battery-powered and easy to install. Wired keypads are powered by the opener itself but require more complex installation.
- Security Technology: Modern keypads use rolling code technology (like LiftMaster’s Security+® or Genie’s Intellicode®), which generates a new access code with every use. This makes it virtually impossible for intruders to capture and reuse your signal, a significant upgrade over older fixed-code systems.
Your Universal 5-Step Garage Keypad Programming Guide
While brand specifics vary, the core principles of garage keypad programming are universal. This five-step guide applies to most models. Before you start, you’ll need a sturdy ladder and your opener’s user manual (most are available online).

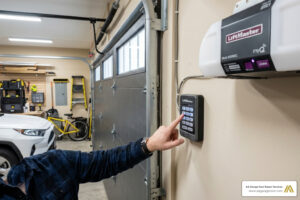
Step 1: Locate the ‘Learn’ or ‘Program’ Button
The ‘Learn’ button syncs your keypad to the opener. It’s a small, square or round button on the motor unit hanging from your garage ceiling, usually near the antenna wire or under the light cover. The button’s color often indicates the opener’s technology:
- Purple or Yellow: Newer Chamberlain, LiftMaster, or Craftsman models with Security+ 2.0.
- Red or Orange: Older Chamberlain, LiftMaster, or Craftsman models with Security+.
- Green: Older models with Billion Code technology.
- Blue or Black: Typically found on Genie or Overhead Door openers.
For help with programming sequences, you can also check resources like this guide on how to reprogram a remote.
Step 2: Clear Existing Codes from the Keypad (Optional but Recommended)
If you’ve moved into a new home, this step is essential for security. To erase all previous codes, press and hold the ‘Learn’ button on the opener for 6-10 seconds until the adjacent LED light turns off. This action clears all remotes and keypads from the opener’s memory, so you will need to reprogram any other devices you use.
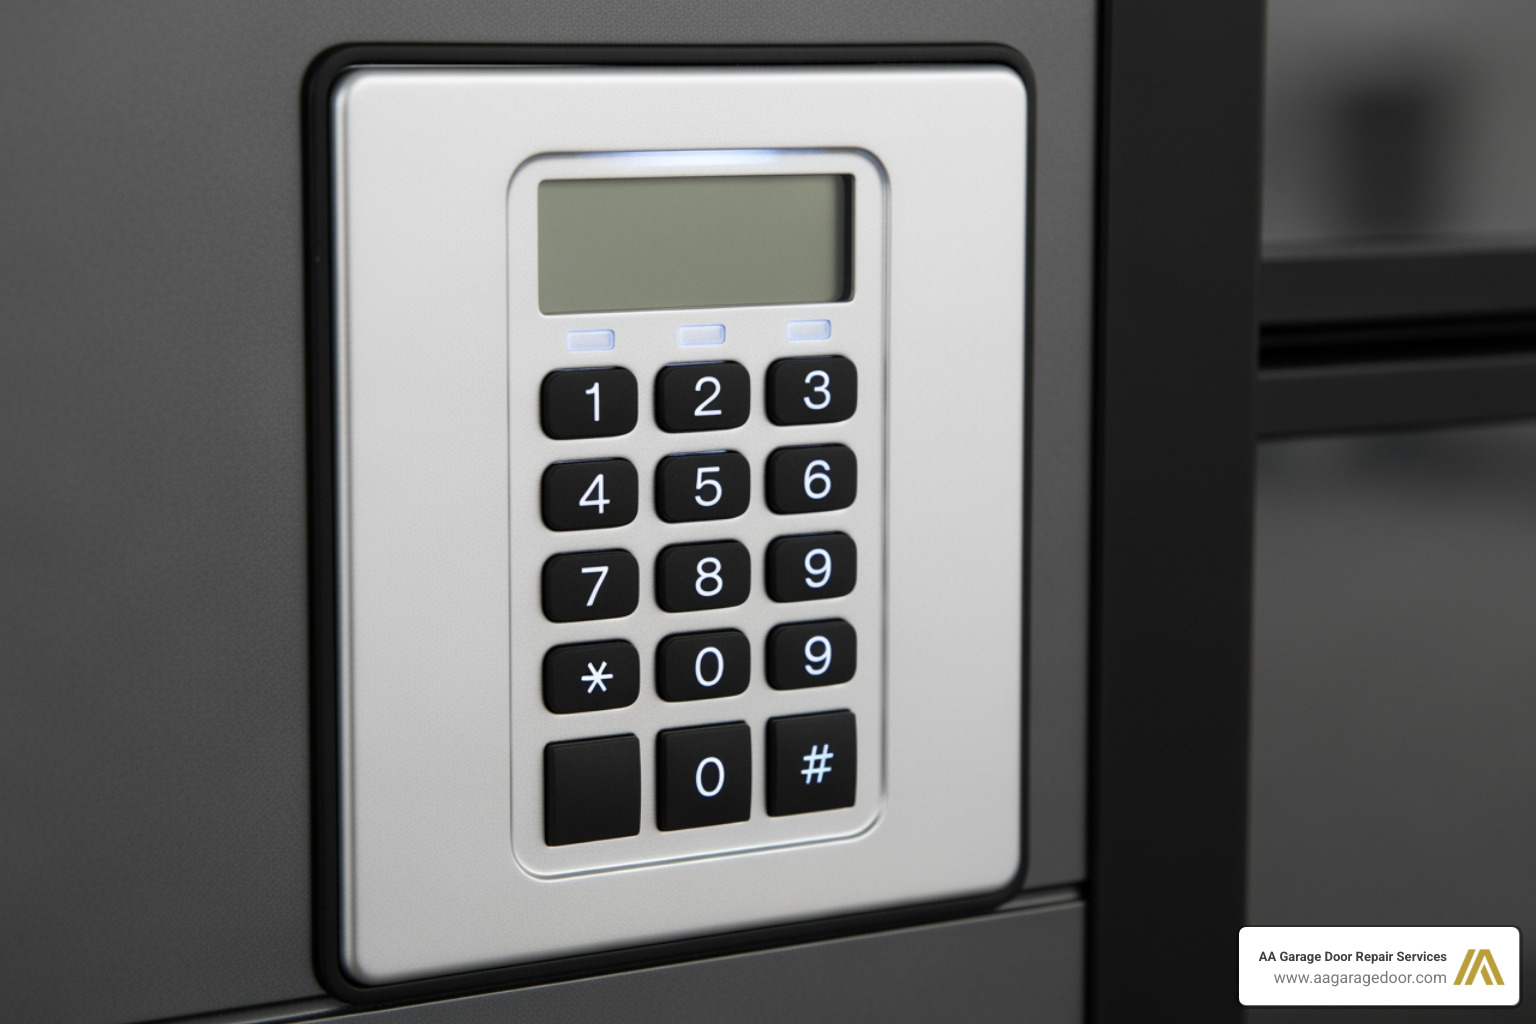
Step 3: How to program a new access code for your garage door keypad
With the old codes cleared, it’s time to program your new PIN.
- Press and release the ‘Learn’ button on the motor unit. The LED will light up or blink, indicating it’s in programming mode.
- You have 30 seconds to complete the next step.
- Enter your desired 4-digit PIN on the keypad.
- Press the confirmation button, which is typically labeled ‘Enter’ or is the ‘Up/Down’ arrow key.
Step 4: Confirm the Programming
After entering your PIN and pressing the confirmation button, the opener will signal that it has accepted the code. You should hear an audible click from the motor unit or see the opener’s main lights flash. If nothing happens, the 30-second programming window likely expired. Simply start again from Step 3.
Step 5: Test Your New PIN
For safety, ensure the garage door’s path is clear. Enter your new PIN on the keypad and press the ‘Enter’ or ‘Up/Down’ button. The garage door should operate immediately. If it works, you’ve successfully programmed your keypad! If not, try replacing the keypad’s batteries and repeat the steps. For more help, consult your garage door opener programming guide.
Step-by-Step Instructions for Popular Brands
While the universal guide is a great starting point, specific brands have unique programming sequences. Here’s a breakdown for the most common models we service in the Twin Cities and Western Wisconsin.
| Brand | Learn Button Location | Typical Learn Button Color | Programming Sequence Highlight |
|---|---|---|---|
| Chamberlain/LiftMaster/Craftsman | On the motor unit, near the antenna wire. | Purple, Red/Orange, Green, Yellow | Press/release Learn, enter PIN on keypad within 30 secs, press and hold ENTER. |
| Genie | On the motor unit, often a “Program” button. | Blue, Black, sometimes Red | Press/hold Program until blue LED, release, press again for purple LED, enter PIN, press UP/DOWN. |
How to handle garage keypad programming for Chamberlain, LiftMaster, and Craftsman

Chamberlain, LiftMaster, and Craftsman are all made by the same parent company, so their programming is nearly identical. The key is the color of the ‘Learn’ button on your opener.
- Locate and press/release the ‘Learn’ button on the motor unit. The LED will light up, starting a 30-second timer.
- Within 30 seconds, enter your desired 4-digit PIN on the keypad.
- Press and hold the ‘Enter’ button on the keypad until the garage door opener’s lights flash or you hear two clicks.
- Release the button and test your new code.
If it doesn’t work, the 30-second window may have expired. Try again, or check the keypad batteries. For more details, see our garage door opener programming guide.
How to handle garage keypad programming for Genie

Genie’s Intellicode® technology uses a slightly different sequence. For a new keypad, you may need to program the PIN into the keypad first.
- On the keypad, press 3-5-7, then press ‘PROGRAM’. Enter your desired PIN (3-8 digits), and press ‘PROGRAM’ again.
- On the opener motor unit, locate the ‘Learn’ or ‘Program’ button.
- Press and hold the button until the round LED turns blue, then release.
- The long LED will begin blinking purple.
- Enter your PIN on the keypad and press the ‘Up/Down’ key several times until the garage door operates.
This confirms the keypad is synced. For model-specific instructions, refer to Genie’s official programming instructions. If you run into trouble, our team at AA Garage Door Repair Services has extensive experience with all Genie systems.
Solving Common Keypad Issues: A Troubleshooting Checklist
If your garage keypad programming attempt fails, don’t worry. Most issues are simple to fix. Use this checklist to diagnose the problem. If these tips don’t work, it may be time for professional garage door opener repair.

Keypad Not Responding at All
If the keypad is completely dead (no lights, no response), check these common culprits:
- Dead Batteries: This is the #1 cause. Replace the 9V or AAA batteries. If the keypad backlight doesn’t turn on, the batteries are the problem. Clean any corrosion from the contacts before inserting new ones.
- Corrupted Programming: Power surges can sometimes erase the keypad’s programming. Try reprogramming it from scratch.
- Signal Interference: Certain LED light bulbs in your garage door opener can emit frequencies that block the keypad’s signal. Try removing the bulbs and testing the keypad again.
Keypad Accepts Code but Door Doesn’t Move
If the keypad lights up but the door won’t budge, the issue is likely with the opener, not the keypad.
- Safety Sensor Misalignment: The photo-eye sensors at the bottom of the door tracks must be perfectly aligned. If their indicator lights are blinking, they are blocked or misaligned. Clean the lenses and ensure they are pointing directly at each other.
- Opener Lock Mode: Many openers have a ‘lock’ or ‘vacation’ mode that disables remotes and keypads. Check your wall control panel for a lock button and deactivate it.
- Lost Sync: The opener may have lost its connection to the keypad. Re-run the programming sequence to re-establish the link.
The Keypad Works Intermittently
Random failures are frustrating but usually point to a weak connection.
- Weak Batteries: Even if the backlight works, dying batteries may not have enough power to send a strong signal. Always start by replacing the batteries.
- Signal Range: Your keypad may be too far from the opener, or a new obstruction (like a large vehicle or metal shelving) could be blocking the signal. Try operating it from a closer position.
- Opener Antenna: Ensure the thin antenna wire on the motor unit is hanging straight down and is not damaged or coiled.
- Extreme Cold: In Minnesota and Wisconsin winters, cold temperatures can drain battery power significantly. If your keypad only fails on the coldest days, the battery is the likely cause.
Beyond the Basics: Security, Maintenance, and Smart Features
Once your keypad is programmed, a few best practices will ensure its long-term security and reliability. For homeowners needing assistance with their garage door system, our team is ready to handle any garage door repair needs in Baldwin, WI, and the surrounding areas.
Best Practices for a Secure PIN
Your PIN is your digital key. Protect it accordingly.
- Avoid Obvious Codes: Never use ‘1234’, your house number, or sequential digits.
- Change Your PIN Regularly: Update your PIN at least once a year, or immediately if you suspect it has been compromised.
- Keep it Private: Don’t write your PIN down near the keypad or share it unnecessarily.
Maintenance and Lifespan
A little care extends your keypad’s life, which is typically 10+ years.
- Keep it Clean: Wipe the keypad with a damp cloth to remove dirt and grime.
- Replace Batteries Annually: For wireless keypads, replace the batteries every year to prevent failure, especially in cold weather.
- Check Mounting: Ensure the keypad is securely attached to the wall to prevent tampering.
For a complete system checkup, consider a professional garage door maintenance service to keep all components in optimal condition.
Advanced Features: Temporary Codes and Smart Home Integration
Modern keypads offer powerful features for access management.
- Temporary Access Codes: Most keypads allow you to set temporary PINs for guests, service providers, or contractors. These codes can be set to expire after a certain number of uses or a specific time period. Consult your manual for instructions.
- Smart Home Integration: Smart keypads connect to your Wi-Fi, allowing you to control and monitor your garage door from a smartphone app. You can receive alerts, grant remote access, and check if the door was left open. Making your garage door smart is a worthwhile upgrade for modern homes.
Frequently Asked Questions about Garage Keypad Programming
Here are quick answers to the most common questions we hear about garage keypad programming from homeowners in the Twin Cities and Western WI.
How often should I reprogram my garage door keypad?
For optimal security, reprogram your keypad with a new PIN at least once a year. Change it immediately if you move into a new home, or if you suspect the code has been compromised.
Can I set a temporary access code for guests?
Yes, most modern keypads from brands like LiftMaster, Chamberlain, and Genie support temporary PINs. This feature is ideal for granting limited access to service providers or guests without sharing your primary code. The process typically involves entering your master PIN followed by a specific command sequence, as detailed in your user manual.
How do I reset my garage door keypad if I forget the PIN?
If you forget your PIN, you must clear the memory from the garage door opener’s motor unit. To do this, press and hold the ‘Learn’ button on the opener for 6-10 seconds until the indicator light goes out. Important: This erases all programmed devices, including all remotes and keypads. You will need to reprogram every device from scratch.
Your Key to Convenient and Secure Access
Mastering garage keypad programming gives you convenient and secure control over your home’s largest entry point. By following these steps, you can set up, troubleshoot, and maintain your system with confidence, enjoying the peace of mind that comes with keyless access.
If you encounter persistent issues or want to upgrade your garage door opener or keypad, the experienced technicians at AA Garage Door are here to help. With 24/7 service across the Twin Cities and Western WI, we ensure your system works flawlessly. For expert advice or to schedule a service, reach out to our local team at AA Garage Door Repair Services.