Understanding Your Opener: The Learn Button and Universal Remotes
How to program a garage remote control takes three steps for most modern openers:
- Press and release the Learn button on your opener motor unit
- Press and hold the button on your remote within 30 seconds until the opener lights blink or you hear a click
- Test the remote to confirm the door responds
That’s the core process for the vast majority of garage door openers made after 1993. The whole job usually takes under 15 minutes.
Of course, there’s more to know – different brands, car-integrated systems like HomeLink, wireless keypads, and security resets all work a little differently. And if something isn’t clicking (literally), troubleshooting matters. That’s what this guide covers.
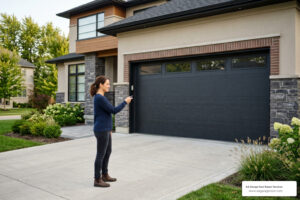
Whether you just moved into a new Twin Cities home, lost a remote, or bought a new clicker that won’t sync, our expert garage door repair in the Twin Cities team at AA Garage Door has seen every scenario. Getting your remote working again is almost always a quick DIY fix – once you know the right steps.
I’m David Sands, owner of AA Garage Door LLC with over 23 years of hands-on experience programming, troubleshooting, and installing opener systems across Wisconsin and Minnesota. I’ve put together this guide to walk you through how to program a garage remote control for every common situation, so you can get it done right the first time.

Before you climb that ladder, you need to understand the technology inside the box on your ceiling. Modern garage door openers manufactured after 1993 use rolling code technology. This is a security feature that generates a new, unique radio code every time you press the button, preventing “code grabbing” by tech-savvy intruders.
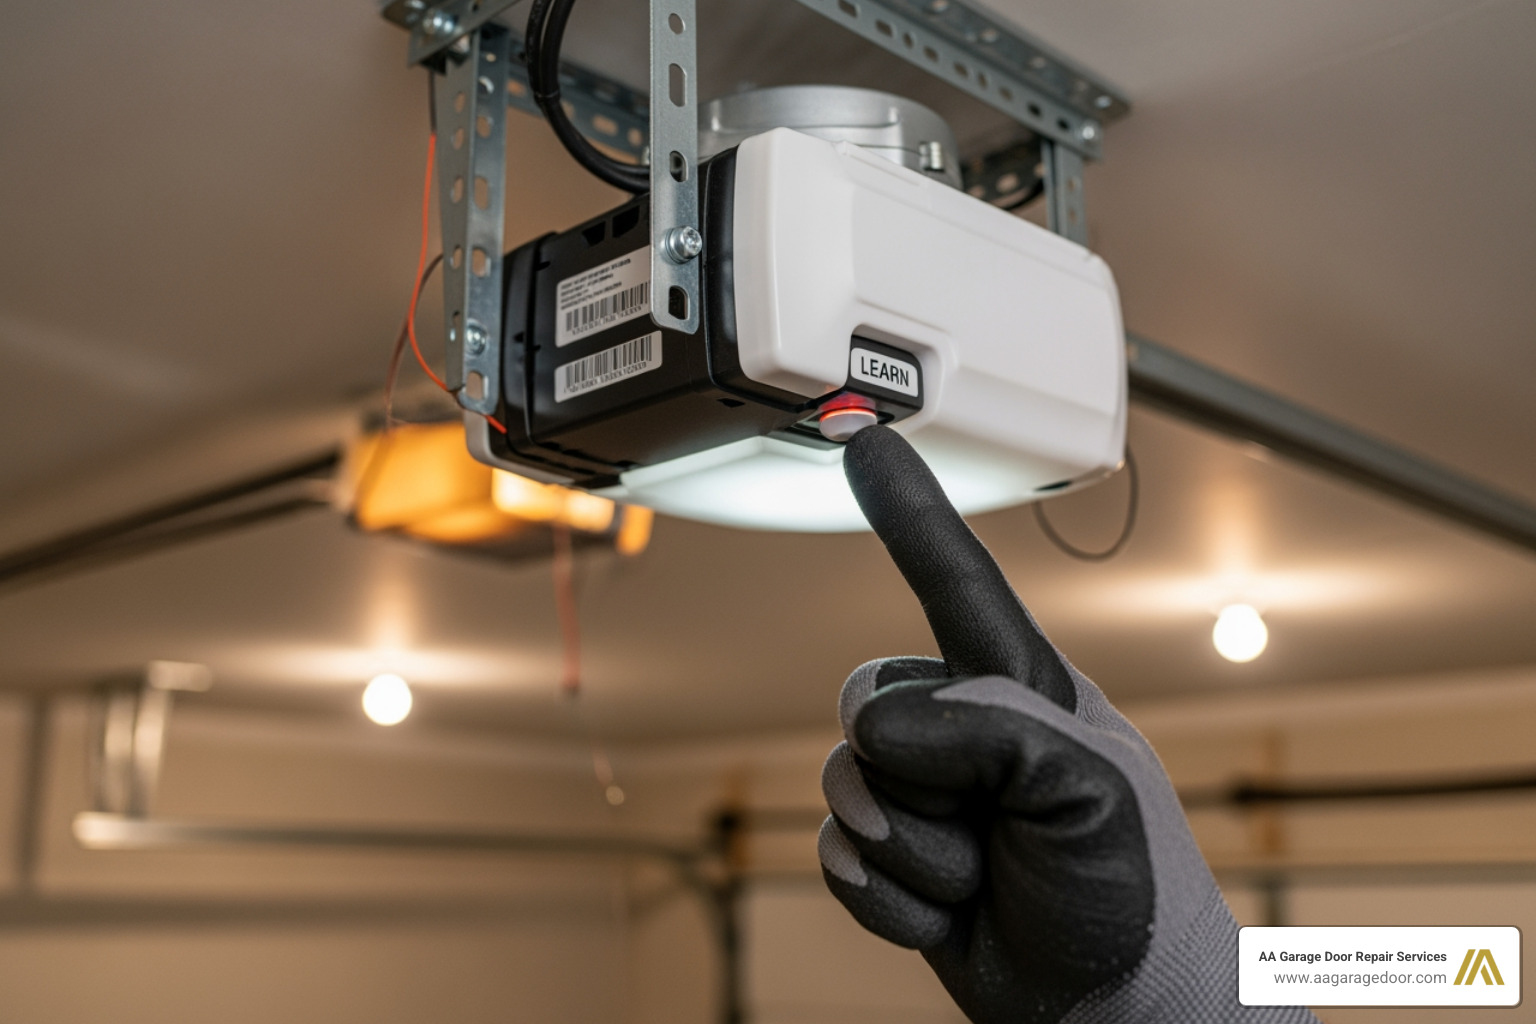
The “brain” of this system is the Learn button. This button tells the opener to listen for a new signal and save it to its internal memory. Most modern openers can store between 8 and 20 remote codes at once.
The Color Code System
If you have a LiftMaster, Chamberlain, or Craftsman opener, the color of the Learn button is the most important piece of information you have. The color indicates the radio frequency and the specific version of Security+ technology the unit uses.
| Learn Button Color | Technology Type | Frequency |
|---|---|---|
| Yellow | Security+ 2.0 | 310, 315, and 390 MHz |
| Purple | Security+ | 315 MHz |
| Red / Orange | Security+ | 390 MHz |
| Green | Billion Code | 390 MHz |

Universal Remote Compatibility
A universal garage door remote is designed to “speak” the languages of multiple brands. These are incredibly useful if you have two different opener brands for a two-car garage. However, compatibility isn’t guaranteed for every model. Most universal remotes work with major brands made after 1993, but if you have a very old unit using DIP switches (tiny manual toggles), you must ensure the universal remote specifically supports that older frequency. For more details on choosing the right hardware, check out our Garage Door Opener Remote Complete Guide.
Step-by-Step: How to Program a Garage Remote Control
Programming a remote is a race against the clock—a very slow race, but a race nonetheless. Once you activate the “Learn” mode on your motor unit, you typically have a 30-second programming window to send the signal from your remote. If you miss this window, the light on the motor will turn off, and you’ll have to start over.
Preparation for How to Program a Garage Remote Control
Don’t wing it. Preparation prevents frustration (and falls).
- Ladder Safety: Ensure your stepladder is on level ground. Never stand on the top rung.
- Fresh Batteries: 70% of programming “failures” are actually just weak batteries. In May 2026, most remotes use CR2032 lithium coin batteries. Replace them before you start.
- Identify the Brand: Look at the motor unit. Is it a Genie, LiftMaster, or Wayne Dalton? This determines the specific button-pressing sequence.
- Clear the Path: Make sure nothing is under the door. You’ll be testing it shortly, and we want to avoid any safety reversals.
The Standard Programming Sequence
While specific brands vary slightly, this is the “Universal Standard” that works for most units. You can also find a detailed Step-by-Step Guide to Programming Your Garage Door Remote for further visual aid.
- Locate the Learn Button: It is usually on the back or side of the motor unit, often hidden behind a plastic light lens.
- Press and Release: Press the Learn button once. The indicator light next to it will glow steadily. Do not hold it down (holding it for more than 6 seconds usually erases all your remotes!).
- Sync the Remote: Within 30 seconds, press and hold the button on your handheld remote.
- Watch for the Signal: The garage door opener lights will flash, or you will hear two clicks. This is the “handshake” confirming the code is saved.
- Test: Wait 10 seconds, then press the remote button to see if the door moves.

Programming Built-in Car Systems and Wireless Keypads
In 2026, almost every new vehicle comes equipped with HomeLink or Car2U systems, usually integrated into the rearview mirror or the overhead console. This allows you to ditch the plastic clicker on your visor for a clean, built-in look.
Syncing HomeLink to Your Opener
Programming a car is a bit more involved because it requires a “double handshake” for rolling code systems.
- Clear Factory Codes: Press and hold the two outer HomeLink buttons in your car for about 20 seconds until the light flashes rapidly.
- Train the Car: Hold your handheld remote 1-3 inches from the HomeLink buttons. Press both the remote button and the desired HomeLink button simultaneously. Hold them until the car’s indicator light changes from a slow blink to a rapid flash.
- The Rolling Code Handshake: Now, go to the garage motor and press the Learn button.
- Finalize: Return to the car within 30 seconds and firmly press the programmed HomeLink button two or three times. The garage door should move, confirming the link.
Note: HomeLink systems in vehicles manufactured in 1995, 1996, and early 1997 are generally not compatible with modern rolling code systems without a bridge kit.
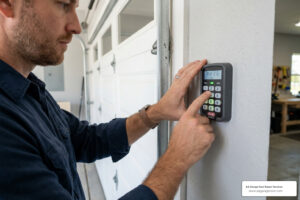
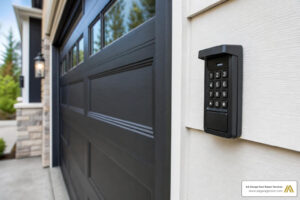
Setting Up a Wireless Keypad
Wireless keypads are a lifesaver for kids coming home from school or for letting in contractors.
- Press the Learn button on the motor.
- Within 30 seconds, enter your chosen 4-digit PIN on the keypad.
- Press and hold the Enter button until the opener lights blink.
- Test by entering the PIN and pressing Enter again.
For more advanced keypad tips, see our guide on Garage Door Keypad Programming.
Troubleshooting and Brand-Specific Programming Tips
Sometimes, you follow the steps perfectly and… nothing. Don’t pull your hair out yet. There are several common environmental factors that can block a signal.
Common Fixes for Programming Failures
- LED Bulb Interference: This is a huge issue in 2026. Cheap LED light bulbs in the opener or nearby in the garage emit radio frequency interference (RFI) that “jams” the remote signal. Switch to incandescent bulbs or specialized “opener-rated” LEDs.
- Antenna Alignment: Ensure the small antenna wire hanging from the motor unit is hanging straight down. If it’s tucked up inside the housing, your range will drop significantly.
- Battery Polarity: It sounds simple, but double-check that the plus (+) side of the coin battery is facing the right way.
- Cold Weather Issues: In our service areas like St. Paul and Baldwin, WI, extreme cold (below -15°C) can weaken battery output. If you’re programming in the winter, keep the remote in your pocket to stay warm before you start.
Brand Differences: LiftMaster, Genie, and Overhead Door
- LiftMaster/Chamberlain: These use the “Learn” button method exclusively. If you have the “MyQ” smart system, you can often program remotes directly through the smartphone app.
- Genie/Overhead Door: These brands often use Intellicode or CodeDodger technology. Instead of a single press, you may need to hold the program button until the LED turns purple, then press the remote button several times to “set” the frequency.
- Older Models: If your opener was made before 1993, it likely has DIP switches. To program these, you must open the remote and the motor unit and make sure the 8 to 12 tiny switches match exactly.
Security Resets and Memory Management
There are times when you don’t want a remote to work. If you’ve just moved into a new home in Woodbury or Hudson, or if you’ve lost a remote, you should perform a full memory reset. This is the digital equivalent of changing the locks on your front door.
How to Erase All Codes
To wipe the memory of your garage door opener:
- Locate the Learn button.
- Press and hold the button for approximately 6 to 10 seconds.
- The indicator light will turn off or blink, signaling that all previous remotes and keypads have been erased.
How to Program a Garage Remote Control After Erasing Memory
Once the memory is clear, none of your remotes will work—including the ones you still have. You must now go back through the standard programming sequence for every device you want to use. This ensures that the lost remote or the previous owner’s remote can no longer open your door. For a deeper dive into this process, read our article on How to Reprogram Garage Door Opener.
Frequently Asked Questions about Garage Remotes
Why won’t my garage door remote program?
The most common reasons are a dead battery, being out of the 30-second programming window, or radio frequency interference from LED bulbs. Also, ensure the remote is actually compatible with your opener’s frequency (check the Learn button color!).
How many remotes can I program to one opener?
Most modern residential openers from brands like LiftMaster and Genie can store between 8 and 20 remote codes. This includes handheld remotes, wireless keypads, and car HomeLink systems.
Do I need to reprogram my remote after changing the battery?
Usually, no. Most modern remotes use non-volatile memory, meaning they “remember” the code even when the power source is removed. If it stops working after a battery change, check the battery orientation or look for signs of RFI.
Conclusion
Mastering how to program a garage remote control is a vital skill for any homeowner. It provides convenience, enhances your home’s security, and saves you the cost of a service call for a simple 10-minute task. By understanding your Learn button color and following the 30-second rule, you can keep your Twin Cities home accessible and secure.
At AA Garage Door Repair Services, we’ve been the local experts in St. Paul, the Twin Cities, and Western Wisconsin since 2001. Whether you need a new garage door opener installation or you’re dealing with a stubborn signal that just won’t sync, we are here to help. We offer 24/7 emergency support and transparent pricing for all our neighbors from Woodbury to Baldwin.
If you’ve tried these steps and your remote still won’t cooperate, it might be a sign of a failing logic board or a more complex electrical issue. Don’t let a faulty remote leave you stuck in the driveway. For expert assistance, you can find our Apple Valley garage door repair specialists ready to assist.