How to Program a Chamberlain Garage Door Opener in Under a Minute
Learning how to program garage door opener Chamberlain models is simpler than most homeowners expect. In most cases, the entire process takes less than 60 seconds once you locate the Learn button on your motor unit.
Here’s the fastest way to get it done:
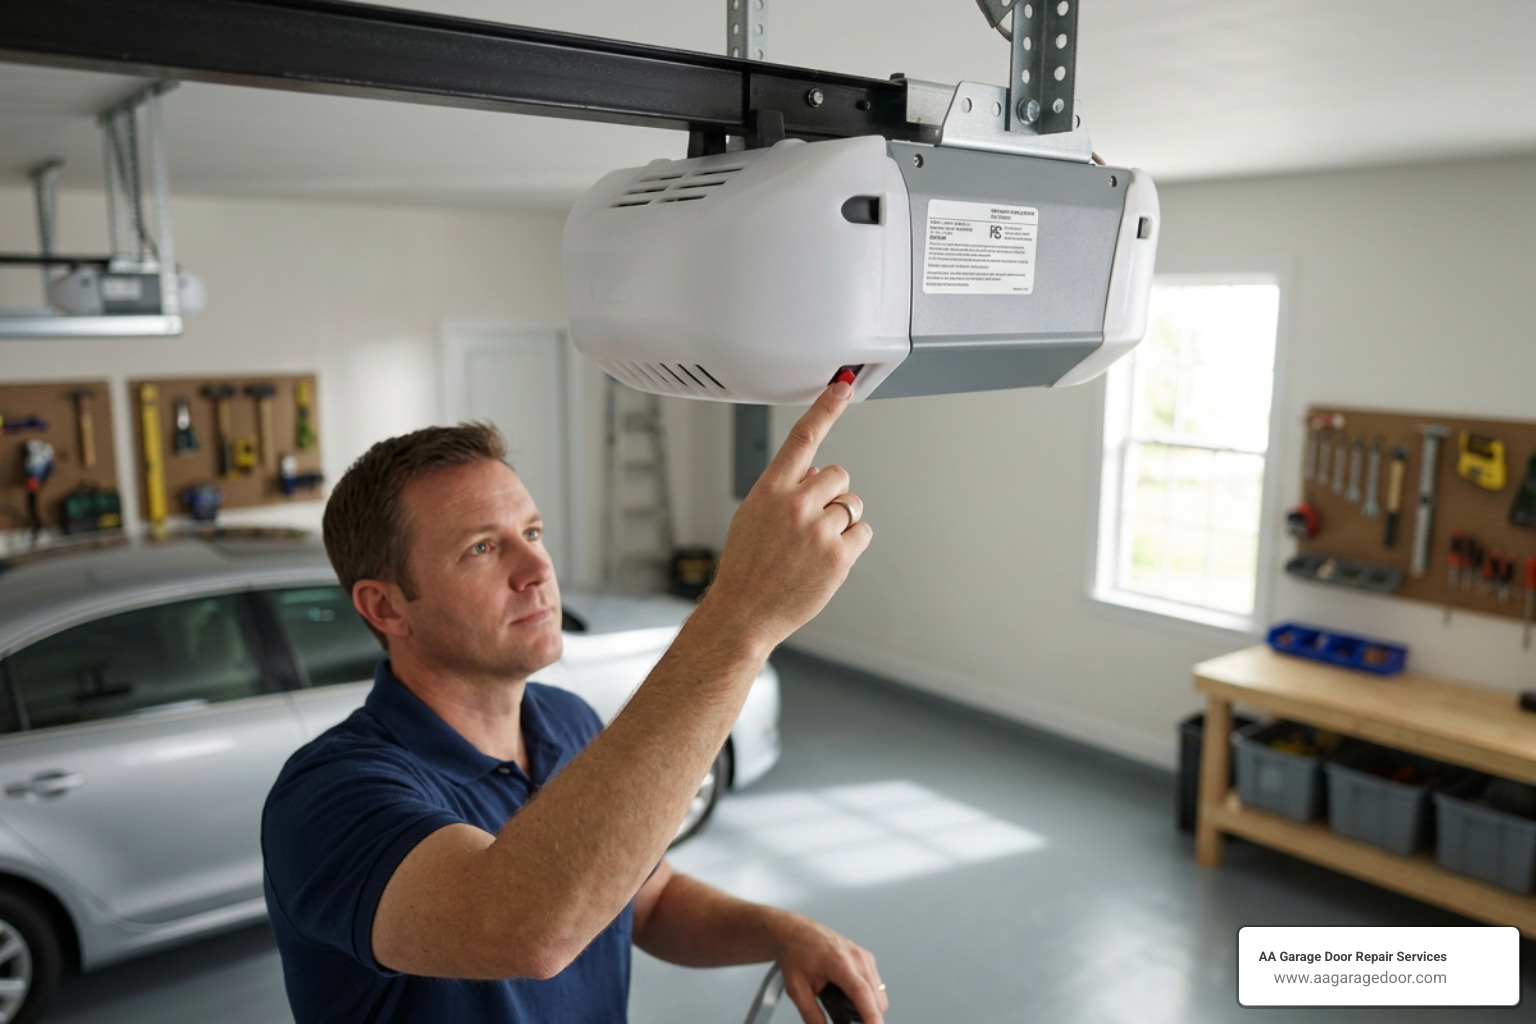
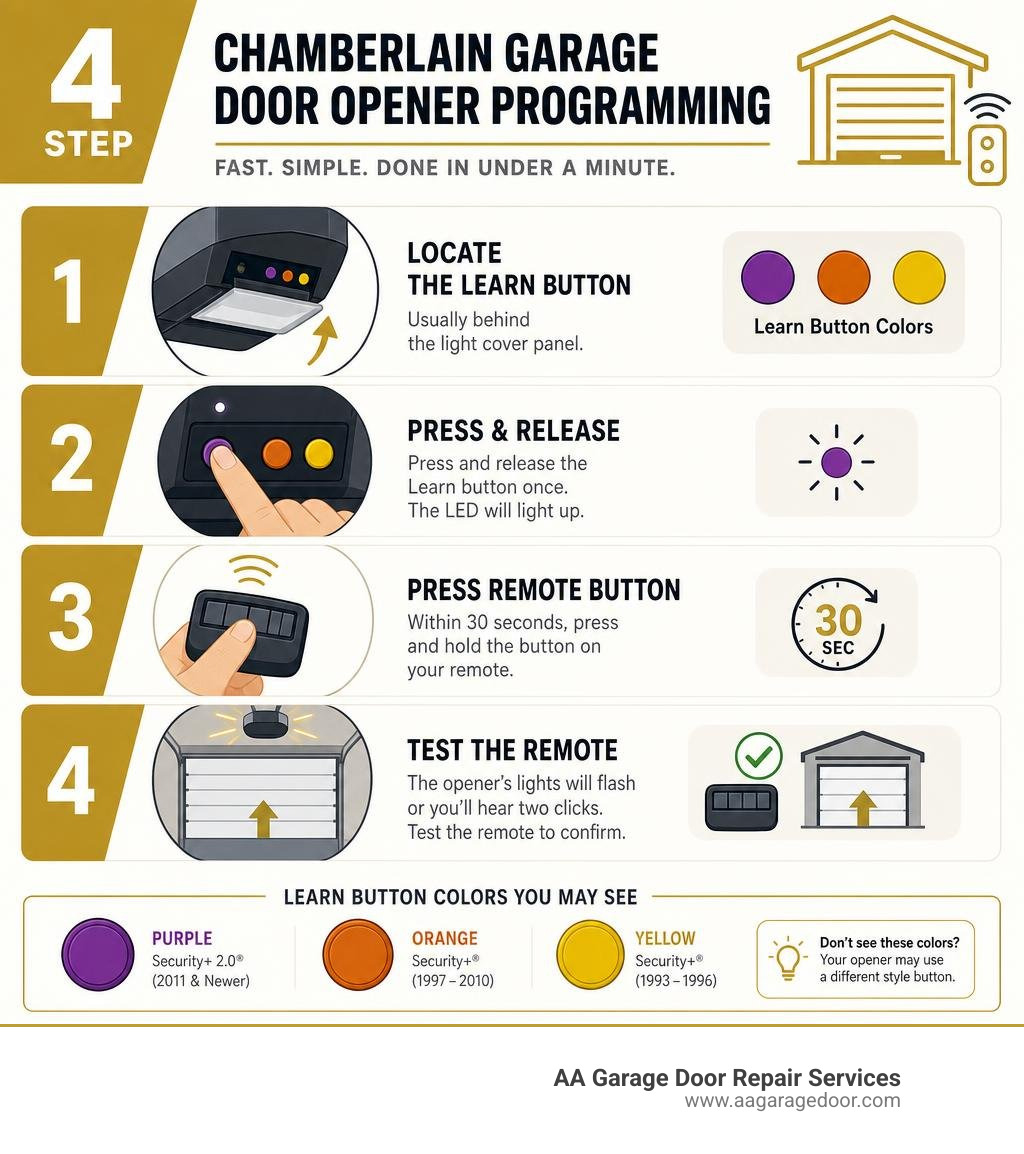
- Locate the Learn button on your Chamberlain motor unit (usually behind the light cover panel).
- Press and release the Learn button once — the LED will light up.
- Within 30 seconds, press and hold the button on your remote until the opener’s lights flash or you hear two clicks.
- Test the remote by pressing the programmed button to confirm the door responds.
If you prefer to have a professional handle this setup, you can rely on trusted local garage door opener help to get your system running perfectly.
That’s the core process. The steps vary slightly depending on your model, Learn button color, and whether you’re using the motor unit, a wall control panel, or the myQ app — but the logic is the same across all Chamberlain openers.
If you’re in the Twin Cities and need hands-on help, our garage door opener repair and programming services are available when DIY isn’t cutting it.
I’m David Sands, owner of AA Garage Door LLC, with over 23 years of experience installing, repairing, and programming Chamberlain and LiftMaster openers across Wisconsin and Minnesota. I’ve put together this guide on how to program garage door opener Chamberlain systems based on what actually works in the field — not just what’s in the manual. Let’s walk through every method step by step so you can get your remote working today.
How to program garage door opener chamberlain vocab explained:
Safety Precautions Before You Begin
Before we dive into pressing buttons and climbing ladders, we must address safety. A garage door is the largest moving object in your home, operating under immense spring tension. While programming a remote control is generally a low-risk activity, accidental activation during the process can cause serious injury or property damage if the area isn’t clear.
First, always clear the garage door’s path of all physical obstructions, including vehicles, tools, pets, and family members. Ensure the door is fully closed before you begin programming to prevent it from moving unexpectedly. If you must program the door while it is open, make sure nothing is parked underneath it.
Second, verify that your safety reversing sensors are properly aligned and clean. These sensors, mounted 5 to 6 inches above the floor on both sides of the door track, project an invisible infrared beam. If this beam is broken, the door will not close. We recommend checking these sensors as part of our garage door maintenance complete guide.
Third, use a sturdy, secure ladder to reach the motor unit. Do not stand on a chair, a bucket, or the roof of your car. Position the ladder to the side of the motor unit rather than directly underneath the rail assembly to avoid reaching awkwardly over your head.
Finally, keep in mind that low-voltage wiring plays a critical role in how your system communicates. If your wall button or sensors are acting up, the culprit might be physical rather than wireless. In fact, nearly 1 in 4 garage door opener service calls are caused by incorrect wiring or loose connections. If you suspect a wiring issue on your unit, consult our guide on how to wire up a Chamberlain garage door opener to rule out electrical faults before assuming your remote is broken.
How to Program Garage Door Opener Chamberlain: The Ultimate Guide
Chamberlain garage door openers are among the most reliable on the market, largely due to their advanced radio frequency encryption. Modern Chamberlain units utilize Security+ 2.0 rolling code technology. This security protocol changes the access code every single time you press the remote button, choosing from billions of possible combinations. This prevents tech-savvy thieves from “code grabbing” or duplicating your remote’s signal.
To program a remote or accessory to this secure system, you must introduce the transmitter to the receiver inside the motor unit. There are three primary pathways to establish this handshake: using the physical Learn button on the motor overhead, using your wall-mounted control panel, or using the modern myQ smart app.
Whether you are setting up a brand-new remote or pairing an older transmitter, understanding these pathways will save you time and frustration. For a broader overview of how these systems sync, check out our programming your garage door opener step-by-step tutorial.
How to Program Garage Door Opener Chamberlain Using the Learn Button
The most common and direct way to pair your remote control is by using the physical Learn button located on the overhead motor unit. This method works for almost all Chamberlain models manufactured over the last three decades.
Here is the step-by-step sequence to program your remote using the motor unit:
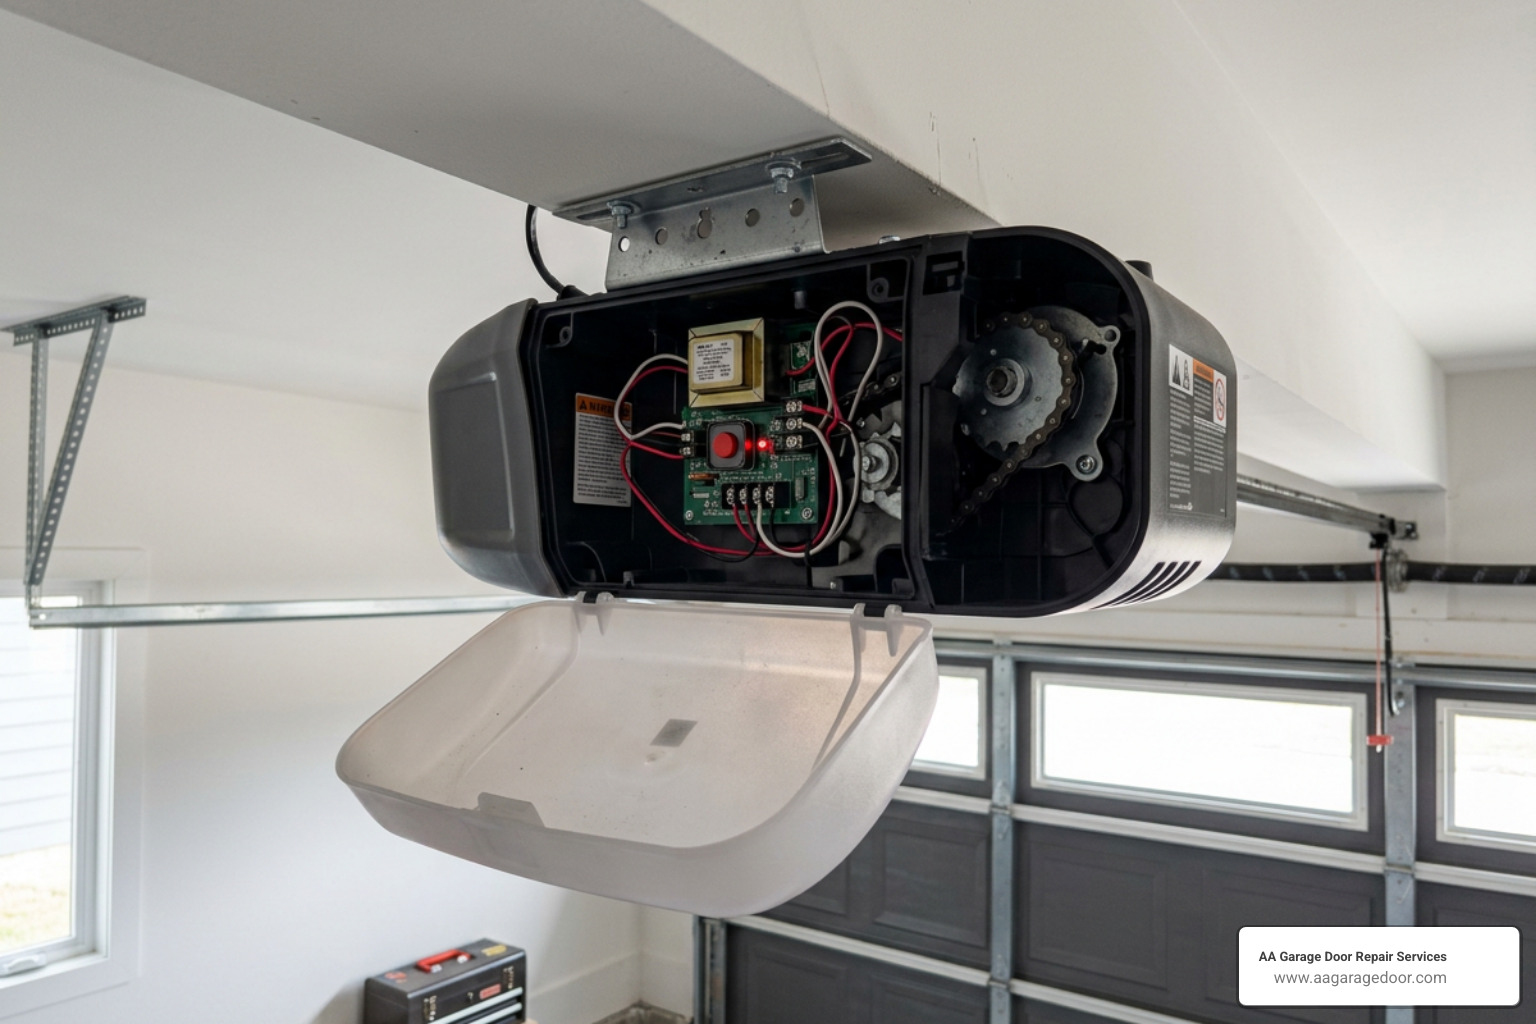
- Locate the Learn Button: Climb your ladder and locate the control panel on the motor head. It is typically hidden behind one of the plastic light lens covers. Gently pull the light cover down to expose the control panel.
- Identify the Button: Look for a small square or round colored button labeled “Learn.” Next to this button, you will see a small LED indicator light.
- Press the Learn Button: Press and immediately release the Learn button once. Do not hold it down, as holding it for more than 6 seconds will erase all programmed remotes from the opener’s memory. The LED indicator light will glow steadily, indicating the unit is now in pairing mode.
- Initiate the 30-Second Window: You now have exactly 30 seconds to complete the pairing process. Step down from the ladder safely and grab your remote control.
- Press the Remote Button: Press and hold the button on your remote control that you wish to operate the garage door. Hold it down for approximately 5 to 10 seconds.
- Watch for Confirmation: Release the remote button when the overhead motor unit’s light bulbs blink twice, or when you hear two distinct clicking sounds from the motor unit. This signal indicates the receiver has successfully captured the remote’s rolling code.
- Test the System: Wait a few seconds, then press the programmed button on your remote again. The garage door should smoothly open or close.
For more detailed technical specifications on this direct-pairing method, you can refer to the official Chamberlain support documentation on how to program a remote control.
How to Program Garage Door Opener Chamberlain with a Wall Control
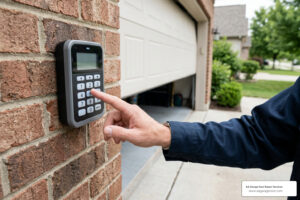
If you have a modern Chamberlain system equipped with a Smart Control Panel or an LCD Multi-Function Wall Control, you don’t even need to climb a ladder. You can put the overhead unit into pairing mode directly from the wall button inside your garage.
To program your remote using an LCD Smart Control Panel:
- Access the Menu: Press the “Menu” button on the wall console to wake up the LCD screen.
- Navigate to Features: Use the arrow keys to scroll down to the “Features” or “Program” option, then press the “OK” or selection button.
- Select Remote: Choose “Remote” from the menu options. This action sends a signal to the overhead motor unit to enter Learn mode, bypassing the need to press the physical button on the ceiling.
- Press the Remote Button: Within 30 seconds, press and hold the button on your handheld remote control that you want to program.
- Listen for the Click: The garage door opener lights will flash, or you will hear two clicks, confirming that the programming is complete. Press the selection button on the wall panel to exit the menu.
If you have a multi-function wall button without an LCD screen but with a light-up push button:
- Press the Program Button: Locate the small “Learn” button on the side or bottom of the wall control housing, or press the light button twice while holding down the main push bar (depending on your specific wall control model).
- Verify the Light: The indicator light on the wall button or the overhead motor unit will light up or blink.
- Sync the Remote: Press and hold the button on your remote control until the overhead light bulbs flash or click.
Using the wall control console is a fantastic, safer alternative to climbing ladders. If you want to explore more about this method, read our guide on how to program a garage remote control the right way.
Programming via the myQ Smart App
Modern Chamberlain garage door openers come equipped with built-in Wi-Fi and myQ smart technology. This allows you to control, monitor, and program your garage door directly from your smartphone.
To connect your Wi-Fi-enabled opener to the myQ app and prepare it for smart accessory pairing:
- Download the App: Download the free myQ app from the Apple App Store or Google Play Store. Create an account or log in.
- Prepare the Opener: Ensure your home Wi-Fi signal is strong inside the garage. Power up your opener and make sure the door is clear.
- Place the Opener into Program Mode: To link the opener to your home network, you must put it into Wi-Fi learn mode. Press and release the yellow Learn button on the motor unit three times quickly. Alternatively, use your smart wall control panel to navigate to “Wi-Fi Setup.” The opener will beep once, and a blue LED light will begin to blink, indicating it is broadcasting its network.
- Connect via the App: Open the myQ app on your smartphone, tap the “+” icon to add a new device, and select “Garage Door Opener.” Follow the step-by-step in-app instructions to connect to the opener’s temporary network, select your home Wi-Fi network, and enter your password.
- Control and Pair: Once connected, you can open and close your door from anywhere, receive real-time notifications, and pair smart accessories like wireless cameras or smart keypads directly through the app’s interface.
For help putting your specific model into the correct state for smart pairing, consult the manufacturer’s guide on how to place an opener into program mode for myQ setup.
Identifying Your Chamberlain Learn Button Color
One of the most common reasons homeowners fail when trying to program their Chamberlain remote is ignoring the color of the Learn button. The color of this button is not a random design choice; it is a critical indicator of the year your opener was manufactured, the radio frequency it communicates on, and the security encryption technology it uses.
If you buy a replacement remote, you must ensure it matches the frequency of your specific Learn button color. For instance, a remote designed for a Purple Learn button will not work with a Yellow Learn button system because they operate on entirely different frequencies and protocols.
| Button Color | Manufacturing Era | Radio Frequency | Security Technology | Compatible Remote Models |
|---|---|---|---|---|
| Yellow | 2011 – Present | 310, 315, & 390 MHz (Tri-Band) | Security+ 2.0 (Rolling Code) | 891LM, 893LM, 953ESTD, myQ Accessories |
| Purple | 2005 – 2014 | 315 MHz | Security+ (Rolling Code) | 371LM, 373LM, 953D |
| Red / Orange | 1997 – 2005 | 390 MHz | Security+ (Rolling Code) | 971LM, 973LM, 953CB |
| Green | 1993 – 1997 | 390 MHz | Billion Code (Fixed Code) | 81LM, 83LM |
If you have a Yellow Learn Button, your system uses Security+ 2.0. This is Chamberlain’s most secure system, utilizing a unique tri-band frequency to virtually eliminate wireless interference from nearby household electronics.
A Purple Learn Button signifies a 315 MHz Security+ system, which was introduced to resolve interference issues caused by military radio communications on the 390 MHz band.
A Red or Orange Learn Button indicates a 390 MHz Security+ rolling code system, while an older Green Learn Button indicates Billion Code technology, which uses a fixed code rather than rolling code technology.
For a deeper look into how these colors affect your specific model, you can read the comprehensive Chamberlain remote programming guide on ArteHow.
Programming Chamberlain Universal Remotes
If you have multiple garage doors from different brands, or if you purchased a universal remote control like the Chamberlain Clicker or the ARQ™ Universal Remote, the programming process requires a slightly different approach. These universal remotes are designed to mimic the signals of various manufacturers, meaning you must configure the remote to speak “Chamberlain language” before pairing it with your motor unit.
When programming a Chamberlain universal remote, we recommend setting up the top button first if you intend to control two different doors. This prevents you from accidentally activating a pre-programmed door while trying to sync the second button.
To program a Chamberlain Universal Remote (such as the 953EV or Clicker models) to your Chamberlain opener:
- Prepare the Remote: Remove the remote’s battery cover to access the program button (usually a small, recessed button that requires a paperclip or a firm press).
- Enter Programming Mode: Press and hold the program button on the remote until the LED light on the remote lights up and remains solid.
- Select Your Button: Press and release the remote button you wish to program.
- Code the Remote: You must now press the remote button a specific number of times depending on your opener’s Learn button color. For example, if your Chamberlain opener has a Yellow Learn button, you will press the remote button 8 times. If it has a Purple button, you will press it 3 times. Refer to your remote’s manual to find the exact button-press count for your color.
- Save the Code: Press the program button on the remote once more to save this configuration. The remote’s LED light will turn off.
- Sync with Opener: Press and release the Learn button on your overhead garage door motor unit.
- Complete Pairing: Within 30 seconds, press the newly configured button on your universal remote. The opener lights will flash or click, indicating a successful connection.
If you are using Chamberlain’s premium ARQ™ remote, which is designed to integrate seamlessly with both modern and older openers, you can access brand-specific pairing steps directly via the ARQ universal remote programming portal.
For general tips on adding a new transmitter to your home, check out our guide on how to program a new garage door remote in 5 easy steps. Additionally, if you are setting up a completely new opener system from scratch, our step-by-step guide on how to hook up a Chamberlain garage door opener covers the physical installation and initial setup.
Troubleshooting and Resetting Your Chamberlain Opener
Sometimes, despite following every step perfectly, your remote refuses to sync. Don’t panic — most programming failures are caused by simple, easily corrected issues.
Here are the most common troubleshooting steps we use in the field:
- Check the Batteries: A weak battery may have enough power to light up the remote’s small LED indicator but not enough power to transmit a strong signal to the overhead motor unit. Always install a fresh, high-quality CR2032 lithium battery before programming.
- Inspect the Antenna: Ensure the thin antenna wire hanging from your overhead motor unit is not bent, cut, or tucked inside the motor housing. It should hang straight down to maximize signal reception.
- Rule Out Signal Interference: Large metal objects, LED light bulbs in the overhead unit, or nearby radio towers can block or interfere with your remote’s signal. If you suspect your overhead LED light bulbs are causing interference, temporarily remove them and try programming the remote again.
- Clear the Memory (Master Reset): If your opener’s memory is full (most older units can only hold up to 10 to 12 remotes or keypads), it will reject new devices. In this case, you must perform a master reset to wipe the memory clean and start fresh.
To perform a master reset on your Chamberlain motor unit:
- Locate the Learn button on the motor head.
- Press and hold the Learn button down. The LED indicator light next to the button will turn on.
- Keep holding the button for approximately 6 seconds.
- Release the button when the LED indicator light goes out. All previous codes, remotes, and keyless entry PINs have now been erased from the system’s memory.
- Reprogram your desired remotes and keypads one by one using the standard pairing steps.
Regularly clearing old codes is an excellent security measure, especially if you have recently moved into a new home or lost a remote control. For more maintenance strategies, check out our garage door opener maintenance guide.
Frequently Asked Questions about Chamberlain Programming
How do I erase the memory on my Chamberlain garage door opener?
To perform a master reset and erase all programmed remotes, keypads, and smart devices from your Chamberlain opener, press and hold the Learn button on the overhead motor unit. Hold the button down for approximately 6 seconds until the LED indicator light goes out. This wipes the receiver’s memory clean, which is highly recommended when moving into a new home or if a remote control is lost or stolen.
Why is my Chamberlain remote not responding after programming?
If your remote fails to respond after a successful programming sequence, check the remote’s battery first. A weak battery is the leading cause of signal failure. Next, ensure the overhead motor unit’s antenna wire is hanging straight down and is undamaged. Finally, check for wireless interference. Cheap or non-shielded LED light bulbs installed inside the garage door opener can emit electromagnetic interference that blocks the remote’s signal.
Can I program a universal remote to a Chamberlain opener?
Yes, you can program a high-quality universal remote control to a Chamberlain opener, provided the remote is compatible with your opener’s specific technology. If your Chamberlain opener uses Security+ 2.0 (indicated by a Yellow Learn button), you must verify that the universal remote explicitly supports Security+ 2.0 rolling codes. Standard dip-switch remotes will not work with modern Chamberlain openers.
Conclusion
Programming your Chamberlain garage door opener is a quick and satisfying DIY project that usually takes less than a minute. By identifying your Learn button color, preparing your workspace safely, and following the correct button-pressing sequence, you can easily restore convenience and security to your daily routine.
However, if you encounter persistent programming issues, suspicious wiring, or mechanical failures, don’t risk your safety. At AA Garage Door Repair Services, we have been serving homeowners across St. Paul, Woodbury, MN, Baldwin, and Hudson, WI, since 2001. We provide fast, reliable 24/7 emergency repair services, transparent pricing, and a satisfaction guarantee.
Whether you need a new remote programmed, a complete opener replacement, or expert repair on your door’s high-tension springs, we are here to help. Explore our Chamberlain garage door openers and services or visit our local Apple Valley garage door repair service page to book an appointment.
Ready for professional, hassle-free service? Contact our friendly local team today and let us handle the heavy lifting!