What is a Universal Garage Door Remote and How Does It Work?
Learning how to program a universal garage door remote takes most homeowners under five minutes — and you don’t need any special tools or technical background to do it. If you run into any issues, you can easily contact garage door repair experts for fast assistance.
Here’s the quick version:
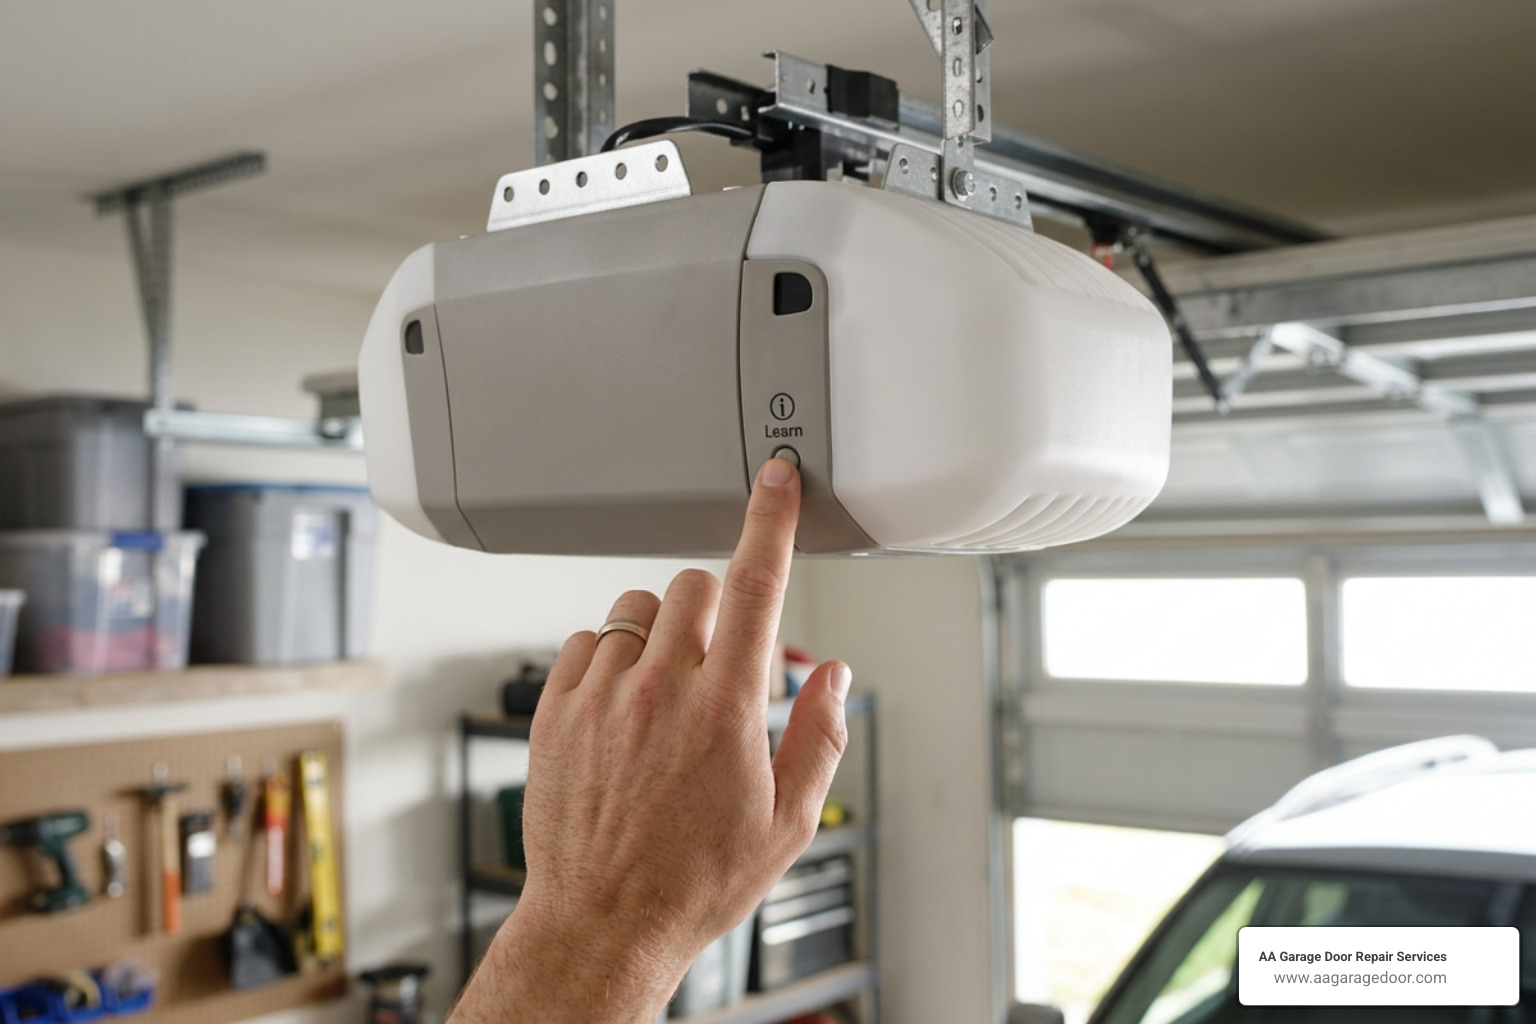
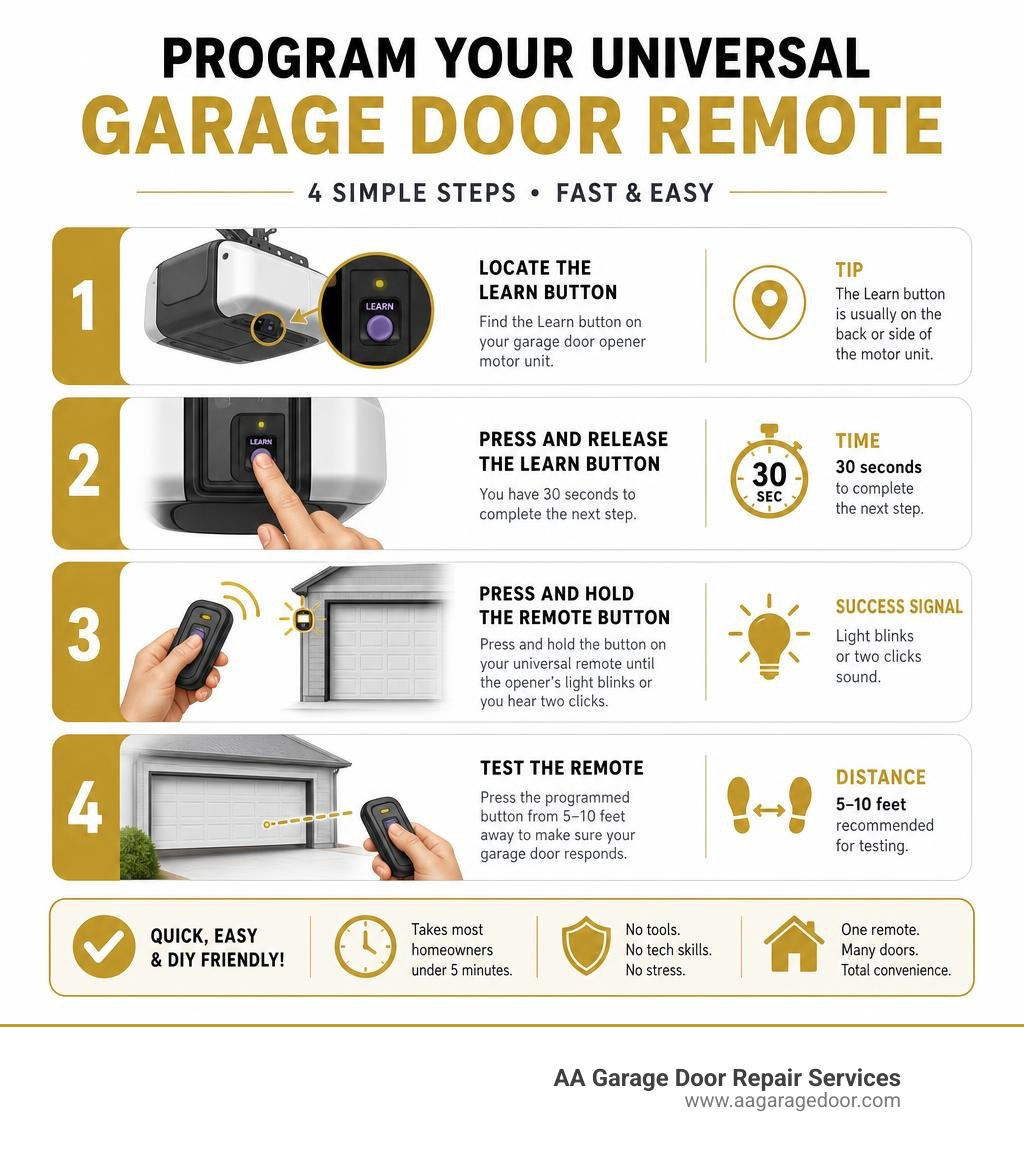
- Locate the Learn button on your garage door opener motor unit.
- Press and release the Learn button — you have 30 seconds to complete the next step.
- Press and hold the button on your universal remote until the opener’s light blinks or you hear two clicks.
- Test the remote by pressing the programmed button from 5–10 feet away.
That’s the core process for most modern openers from brands like LiftMaster, Chamberlain, Genie, and Craftsman. Older openers with DIP switches take a bit longer — closer to 10 minutes — but are still fully DIY-friendly.
Whether your old remote died, you moved into a new home, or you just want a single remote that controls multiple doors, a universal remote is one of the easiest upgrades you can make.
I’m David Sands, owner of AA Garage Door LLC, with over 23 years of hands-on experience programming and troubleshooting garage door opener systems for homeowners across Wisconsin and Minnesota. I’ve put together this guide to walk you through how to program a universal garage door remote the right way — covering every method, every major brand, and every common problem you might hit along the way.
How to program a universal garage door remote terms to learn:
A universal garage door remote is a multi-brand transmitter designed to replace or supplement your original manufacturer’s clicker. Unlike brand-specific remotes that only broadcast on a single proprietary frequency, a universal remote contains a versatile radio frequency (RF) chip capable of communicating across multiple frequencies, typically ranging from 315 MHz to 390 MHz.
These devices work by mimicking the exact signal patterns that major brands like LiftMaster, Chamberlain, Genie, Craftsman, Linear, and Wayne Dalton use. To understand how they sync, it helps to look at the two primary technologies used in residential garage doors over the last few decades:
- Rolling Code Technology: Used by almost all openers manufactured after 1995. Every time you press your remote button, a proprietary algorithm rolls the security code to a brand-new, unique combination out of billions of possibilities. This prevents thieves from recording and replaying your signal.
- Fixed Code (DIP Switch) Technology: Common in older systems built before 1995. These rely on a physical row of 8 to 12 tiny plastic switches (DIP switches) inside both the remote and the opener head. If the switches match, the door opens.
For a deeper dive into how these signals interact with your overall system, check out our garage door opener remote complete guide. You can also reference the official Chamberlain Remote Programming Support page for detailed background on how modern rolling codes handshake with universal receivers.
Preparing to Learn How to Program a Universal Garage Door Remote
Before you climb up on a ladder, a little preparation will save you from frustration. We recommend gathering your details beforehand so you don’t get stuck midway through a timed programming sequence.
- Identify Your Opener’s Brand and Model: Look at the sticker on the motor unit hanging from your garage ceiling.
- Locate and Identify the Learn Button Color: This is the absolute key to rolling code systems. Chamberlain, LiftMaster, and Craftsman openers feature color-coded Learn buttons (Yellow, Purple, Red/Orange, or Green) located on the back or side panel of the motor. The color tells you the exact frequency and security generation of your machine.
- Perform a Battery Check: Ensure your new universal remote has a fresh battery. Weak batteries are responsible for roughly 70% of all programming failures. Most universal remotes use a standard CR2032 coin cell battery.
- Confirm Safety Sensor Alignment: Make sure your garage door safety eyes (the sensors near the floor) are clean and aligned. If the sensors are blocked, the door won’t close, which can make testing your newly programmed remote confusing.
- Secure Your Visor Clip: Keep the remote’s visor clip handy, as some models require you to remove the clip to access the internal program button or DIP switches.
Step-by-Step: How to Program a Universal Garage Door Remote
The vast majority of modern universal remotes — including the popular Chamberlain Clicker series and Genie universal models — use the Learn Button Method. This is the fastest programming path, usually taking between 3 and 5 minutes to complete.
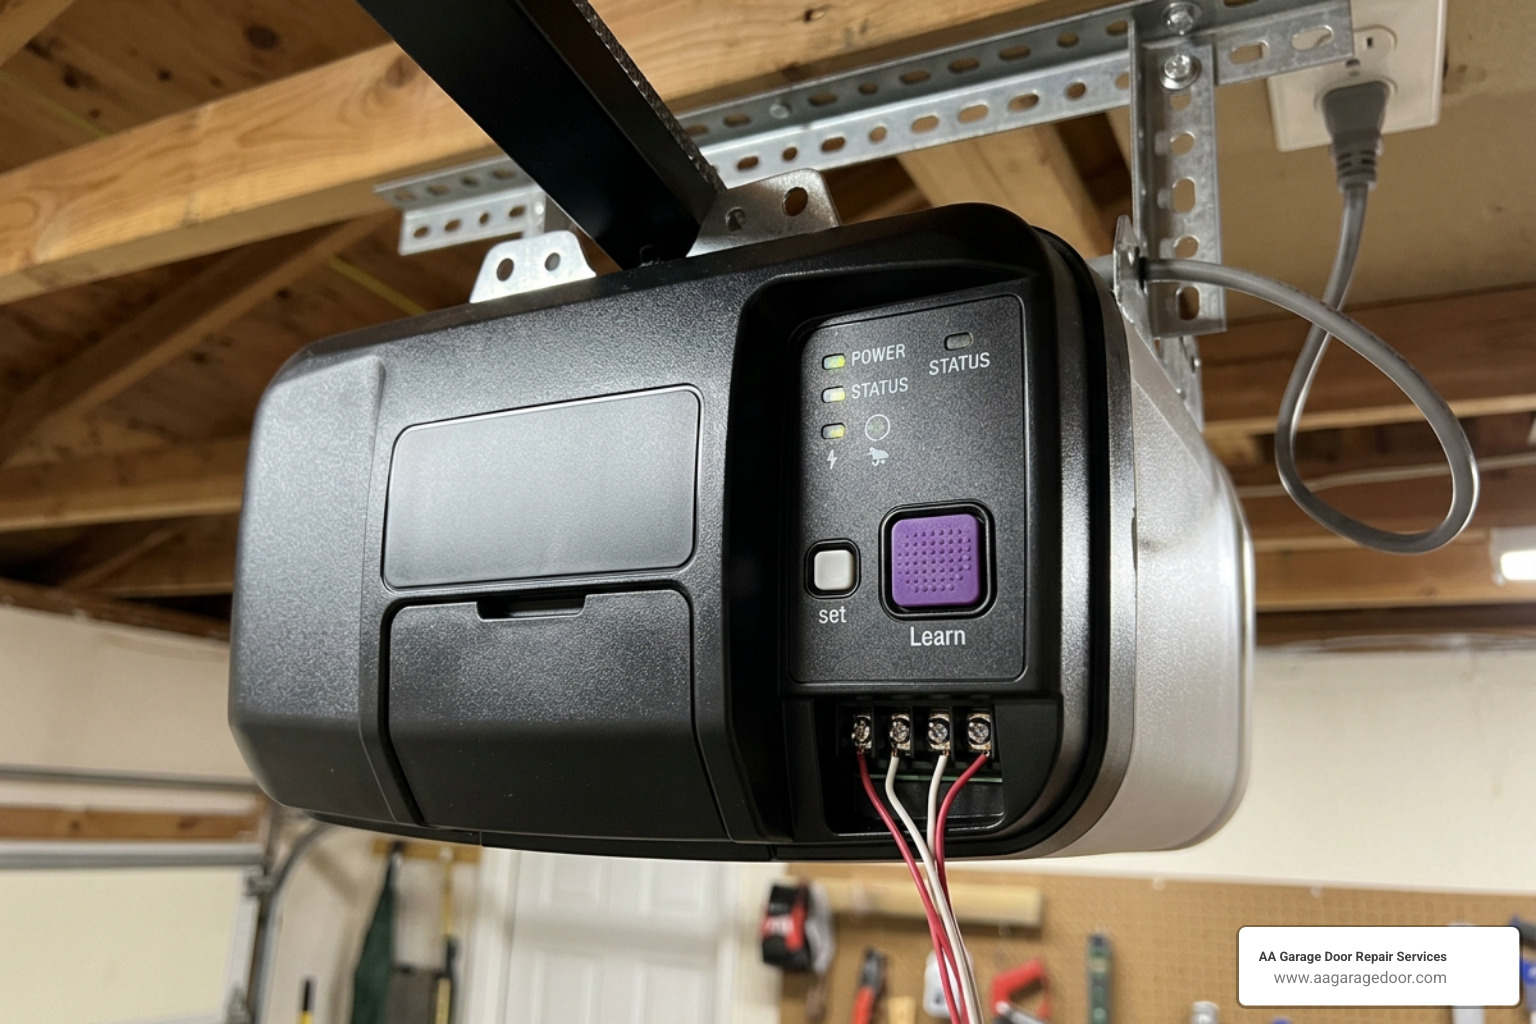
Follow these steps to pair your remote to a rolling code opener:
Step 1: Access the Motor Unit
Place a sturdy ladder off to the side of your garage door opener motor so you can safely reach the back control panel without standing directly under the door’s path of travel.
Step 2: Prepare the Remote
If your universal remote has a dedicated “Program” button (often a recessed button on the back or side, or a specific key combination), press it until the remote’s LED indicator light turns solid. On some models, this puts the remote into “Search” or “Pairing” mode.
Step 3: Press the Opener’s Learn Button
Press and immediately release the Learn/Program button on your garage door opener’s motor unit.
- Crucial Tip: Do not hold this button down. Holding it for more than 2–3 seconds will erase all programmed remotes and keypads from your opener’s memory, forcing you to reprogram everything from scratch.
- Once pressed, the opener’s indicator LED will glow steadily. You now have a 30-second window to complete the pairing on your remote.
Step 4: Sync the Remote Button
Point the universal remote at the motor unit. Press and release the specific button on the remote you wish to use to control this door.
- If you are using a multi-brand universal remote, you may need to press the button multiple times (waiting for the remote’s LED to stop flashing between presses) until the garage door opener responds. Each brand requires a different number of clicks to match its signal format.
- You will know the handshake is successful when the light bulb on the garage door opener blinks twice or you hear two distinct clicking sounds from the motor unit.
Step 5: Lock in the Programming
Press the “Program” button on the remote one more time to exit programming mode and save the settings.
Step 6: Test Your Remote
Step back 5 to 10 feet from the door and press your newly programmed button. The door should smoothly open or close. If it doesn’t, wait 30 seconds for the system to time out and try the steps again.
For more detailed visualization, you can read our guide on how to program a new garage door remote in 5 easy-to-follow steps or refer to How To Program A Universal Clicker Garage Door Opener for brand-specific click counts.
Alternative Programming Methods: Cloning and DIP Switches
If your opener doesn’t have a Learn button, or if you want to copy an existing working remote without climbing a ladder, you will need to use alternative programming methods.
The Teach & Pair (Cloning) Method
This option is perfect if you have an existing, fully functional remote and a universal remote that supports cloning (like the Genie Universal 4-Button Remote). This method copies the signal directly from remote to remote.
- Place your working remote and the universal remote side-by-side on a flat surface, about 1 to 3 inches apart.
- Put your universal remote into “Teach & Pair” mode (consult your specific manual for the button sequence, often involving holding buttons 1 and 4 simultaneously).
- Press and hold the button on your original, working remote.
- While holding the original button, press and hold the button you want to program on your universal remote.
- Hold both until the universal remote’s LED flashes rapidly or changes color, indicating it has successfully cloned the frequency.
The DIP Switch Method (For Older Fixed-Code Openers)
If your garage door opener was manufactured before 1995, it likely uses DIP switches. These systems do not use rolling codes. Instead, they use a static code determined by a physical row of 8 to 12 tiny switches.
- Expose the Switches: Remove the battery cover or visor clip on your old remote, or open the light cover on your garage ceiling motor unit to locate the row of switches.
- Note the Code: Write down the sequence of switches. They will be in one of two positions (On/Off, Up/Down) or three positions (+, 0, -).
- Configure the Universal Remote: Some universal remotes have physical DIP switches inside them that you must flip to match your opener exactly. Others require you to convert the switch positions into button presses (for example, mapping “Up” to button 1, “Middle” to button 2, and “Down” to button 4) and program them using a specific code sequence.
- Confirm the Code: If your remote uses physical switches, match them exactly to the sequence in the motor unit. If even one switch is off by a hair, the remote will not work.
You can find a complete index of code patterns in our universal garage door opener codes guide. For specific DIP-to-button conversion charts, check out the GENIE Universal Remote Manual on ManualsLib.
Programming Methods Comparison
| Method | Best Used For | Average Setup Time | Difficulty Level |
|---|---|---|---|
| Learn Button | Modern rolling code openers (post-1995) | 3–5 minutes | Easy |
| Teach & Pair (Cloning) | Duplicating a working remote without ladder access | 3–5 minutes | Easy |
| DIP Switch Matching | Legacy fixed-code openers (pre-1995) | 10 minutes | Moderate |
Advanced Tips on How to Program a Universal Garage Door Remote
Once you understand the basic programming steps, you can leverage advanced features to maximize your remote’s convenience:
- Multi-Brand Programming: Most universal remotes feature 2 to 4 buttons. Each button operates completely independently. This means you can program Button 1 to a Chamberlain opener at your home in Woodbury, MN, and Button 2 to a older Genie opener at your cabin in Baldwin, WI.
- In-Car Vehicle Integration: If your vehicle has built-in buttons on the rearview mirror or visor (HomeLink or Car2U), you can often use your universal remote to train your car. Read How to program a universal garage door remote in a car for step-by-step vehicle pairing instructions.
- Antenna Positioning: To maximize your remote’s range, ensure the thin wire antenna hanging from your garage ceiling motor unit is dangling straight down. Do not wrap it around the chassis or bracketry, as this severely cuts down signal reception.
- LED Interference Prevention: If you notice your remote only works when you are standing right next to the door, check the lightbulbs inside your motor unit. Standard household LED bulbs emit radio frequency interference that can block your remote’s signal. Always use specialized, shielded garage door LED bulbs.
Troubleshooting and Resetting Your Universal Remote
If you’ve followed the steps and your remote still refuses to cooperate, don’t worry. Most programming issues can be resolved with a few simple troubleshooting steps.
What to Do If Your Remote Won’t Program
- Check the Battery: Even if the remote’s LED lights up, it might not have enough power to transmit a strong programming signal. Swap in a fresh CR2032 battery.
- Clear Obstructions: Ensure there is a clear line of sight between your remote and the receiver antenna during the programming process.
- Mind the 30-Second Window: If you take too long between pressing the Learn button on the motor and pressing the button on your remote, the system will exit programming mode. Move quickly!
- Check for Signal Interference: Turn off any nearby household electronics, baby monitors, or cheap LED work lights while programming to prevent signal disruption.
Resetting and Erasing Memory
If you have lost a remote, suspect a neighbor’s remote is accidentally opening your door, or want to start fresh, you should clear your opener’s memory.
- Press and Hold the Learn Button: Locate the Learn button on your garage ceiling motor unit.
- Hold for 6 to 10 Seconds: Press and hold the button down. The indicator light next to it will turn on.
- Wait for the Light to Turn Off: Keep holding until the indicator light goes out (usually 6 to 10 seconds). This erases all programmed remotes, keypads, and car connections from the opener’s memory.
- Reprogram Your Devices: You can now reprogram your universal remote and any other accessories one by one.
To learn how to sync everything back up cleanly, see our guide on how to sync garage door remote control the right way. For general troubleshooting guidelines, you can also consult How to Program a Garage Door Opener – AutoZone.
Frequently Asked Questions About Universal Remotes
Can one universal remote control multiple garage doors?
Yes. Most universal remotes feature 2, 3, or 4 buttons. Because each button programs individually, you can sync each one to a different garage door opener. You can even mix and match brands, controlling a Chamberlain door on Button 1 and a Genie door on Button 2.
How long do universal garage door remotes typically last?
With regular maintenance and basic care, a high-quality universal remote will last between 5 and 10 years. To maximize its lifespan, replace the batteries annually, keep the remote clean and dry, and avoid dropping it on hard garage floors.
Will programming a new universal remote erase my existing remotes?
No. Standard programming using a quick press of the Learn button simply adds the new remote to your opener’s empty memory slots. Most modern openers can store between 7 and 20 individual remotes or keypads. Your existing remotes will only be erased if you manually hold down the opener’s Learn button for more than 6 seconds.
Conclusion
Programming a universal garage door remote is a simple, highly rewarding DIY project that brings instant convenience to your daily routine. By identifying your opener’s brand, locating the Learn button, and following the straightforward pairing steps, you can have your system synced and running smoothly in just a few minutes.
However, if you encounter persistent signal issues, suspect a faulty receiver logic board, or simply prefer to have a professional handle the setup, we are here to help.
At AA Garage Door Repair Services, we have been serving homeowners across St. Paul, Woodbury, Hudson, Baldwin, and the wider Twin Cities metro since 2001. We offer comprehensive garage door openers installation, remote programming, and 24/7 emergency repair services with transparent pricing and a satisfaction guarantee.
If you are located near Apple Valley or anywhere else in our local service areas, contact us today to schedule an appointment with our expert team!