Why Knowing How to Use a Garage Door Keypad Can Save You Time, Money, and Stress
Knowing how to use a garage door keypad is one of the most practical skills a homeowner can have. Whether you just moved in, forgot your PIN, or your keypad suddenly stopped working — the fix is usually simpler than you think. For reliable assistance with your entry systems, you can always count on the experts at AA Garage Door to keep your home secure.
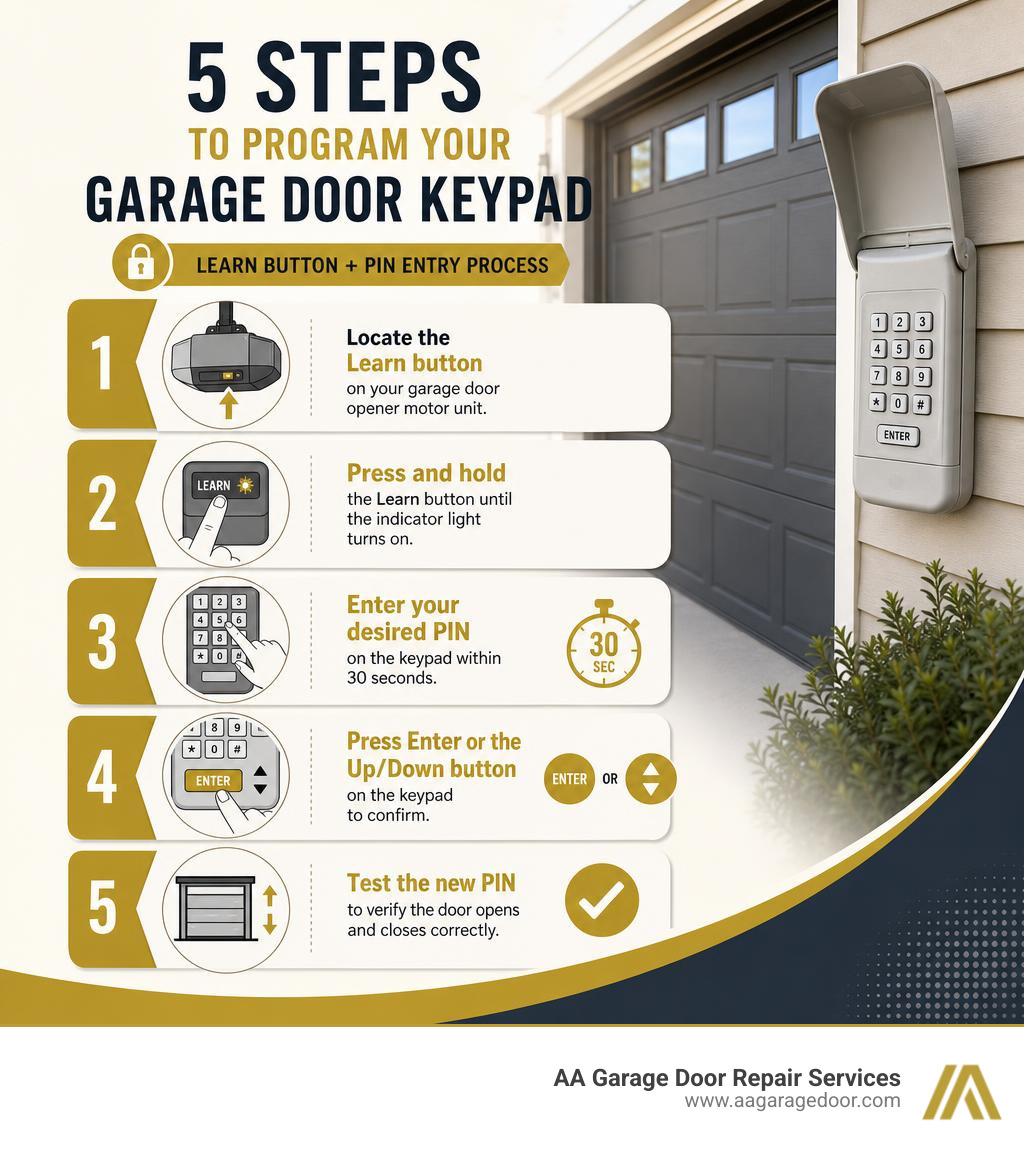
Here’s how to use a garage door keypad in 5 steps:
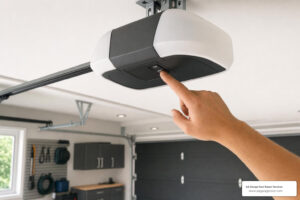
- Locate the Learn button on your garage door opener motor unit
- Press and hold the Learn button until the indicator light turns on
- Enter your desired PIN on the keypad within 30 seconds
- Press Enter or the Up/Down button on the keypad to confirm
- Test the new PIN to verify the door opens and closes correctly
Over 70% of homeowners consider keyless entry essential for their garage door opener system — and for good reason. A keypad gives your family quick access without keys or remotes, lets you hand out temporary codes to contractors, and adds a reliable backup when phones or remotes fail.
Most programming jobs take under two minutes. But small mistakes — wrong button sequence, dead battery, or an incompatible keypad — can make it feel impossible.
That’s why this guide walks you through everything step by step, from identifying your opener type to fixing the most common keypad problems.
I’m David Sands, owner of AA Garage Door Repair Services, and after more than 23 years servicing garage door systems across Wisconsin and Minnesota, I’ve helped thousands of homeowners master how to use a garage door keypad — including the tricky edge cases most guides skip. Let’s get your keypad working right.
Simple how to use a garage door keypad word guide:
What is a Garage Door Keypad and How Does It Work?
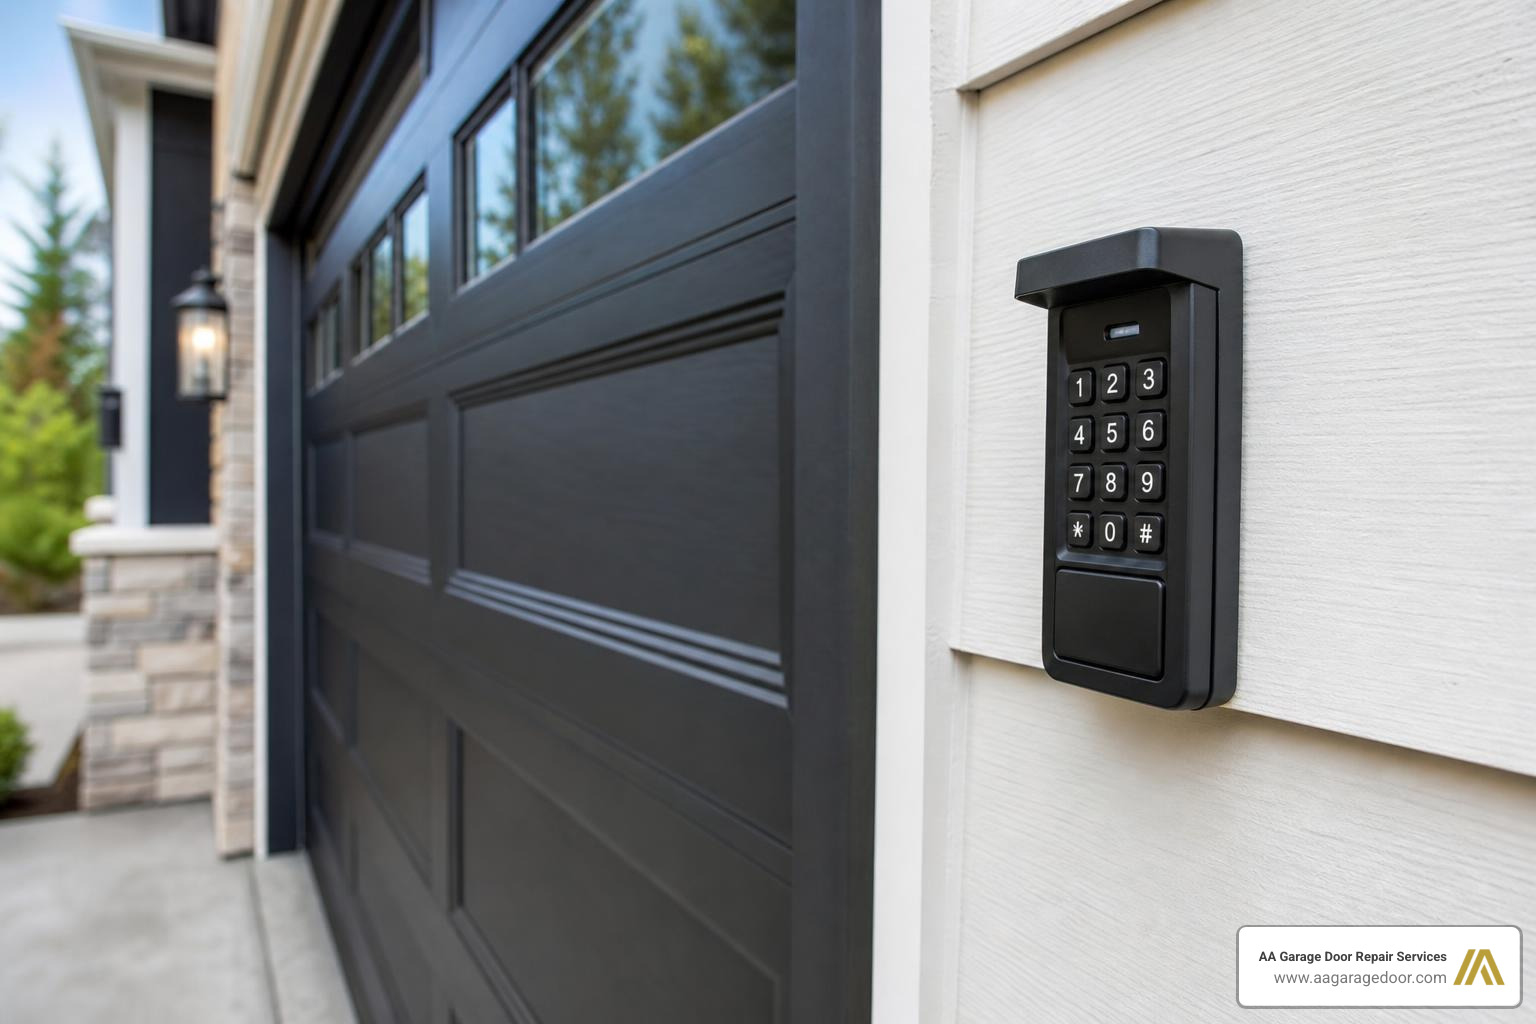
At its core, a garage door keypad is an exterior-mounted, weather-resistant transmitter. Instead of using a physical key or a handheld remote control that you clip to your car’s visor, you enter a personalized 3-to-8-digit Personal Identification Number (PIN) directly on a numeric pad to open or close your garage door.
But how does it communicate with that heavy motor hanging from your garage ceiling? The magic lies in radio frequency (RF) signals.
When you type your PIN and press the “Enter” or “Up/Down” key, the keypad converts your code into a specific radio signal. It broadcasts this signal over the air. The receiver inside your garage door opener motor unit detects the signal, verifies that the code matches its memory, and activates the motor to lift or lower the door.
To understand the full scope of these systems, check out our Garage Door Keypad Complete Guide.
The Evolution of Security: Rolling Code Technology
If you are using an older garage system, it might rely on fixed-code technology. These older systems used physical switches to set a single static frequency. The problem? Tech-savvy thieves could “sniff” or grab your signal out of the air using basic radio equipment.
Modern systems manufactured after 1993 use rolling code technology (such as LiftMaster’s Security+ or Genie’s Intellicode). Every single time you enter your PIN on a rolling-code keypad, the system automatically generates a brand-new, randomized security code from billions of possibilities. The keypad and the opener head use a synchronized algorithm to agree on the next code in line. Once a code is used, it is immediately discarded and will never work again. This prevents signal grabbing entirely, making modern wireless keyless entry pads exceptionally secure.
How to Use a Garage Door Keypad: Identifying Your Opener Type
Before you grab a ladder and start pressing random buttons, you must identify what kind of garage door opener you have. Trying to program a keypad without knowing your opener’s technology is like trying to enter a password in the wrong language — it simply won’t translate.
Most universal garage door keypads are compatible with openers manufactured after 1993 that use photoelectric safety sensors (the small infrared “eyes” near the floor of your garage track). To determine how to pair your keypad, you need to check how your motor unit receives programming instructions.
The “Learn” or “Program” Button
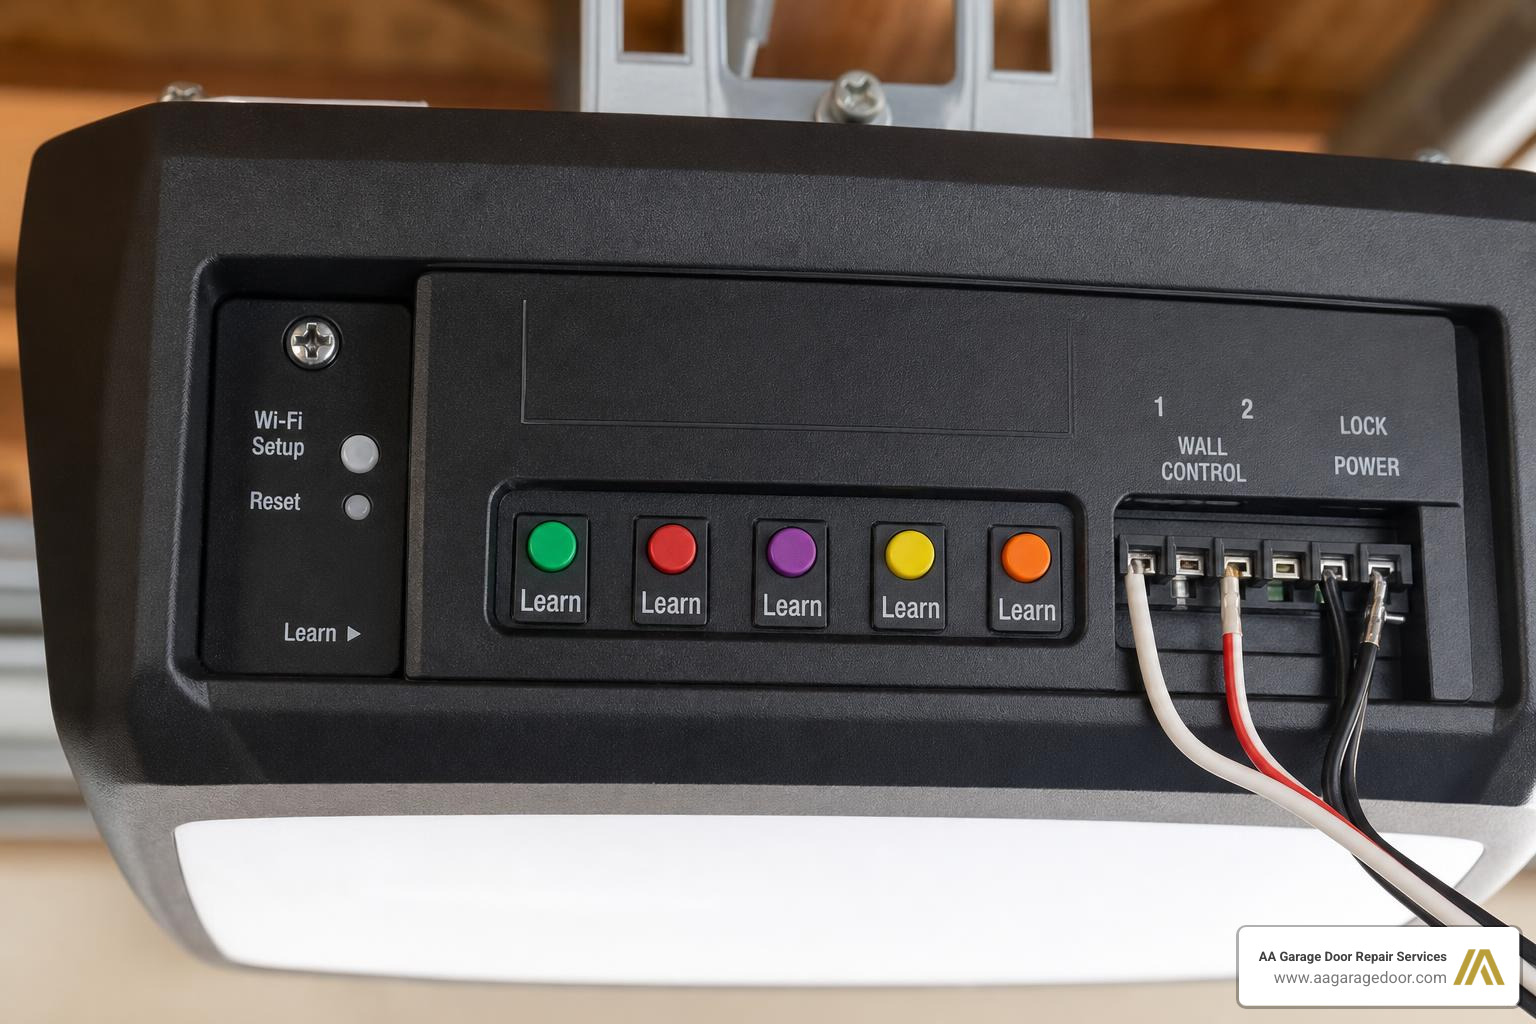
On almost all modern openers built in the last three decades, you will find a colored Learn button. This button is typically located on the back or side of the motor unit, often hidden behind a plastic light lens cover.
The color of this button is not just for aesthetics; it indicates the specific radio frequency and security protocol your opener uses:
- Green Button: Uses older “Billion Code” technology (390 MHz), common in the early-to-mid 1990s.
- Red/Orange Button: Uses Security+ 390 MHz rolling codes, common from the late 1990s to 2005.
- Purple Button: Uses Security+ 315 MHz rolling codes, standard from 2005 to 2011.
- Yellow Button: Uses modern Security+ 2.0 technology (tri-band frequency), standard from 2011 to the current year of 2026.
- Round Gray/Blue Button: Commonly found on Genie and Overhead Door openers utilizing Intellicode technology.
DIP Switches (Legacy Systems)
If you climb your ladder and don’t see a colored, round, or square Learn button, but instead find a small block of 8 to 12 tiny sliding switches (resembling miniature light switches), you have a legacy DIP switch system. These systems use fixed codes. To program a keypad to a DIP switch opener, you must match the physical pattern of the switches inside your keypad’s battery compartment to the pattern of the switches on the back of your opener motor.
Step-by-Step Guide: How to Program Your Keypad
Ready to dive in? For a quick visual demonstration before we begin, you can watch this Garage Door Opener Keypad Programming | Easy Steps video.
While exact button sequences can vary slightly by brand, almost every wireless keypad on the market follows a universal programming pattern. Here is the standard 5-step process to get your keypad synced up:
- Prep the System: Grab a sturdy step ladder. Ensure your garage door is fully closed and that there are no obstructions in the door’s path. Ensure your keypad has a fresh battery.
- Locate and Press the Learn Button: Climb up to your opener motor. Locate the colored Learn button. Press and release it firmly. Do not hold it down. Holding the button down for more than 6 seconds will completely wipe the receiver’s memory, erasing all your existing car remotes and smart links. When pressed correctly, a small LED indicator light next to the button will glow steadily or begin to blink slowly.
- Beat the 30-Second Clock: Once you press the Learn button, a countdown timer starts in the opener’s brain. You have exactly 30 seconds to walk over to your exterior keypad and enter your desired 4-digit PIN.
- Send the Sync Command: Immediately after typing your new PIN on the keypad, press and hold the Enter button (or the Up/Down button on some models). Keep holding it until you see the light bulbs on your garage opener motor flash once or twice, or until you hear two distinct clicking sounds from the motor head. This flash or click is your confirmation that the opener has successfully received and saved the new code.
- Test the Code: Wait about 10 seconds for the programming mode to automatically exit. Enter your newly programmed PIN on the keypad and press Enter. Your garage door should smoothly cycle open or closed.
How to Use a Garage Door Keypad for Single-Door Programming
If you only have one garage door, the standard pairing process is incredibly straightforward. The key to success is choosing a strong code and executing the steps in the correct order.
For detailed brand-specific steps, review the Ultimate Guide to Programming a Universal Garage Door Keypad.
When programming a single door, the keypad must be mounted in a highly specific location. For safety reasons, always mount your keypad:
- At least 5 feet (1.5 meters) above the ground to keep it out of reach of small children.
- In direct, clear line of sight of the garage door itself so you can monitor for safety hazards while operating it.
- Away from any moving parts of the door or track system so your hand is never in danger when typing your code.
How to Use a Garage Door Keypad for Multi-Door Setup
Do you have a double-car garage with two separate doors, or perhaps a third detached stall? You don’t need to clutter your exterior wall with multiple keypads. Most modern keypads — including universal models and brand-specific options like the Genie GUK-1 or LiftMaster 878MAX — can control up to three or four doors independently.
To configure a multi-door setup, you will use channel selection or sequential door numbering. Instead of a single shared code opening all doors simultaneously (which would be a major safety hazard!), you will assign a specific door number to each opener.
Here is how a typical multi-door programming sequence works:
- Program Door 1 first: Follow the standard single-door programming steps above. Sync your primary PIN (e.g., 4-3-2-1) to the first opener.
- Prepare the Keypad for Multi-Door Mode: On many keypads, you must activate multi-door mode by entering your PIN, pressing the Program/Star (*) key, entering the number 1 (for the first door), and pressing Program again.
- Program Door 2: Go to your second garage door opener motor unit and press its Learn button. Within 30 seconds, return to the keypad, type your primary PIN, press the Program/Star (*) key, type 2 (designating the second door), and press Enter. Hold the Enter key until the second opener’s lights flash.
- Operating the Doors: To open Door 1, you will type
4-3-2-1and press1. To open Door 2, you will type4-3-2-1and press2.
This setup keeps your property highly secure while offering the convenience of a single keypad. For more advanced configurations, you can consult our detailed Garage Keypad Programming Guide.
Managing Your PIN: Creating, Changing, and Resetting Codes
Managing your access codes is a critical part of home security. Just like you wouldn’t keep the same computer password for ten years, you shouldn’t leave your garage door keypad on its factory default settings or use the same code indefinitely.
For initial setup instructions, read our guide on How to Set Up a Garage Door Keypad.
How to Set Up a New PIN Code
When creating a new PIN, avoid the obvious traps. Statistics show that easy-to-guess codes like “1-2-3-4”, “0-0-0-0”, your house street number, or your birth year are the first combinations potential intruders try.
Instead, choose a randomized, non-sequential 4-digit code. To maximize security, regularly changing your garage door keypad code can reduce security breaches by up to 40%. We recommend updating your code at least once a year, particularly before the harsh winter weather sets in.
How to Change or Reset a Forgotten PIN
If you bought a new home in St. Paul or Woodbury, or if you simply forgot the PIN you set years ago, don’t worry. You do not need to buy a new keypad. You can perform a full factory reset.
To learn how to reset a universal unit, see our Universal Garage Door Keypad Reset Guide.
If you know your current PIN and simply want to change it to a new one for security, you don’t even need to climb a ladder. Many keypads allow you to change the code directly on the keypad:
- Enter your existing PIN.
- Press and hold the Program or # button until the keypad backlight blinks twice.
- Enter your new PIN.
- Press Enter. The keypad lights will flash to confirm the change.
If you have completely forgotten your old PIN, you must clear the link between the keypad and the opener motor head. Check out our specific instructions on How to Change Your Garage Door Keypad Code.
To completely wipe a forgotten PIN from the system:
- Locate the Learn button on your garage opener motor.
- Press and hold the Learn button down for a full 6 to 10 seconds. The indicator light will glow and then turn off. This action completely clears the receiver’s memory, erasing all paired keypads, remotes, and smart home links.
- Follow the standard step-by-step programming steps to pair your keypad with a brand-new PIN. You will also need to re-pair any handheld car remotes you use.
Troubleshooting Common Keypad Issues
Even the most reliable garage door keypads can occasionally experience issues. Because these devices live outside, they are subjected to blazing summer sun, torrential spring rain, and sub-zero Midwestern winters.
If you are setting up a wireless keypad for the first time, you can also view these helpful instructions on Programming a Wireless Keypad.
The Cold Weather Drain
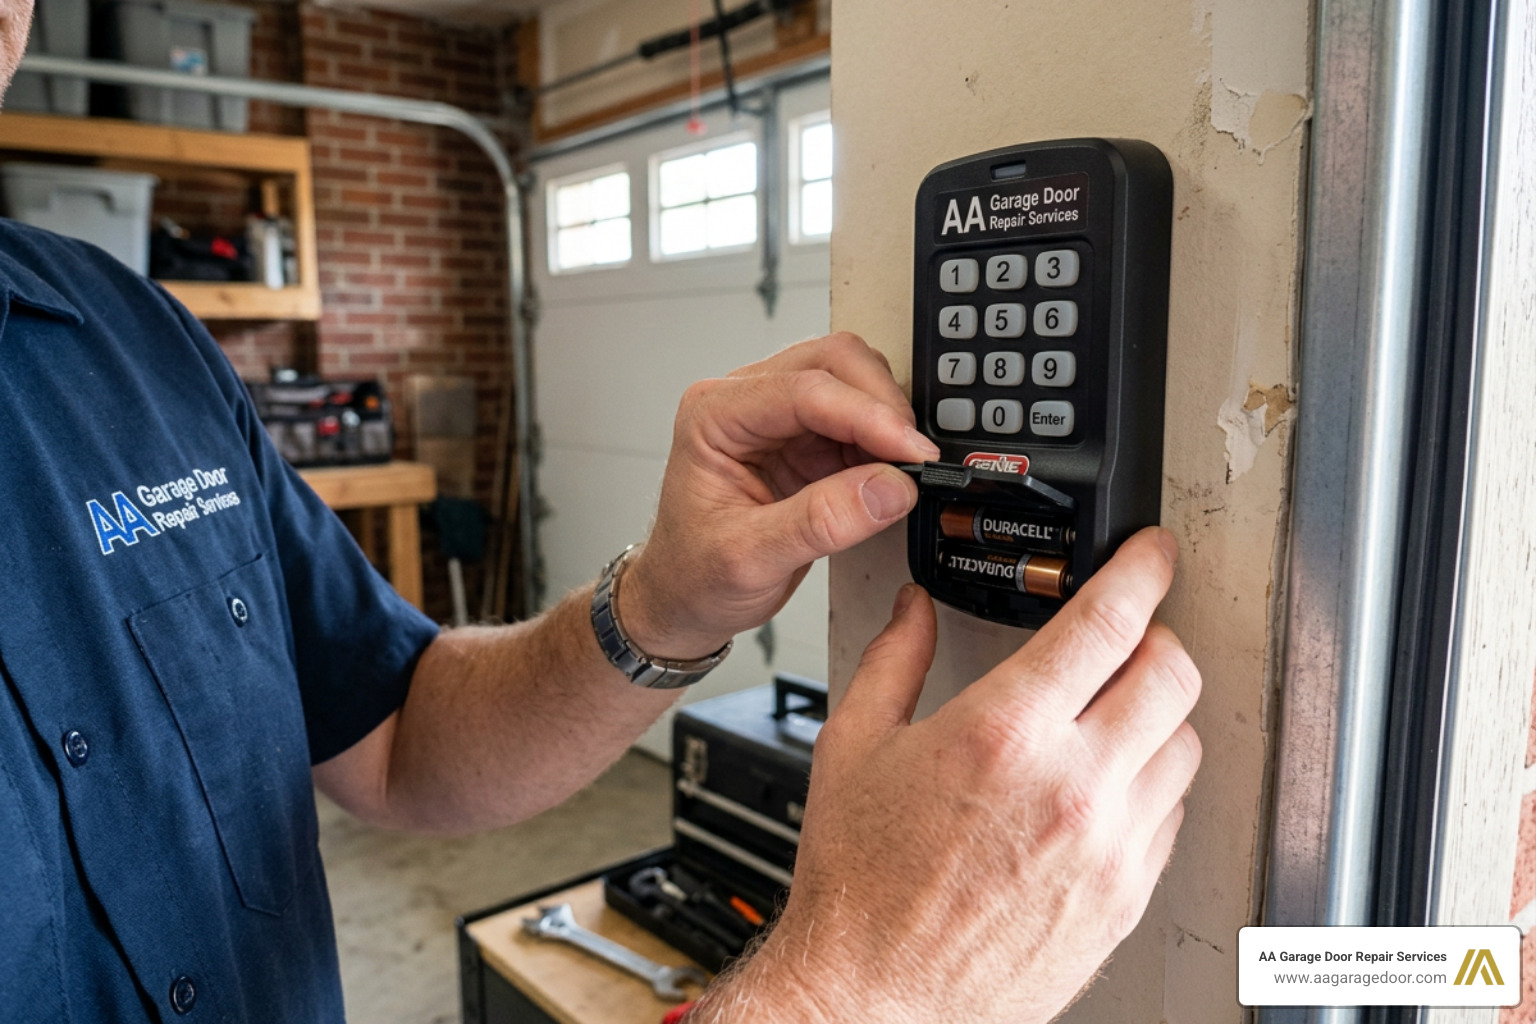
For our neighbors in St. Paul, MN, Woodbury, MN, Baldwin, WI, and Hudson, WI, winter is the ultimate test for electronics. Sub-zero temperatures drastically reduce battery efficiency. If your keypad works perfectly in July but starts responding intermittently or fails to light up in January, the cold battery is almost certainly the culprit. We highly recommend replacing your wireless keypad battery every autumn with a high-quality, cold-resistant alkaline or lithium battery to avoid getting locked out in the snow.
RF Interference from LED Bulbs
This is one of the most common “hidden” issues we diagnose. If your keypad lights up and accepts your code, but the door only moves occasionally or refuses to close when the opener lights are on, check your light bulbs!
Many standard household LED light bulbs emit electromagnetic radiation that operates on the exact same frequency as your garage door opener (usually 300 MHz to 390 MHz). When the opener’s lights turn on, they create a wall of radio “noise” that completely blocks the keypad’s signal. Always use specialized, shielded garage-door-safe LED bulbs in your opener motor.
Troubleshooting Quick Reference Table
| Symptom | Probable Cause | Actionable Solution |
|---|---|---|
| No lights or beeps on the keypad | Dead battery or corroded battery terminals. | Open battery compartment; clean terminals with a dry cloth; install a fresh 9V or AAA battery. |
| Keypad lights up, but door won’t move | Code mismatch or keypad out of sync. | Reprogram the keypad using the 5-step Learn button process. Verify compatibility. |
| Door starts to move, then reverses with lights flashing | Obstructed safety sensors or misaligned photo-eyes. | Clear any snow, dirt, or spiderwebs from the safety sensors near the garage floor. |
| Poor range or intermittent response | Low battery or local RF interference. | Replace battery; check for nearby LED bulbs or Wi-Fi routers interfering with the signal. |
| PIN works to open, but won’t close the door | Misaligned safety sensors or sun glare on photo-eyes. | Realign safety sensors. Ensure no direct sunlight is blinding the receiver sensor eye. |
Frequently Asked Questions about Garage Door Keypads
Can I set up a temporary PIN for guests?
Yes! Most modern keypads from major brands like LiftMaster, Chamberlain, and Genie allow you to program a temporary PIN. This is incredibly useful for house guests, dog walkers, or contractors working on your home.
You can program a temporary PIN to automatically expire after a set number of hours (e.g., active for 24 hours) or after a set number of uses (e.g., will only work 3 times before automatically deleting itself). This ensures your home remains secure without you having to remember to manually change your primary PIN after your guests leave.
Why does my keypad only work at night?
This strange phenomenon is almost always caused by sun glare sensor saturation. During the day, direct sunlight can hit the infrared safety sensors at the bottom of your garage door tracks, blinding the receiver eye. Because the system thinks there is an obstruction in the path of the door, it blocks the keypad’s signal to close.
Additionally, daylight-triggered devices like solar chargers or specific outdoor lighting can create localized RF interference during the daytime.
How long do outdoor garage door keypads typically last?
Modern garage door keypads typically last 5 to 8 years outdoors, depending on how much direct weather exposure they receive. Keypads mounted on walls that receive direct afternoon sun, heavy rain, or blowing snow will naturally wear out faster than those protected under a soffit or porch overhang. To maximize your keypad’s lifespan, never caulk the entire casing shut — it requires internal ventilation to prevent condensation. Instead, apply a thin bead of silicone caulk only along the top edge of the mounting bracket to deflect rain.
Conclusion
Mastering how to use a garage door keypad is a simple, highly rewarding DIY task that keeps your home running smoothly and securely. By understanding your opener type, following the correct programming steps, and staying on top of basic maintenance like annual battery swaps, you can enjoy seamless, keyless access to your home for years to come.
However, sometimes a keypad issue points to a deeper problem — like a failing receiver board, damaged wiring, or an outdated opener that lacks modern rolling-code security.
If you find yourself struggling with a stubborn keypad, a malfunctioning motor, or if you simply prefer the peace of mind that comes with professional installation, we are here to help. At AA Garage Door Repair Services, we have been serving St. Paul, MN, Woodbury, MN, Baldwin, WI, and Hudson, WI since 2001. We offer expert garage door repair, maintenance, and professional installation of the latest, ultra-secure Garage Door Openers.
Don’t let a faulty keypad lock you out in the cold. Contact our friendly, local team today at 651-702-1420 to schedule your service or receive a free estimate!