Understanding Your System Before Reprogramming Garage Door Opener Keypad
Reprogramming your garage door opener keypad takes less than 2 minutes in most cases — and you don’t need any special tools to do it. If you ever need professional assistance, you can always rely on AA Garage Door Repair Services for expert support.
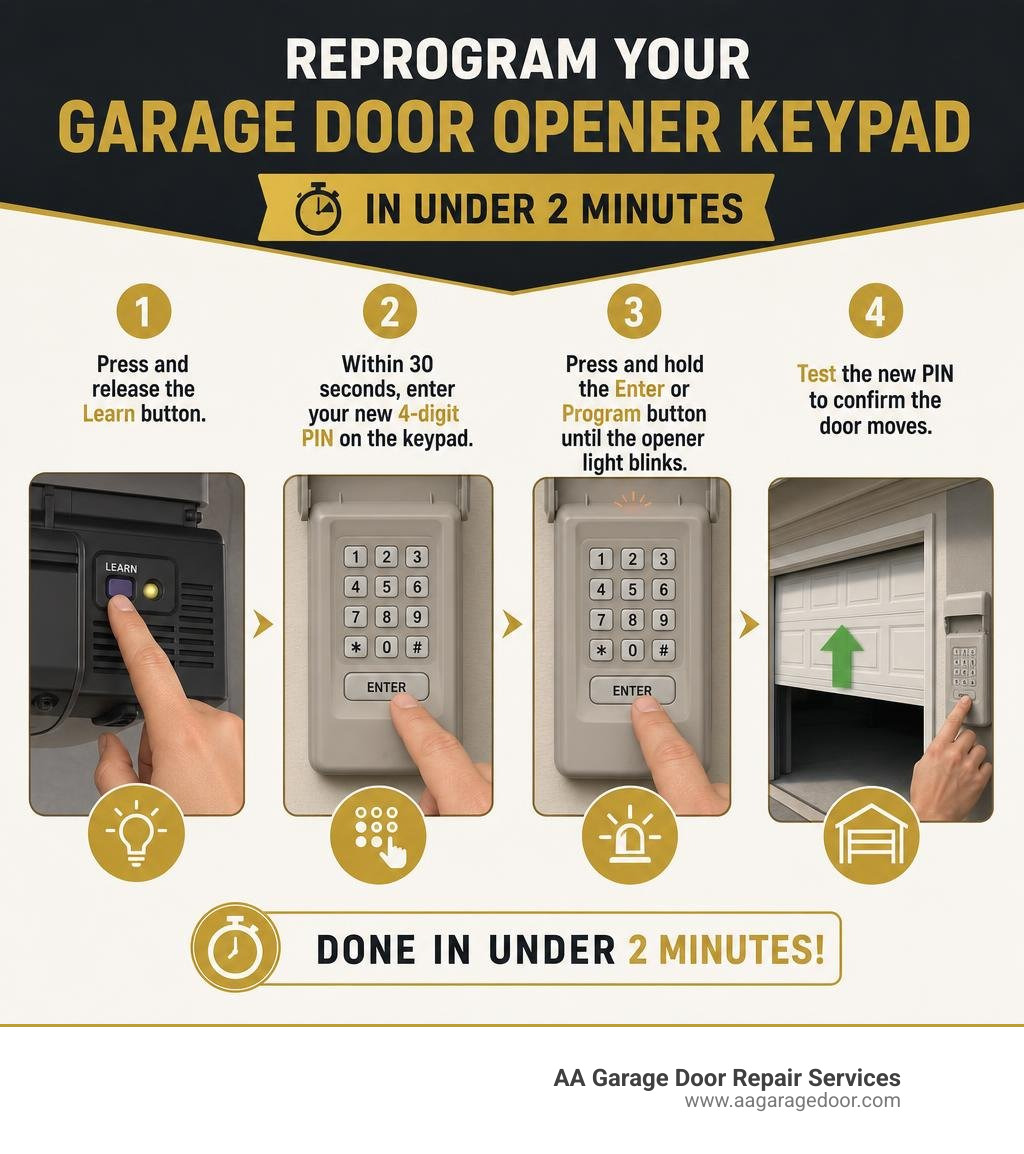
Here’s the quick version of how it works:
- Press and release the Learn button on your opener motor unit.
- Within 30 seconds, enter your new 4-digit PIN on the keypad.
- Press and hold the Enter or Program button until the opener light blinks.
- Test the new PIN to confirm the door moves.
That’s the core process for most modern openers, including LiftMaster and Chamberlain. Genie, Overhead Door, and older wired keypads follow slightly different steps — all covered below.
Your keypad is one of the most-used entry points in your home. When it stops responding, gets stuck on an old code, or needs a new PIN after a contractor visit, it’s frustrating. But the fix is almost always something you can handle yourself in a few minutes — no ladder required for most methods.
Whether you’ve forgotten your code, just moved into a new house, or want to set a temporary PIN for a service worker, this guide covers every scenario. We’ll walk through garage door keypad programming for all major brands, wired and wireless models, and common troubleshooting fixes — all in plain language.
I’m David Sands, owner of AA Garage Door Repair Services, with over 23 years of hands-on experience helping Twin Cities homeowners with opener systems — including hundreds of keypad resets and reprogramming calls. Reprogramming garage door opener keypads is one of the most common service questions we get, and this guide reflects exactly what our technicians walk customers through every day.
Before you climb a ladder or press any buttons, you must identify the brand and technology of your garage door opener. Trying to program a newer Security+ 2.0 keypad using legacy instructions is a recipe for frustration.
Most modern garage door openers rely on rolling code technology. This security feature changes the wireless transmission code every single time the door is operated, preventing tech-savvy thieves from grabbing your signal. Chamberlain and LiftMaster call their rolling code technology Security+ (versions 1.0 and 2.0), while Genie refers to theirs as Intellicode.
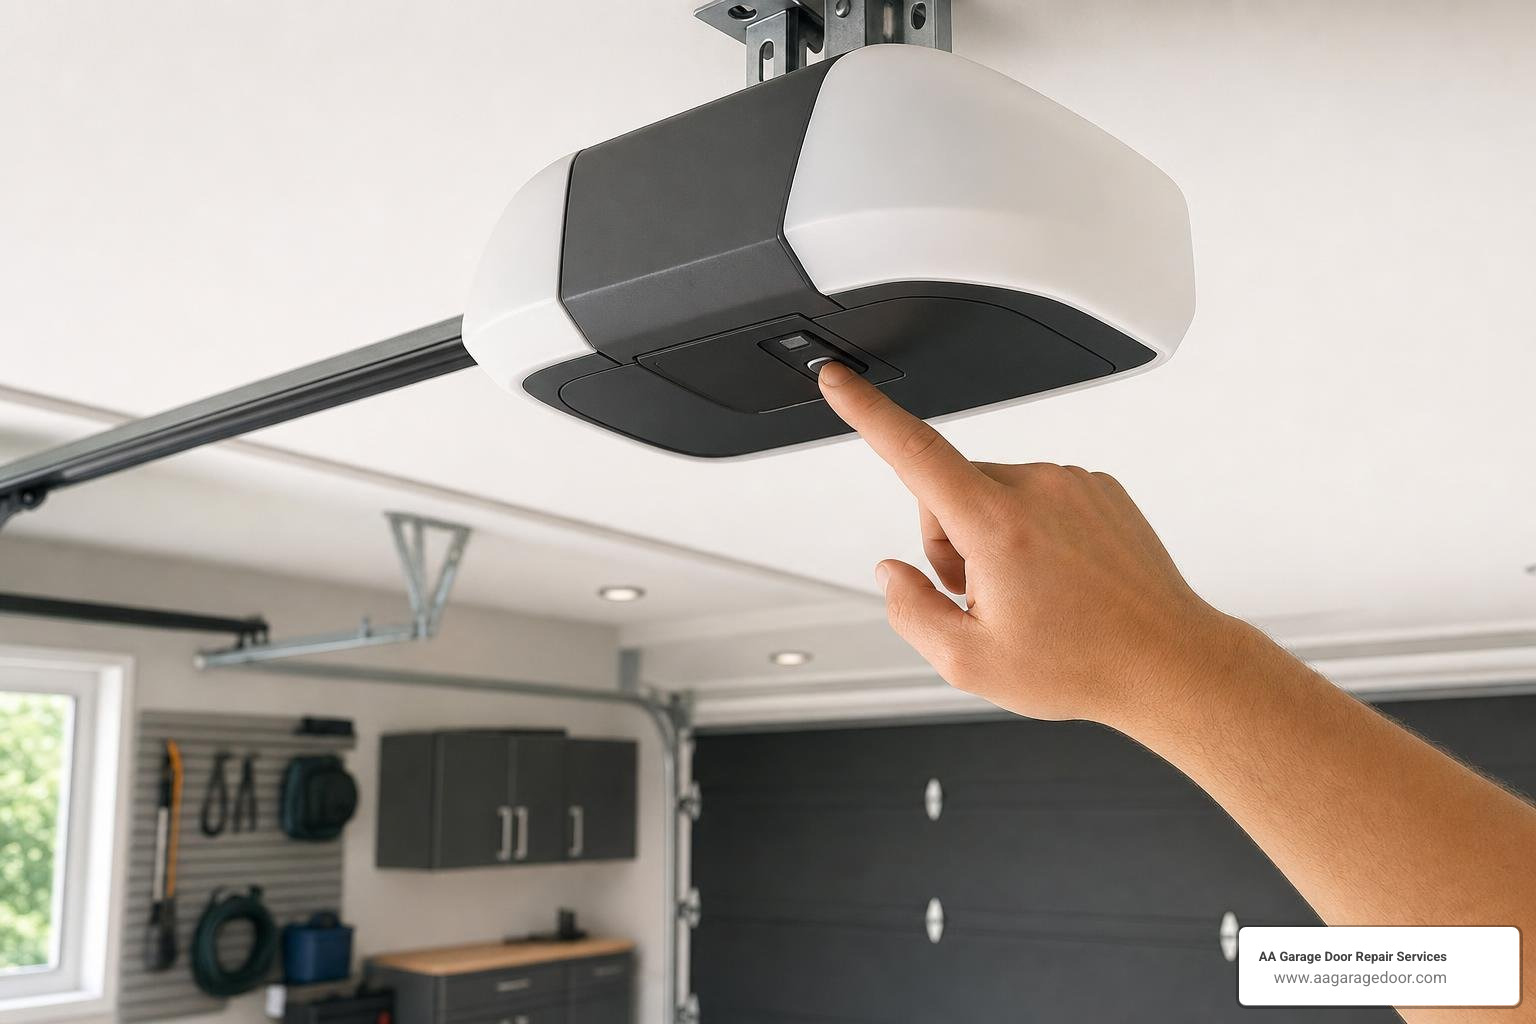
The easiest way to determine which system you have is by looking at the “Learn” button on the motor unit mounted to your garage ceiling. You will need to remove the light cover or control panel cover to spot this colored button. The color of this button is a universal key indicating the radio frequency and encryption protocol your system uses.
| Brand | Learn Button Color | Technology / Generation | Production Era |
|---|---|---|---|
| Chamberlain / LiftMaster / Craftsman | Yellow | Security+ 2.0 (Dual 310/315/390 MHz) | 2011 – Present |
| Chamberlain / LiftMaster / Craftsman | Purple | Security+ 315 MHz | 2005 – 2011 |
| Chamberlain / LiftMaster / Craftsman | Red / Orange | Security+ 390 MHz | 1997 – 2005 |
| Chamberlain / LiftMaster / Craftsman | Green | Billion Code 390 MHz | Pre-1997 |
| Genie / Overhead Door | Black, Gray, or Colored | Intellicode / CodeDodger (315/390 MHz) | 1995 – Present |
Knowing these colors and generations prevents compatibility headaches. For instance, a Security+ 1.0 keypad (designed for purple or red buttons) will not pair with a Security+ 2.0 (yellow button) motor unit. For a deeper look into selecting compatible hardware, check out our garage door keypad complete guide.
How to Program a Keypad Using the Learn Button vs. Wall Control
There are two primary ways to sync a wireless keypad to your opener: using the Learn button directly on the overhead motor unit, or using the smart wall control panel inside your garage. Both methods achieve the exact same result, but utilizing the wall control means you can keep your feet safely on the ground.
Regardless of the method you choose, safety is paramount. Always clear the garage door path of any obstructions, vehicles, pets, or children before you begin. It is common for the door to activate during the final confirmation steps of the programming sequence. If you are using a ladder to reach the overhead motor unit, ensure it is stable and positioned to the side of the rail — not directly underneath the door’s path.
If your keypad has completely stopped responding and you want to bypass any old codes entirely, you can learn How to Reprogram a Garage Door Keypad Without the Code – Engineer Fix to reset the system’s memory. For most standard situations, you can follow the steps below to make sure you are doing how to reprogram a garage door keypad the right way.
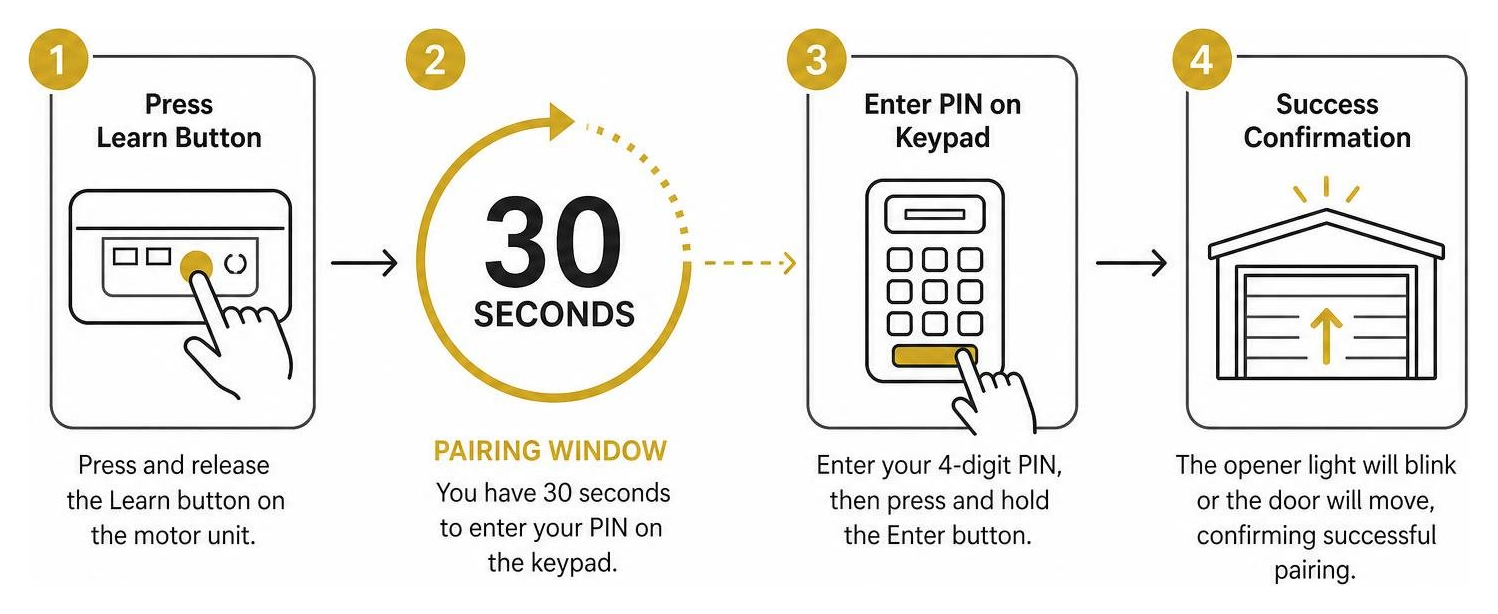
Step-by-Step Guide for Reprogramming Garage Door Opener Keypad via the Motor Unit
Programming directly from the overhead motor unit is the most common method. The entire process hinges on a tight 30-second programming window. Once you press the Learn button, the logic board’s receiver remains active for exactly 30 seconds before timing out.
Follow this step-by-step sequence to pair your keypad:
- Position your ladder safely next to the overhead motor unit. Remove the light lens cover to expose the control panel.
- Locate the colored Learn button (Yellow, Purple, Red/Orange, or Green).
- Press and immediately release the Learn button. Do not hold it down. Holding the button for more than 6 seconds will erase all programmed remotes and keypads from the opener’s memory. The indicator LED next to the button will turn on and glow steadily.
- Carefully descend the ladder and walk to the outdoor keypad. You have 30 seconds to complete the next step.
- Enter your chosen 4-digit PIN on the keypad.
- Press and hold the ENTER button on the keypad. Watch the overhead motor unit. Release the ENTER button as soon as you see the opener light bulb blink or hear a distinct click. This indicates that the receiver has successfully registered the new keypad code.
- Wait 10 seconds, then enter your new PIN and press ENTER to test the travel of the door.
For specific Chamberlain models, you can find a tailored walkthrough on How to Reprogram Chamberlain Garage Door Keypad to ensure you do not miss any brand-specific button prompts.
Alternative Method: Reprogramming Garage Door Opener Keypad via the Wall Control
If you have a modern LiftMaster or Chamberlain wall console equipped with a screen or a dedicated programming button, you can skip the ladder entirely. This method is incredibly convenient, especially during cold Minnesota winters when climbing a ladder in a chilly garage is the last thing you want to do.
To program using your wall control:
- Locate the programming button on your wall console. On smart control panels, this is often found under the menu options. On standard multi-function wall buttons, you will need to locate the small “Learn” button on the side or press the light button and the main push bar in a specific sequence.
- Press the Learn button on the wall control twice in rapid succession. The command LED or screen indicator will begin to flash, signaling that the system is in pairing mode.
- Walk to the outdoor keypad within the 30-second window.
- Enter your new 4-digit PIN on the keypad.
- Press and hold the ENTER button until the overhead opener lights flash or you hear two clicks from the motor unit.
- Test the keypad by entering the PIN again to ensure the door responds.
This dual-method approach makes updating your access codes straightforward. For more tips on managing your entry systems, take a look at our guide on how to change garage door code 3 methods that guarantee results.
Managing PINs: Changing, Resetting, and Temporary Codes
Managing the security of your garage door keypad involves more than just setting a single code and forgetting it. Over time, you may need to update your PIN for security reasons, perform a complete factory reset, or provide temporary access to house guests, dog walkers, or home renovation contractors.
If you suspect your code has been compromised, or if you have recently moved into a new home in Woodbury or Hudson, performing a full memory clearance is highly recommended. To explore all your options, read through our change code garage door keypad guide.
How to Change an Existing PIN or Reset a Forgotten Code
If you know your current PIN and simply want to update it for routine security hygiene, you do not need to climb a ladder to access the motor head. You can perform this update directly from the keypad:
- Enter your existing 4-digit PIN on the keypad.
- Press and hold the # button until the backlight on the keypad blinks twice.
- Enter your new 4-digit PIN.
- Press the ENTER button. The keypad backlight will flash once to confirm the change. Test the new code immediately.
However, if you have forgotten your PIN, you cannot use this shortcut. To bypass a forgotten code, you must perform a factory reset on the opener’s logic board to clear its memory:
- Press and hold the Learn button on the overhead motor unit for 6 to 10 seconds.
- Release the button as soon as the indicator LED light turns off.
- Note: This action completely erases the memory of the logic board. All paired hand-held remotes, keyless entry keypads, and smart home connections will be wiped. You will need to reprogram every device back to the unit.
- Reprogram your keypad using the standard Learn button pairing sequence described in the previous section.
For Overhead Door and Genie models, the physical reset process on the keypad itself differs. According to the official Wireless Keypad Programming Instructions, you can reset an OKP-BX keypad by pressing and holding the PROGRAM button while simultaneously pressing and holding the UP/DOWN button for 5 seconds. Once released, you can program a new PIN from scratch.
Setting Up Temporary PINs for Guests and Service Workers
Providing temporary access to your home is a fantastic convenience. Rather than sharing your permanent family PIN with a contractor or neighbor, you can program a temporary code that automatically expires after a set period of time or a specific number of uses.
For LiftMaster and Chamberlain systems, you can configure temporary codes based on hours or usage:
- To set a temporary PIN by hours (up to 255 hours): Enter your permanent PIN, press and hold the * button until the keypad blinks three times, enter your temporary 4-digit PIN, press the * button, enter the number of hours you want the code to remain active, and press the * button again.
- To set a temporary PIN by uses (up to 255 uses): Enter your permanent PIN, press and hold the * button until the keypad blinks, enter your temporary 4-digit PIN, press the # button, enter the number of times the code is allowed to operate the door, and press the # button again.
For Overhead Door CodeDodger systems, temporary codes are managed differently. As detailed in the resources for Wireless Keypad Programming, Overhead Door Co. of Kearney™, you can set a temporary PIN by entering your regular PIN, pressing the PROGRAM button three times, entering the temporary PIN, and pressing PROGRAM once more. This temporary code automatically deactivates the very next time your permanent PIN is entered, making it perfect for one-time deliveries or service calls.
Troubleshooting Common Keypad Issues and Intermittent Response
It is incredibly frustrating when you enter your PIN, the keypad lights up, but the garage door refuses to budge. Many homeowners assume the keypad is broken, but the root cause is often environmental or electronic interference.
If your keypad is acting up, we have compiled a comprehensive list of solutions in our guide on keypad programming made simple for any garage door opener. Below, we break down the most common troubleshooting steps.
Why Your Keypad Fails After a Battery Change or Power Outage
A common misconception is that a power outage or a dead battery will erase your keypad’s programmed memory. Keypads use non-volatile memory (EEPROM), meaning they retain your PIN even when completely unpowered. However, power surges or battery swaps can occasionally cause a communication desync between the keypad and the receiver.
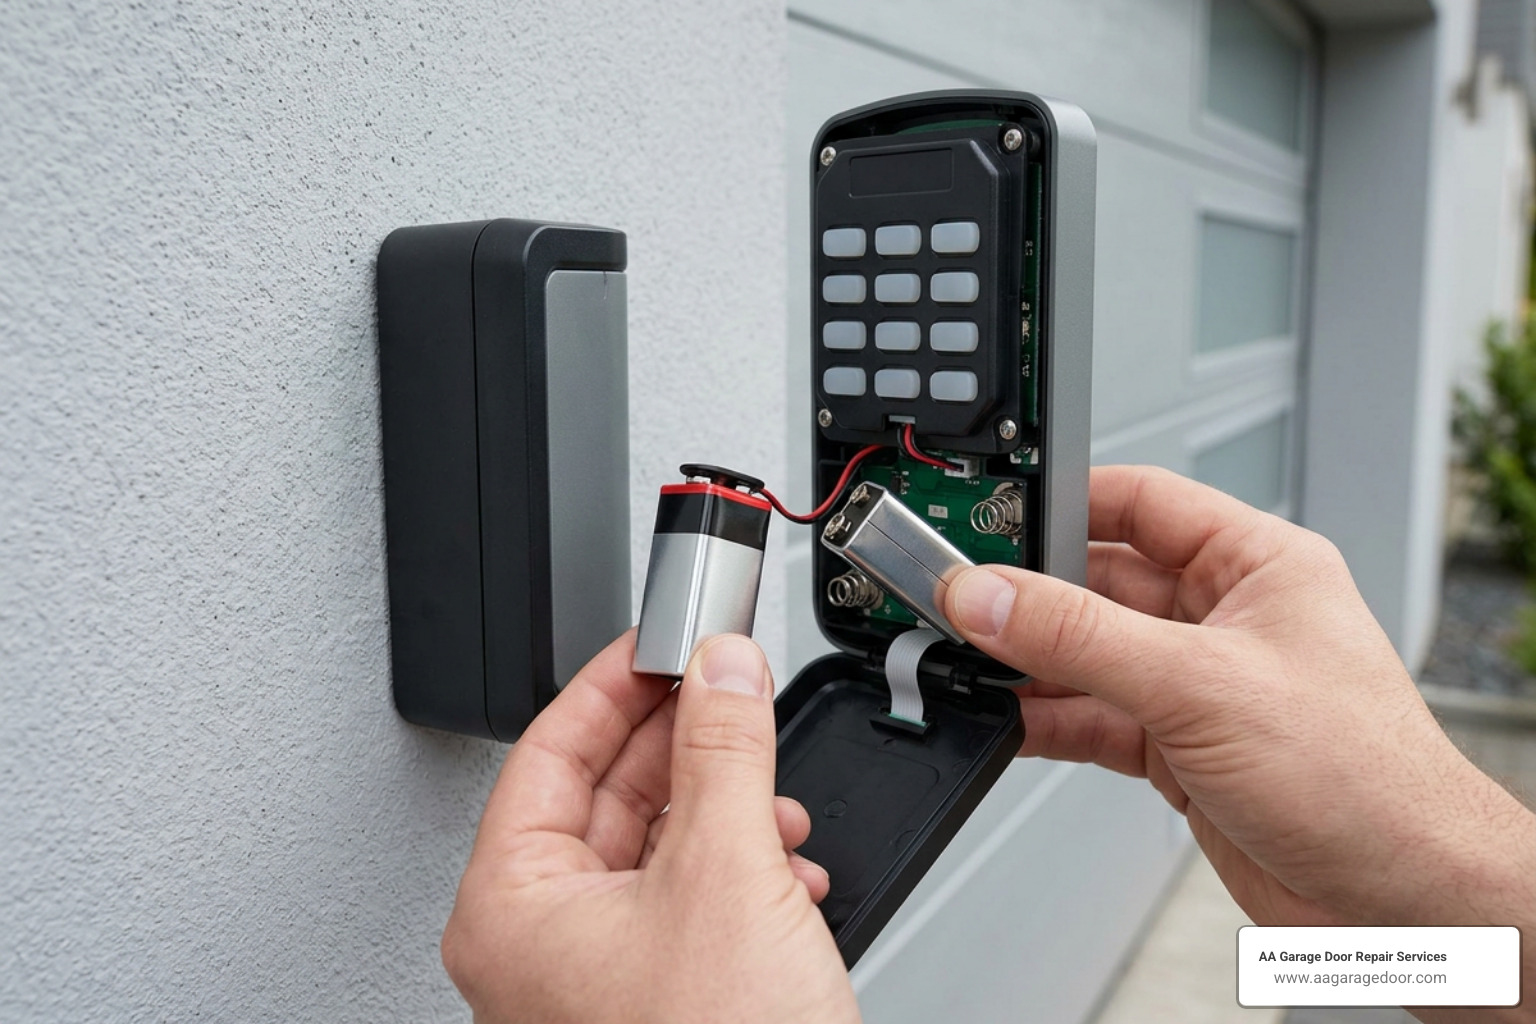
In the Twin Cities and Western Wisconsin, extreme winter temperatures are the leading cause of sudden keypad failure. Standard alkaline batteries struggle in freezing conditions, dropping voltage rapidly and causing the keypad’s transmitter to fail while the backlight still manages to glow.
- The Cold Weather Fix: Always replace standard alkaline batteries with premium lithium 9V or AAA batteries. Lithium batteries perform exceptionally well in sub-zero temperatures, ensuring consistent voltage.
- Battery Lifespan: Plan to replace your keypad batteries once per year in cold regions, or every 6 to 9 months under heavy family use. If you are experiencing power issues with other parts of your system, consult our guide on the garage door opener battery for backup options.
Resolving Poor Range, Sun Glare, and Signal Interference
If your keypad only works when you stand inches away from the door, or if it works perfectly at night but fails during the day, you are likely dealing with signal interference or environmental factors:
- Radio Frequency (RF) Interference: LED and compact fluorescent (CFL) light bulbs installed inside the garage door opener or nearby shop lights are a major source of RF interference. Cheap LED bulbs emit electromagnetic noise that blocks the keypad’s signal. Always use specialized, shielded garage door LED bulbs.
- Antenna Positioning: Ensure the thin antenna wire hanging from your overhead motor unit is not bent, cut, or tucked inside the metal chassis. Let it hang straight down to maximize signal reception.
- Sun Glare and Photodiode Saturation: If your keypad only works at night, direct sunlight may be saturating the aging photodiode sensors of your garage door’s safety eyes. When the safety eyes are saturated by glare, the opener behaves as though there is an obstruction, blocking any closing commands from the keypad. You can verify this by checking if the opener lights flash when you try to close the door.
- Metal Trim Interference: Mounting your wireless keypad directly onto a metal siding jamb can severely degrade the wireless signal. Moving the keypad just 6 to 12 inches away from metal trim onto wood or brick can instantly restore its range.
To see these troubleshooting steps in action, you can watch this video on How to Reprogram Garage Door Remotes & Keypad for visual confirmation of antenna adjustments and pairing sequences.
Special Cases: Wired Keypads and Universal Models
While modern wireless keypads dominate the market, many homes in the St. Paul and Baldwin areas still feature older, hard-wired keypads or universal aftermarket models. Understanding how to handle these systems is crucial to avoiding unnecessary replacement costs. For a complete manual on managing these devices, check out our universal garage door keypad complete manual.
How to Reprogram a Wired Keypad Without an ENTER Button
Older wired keypads (popular in the 1990s, such as those paired with Craftsman 139 series openers) do not communicate via radio waves. Instead, they are physically wired to an indoor wall console or directly to the opener’s terminal strip. These legacy keypads often lack an “ENTER” button.
These systems do not store the PIN inside the outdoor keypad. Instead, the code is saved on a battery-backed circuit board located inside the indoor wall control panel. If the battery in this indoor panel dies, the system loses power and the code is wiped.
To reprogram a wired keypad without an ENTER button:
- Ensure a fresh battery is installed in the indoor wall console.
- Locate the small control cover on the indoor wall panel. Slide it open to reveal the switches.
- Slide the programming switch from “OPERATE” to “PROGRAM”.
- Walk to the outdoor keypad and enter your desired 4-digit PIN.
- Return to the indoor wall panel and slide the switch back to “OPERATE”.
- Test the keypad.
For hobbyists or homeowners interested in custom integrations, you can explore this project on Keypad Garage Opener – Hackster.io to see how modern microcontrollers can be used to interface with older garage entry systems.
Programming Universal Keypads and Multi-Door Setups
Universal keypads are designed to work with multiple brands of openers simultaneously. If you have a Chamberlain opener on your left bay and a Genie opener on your right bay, a single universal keypad can control both.
When programming a universal keypad, you must enter a specific brand ID code during the setup process so the keypad knows which radio frequency to transmit.
- Locate the brand ID chart in your universal keypad’s manual.
- Put the keypad into program mode (usually by pressing the * and # keys simultaneously until the backlight flashes).
- Enter your new PIN, press the # key, enter the brand ID code (e.g., “1” for Chamberlain Yellow Learn Button, “2” for Genie Intellicode), and press the # key again.
- Press the Learn button on your garage door opener.
- Enter your PIN on the keypad and press the ENTER key repeatedly until the door cycles.
If you run into issues where the keypad refuses to take the brand code, you can consult this professional Q&A thread on Garage Door Keypad Not Programming? Expert … to troubleshoot stubborn logic board sync issues.
Frequently Asked Questions about Keypad Programming
How do I program a keypad for multiple garage doors?
Most multi-door keypads allow you to assign a unique PIN to each door, or use a single PIN followed by a specific door number. For example, to program a Chamberlain keypad for two doors, you would press the Learn button on Opener 1, enter your PIN on the keypad, and press the “1” key. Then, press the Learn button on Opener 2, enter the same PIN, and press the “2” key.
When should I replace my keypad instead of reprogramming it?
While reprogramming fixes most software glitches, physical degradation requires replacement. Outdoor keypads have a typical lifespan of 5 to 8 years. If the rubber membrane over the keys is cracked, buttons are physically stuck, or the internal contacts are heavily corroded from moisture, it is time to replace the unit.
Why does my keypad light up but the door won’t move?
If the keypad lights up but nothing happens, check your indoor wall console to see if “Vacation Mode” or “Lock Mode” is turned on. This security feature disables all radio frequency signals, meaning your remotes and wireless keypads are locked out until you slide the switch back to the unlocked position.
Conclusion
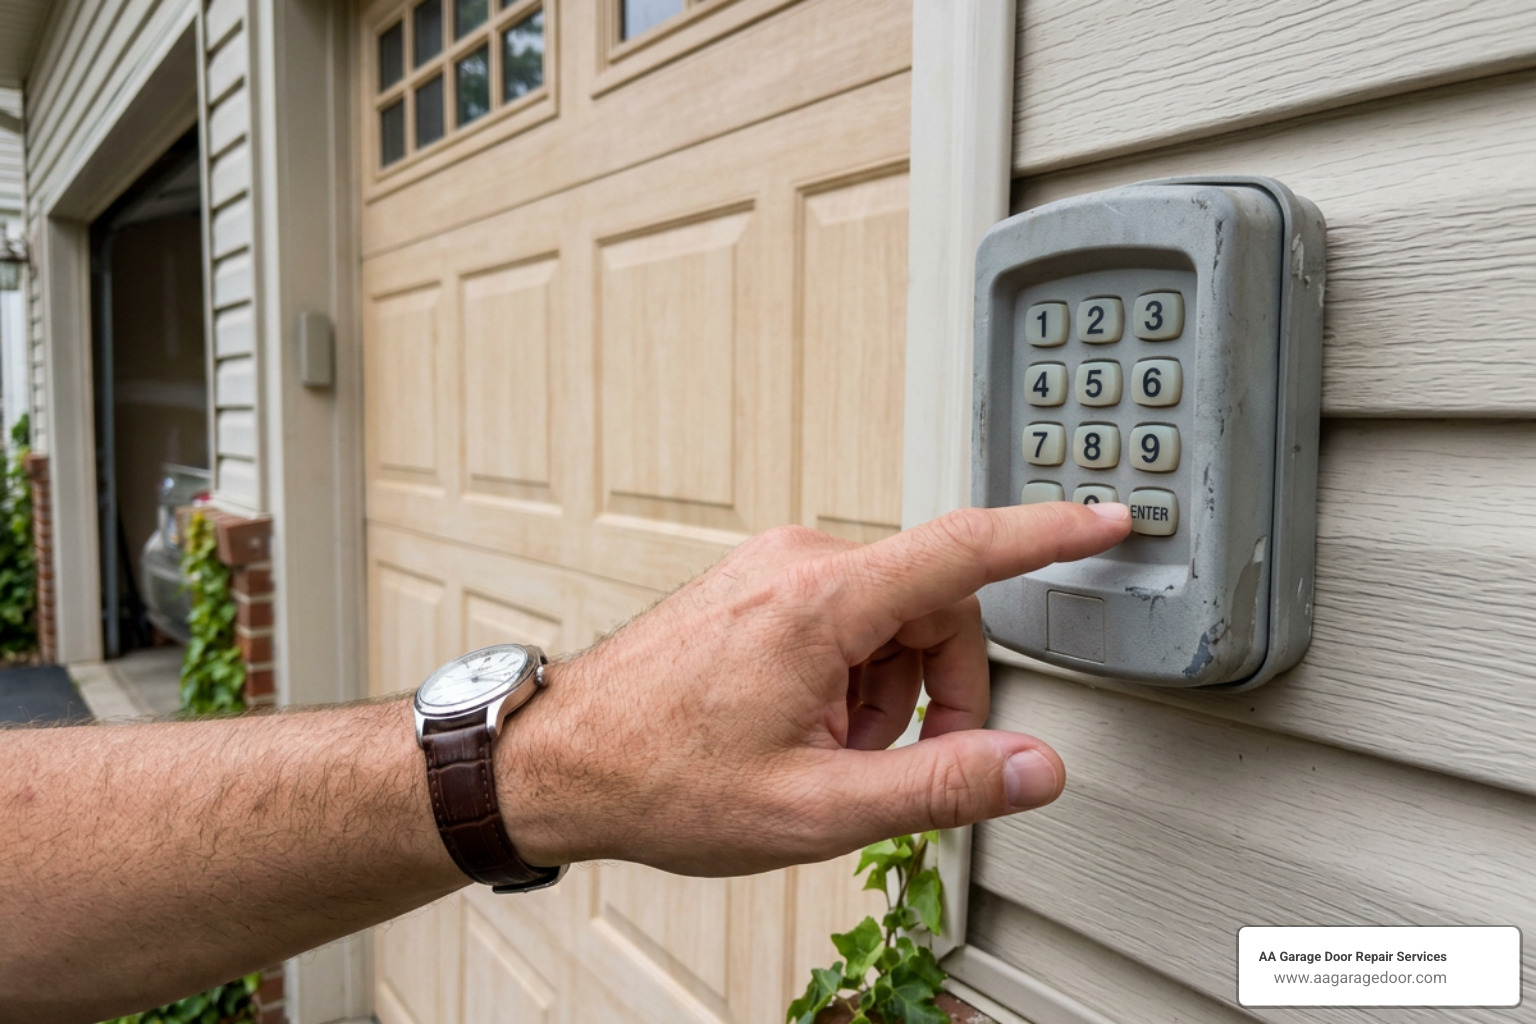
Reprogramming your garage door opener keypad is a simple DIY task that instantly improves your home’s security and convenience. By understanding your system’s Learn button color, managing your PINs safely, and keeping fresh lithium batteries in your unit, you can ensure reliable keyless access all year round.
If you have tried these steps and your keypad remains completely unresponsive, there may be a deeper hardware issue, such as a failing receiver logic board or damaged wiring. Our team at AA Garage Door Repair Services is always here to help. We provide expert diagnostic services, opener repairs, and high-quality replacement parts.
If you need a hand with your entry systems, you can check out our local services at garage door repair near me apple valley or explore our inventory of compatible garage door remotes to keep your system running smoothly.
For fast, friendly, and reliable local garage door service across St. Paul, Woodbury, Baldwin, and Hudson, contact our team today to schedule your appointment!